Splan Visitor Management System Help Guide
TABLE OF CONTENTS
User Guide Document
- Introduction
- Purpose of The Document
- General Overview
- Overview
- Splan Visitor
INTRODUCTION
-
Purpose of The Document
This is a user guide for Splan Visitor Management System. It providers various usability aspects of the system.
GENERAL OVERVIEW
-
Goals
Splan Visitor Management System Goal of this document is to successfully deploy the System.
Splan VISITOR
All the features of Splan Visitor Manager are mentioned below.
-
DASHBOARD
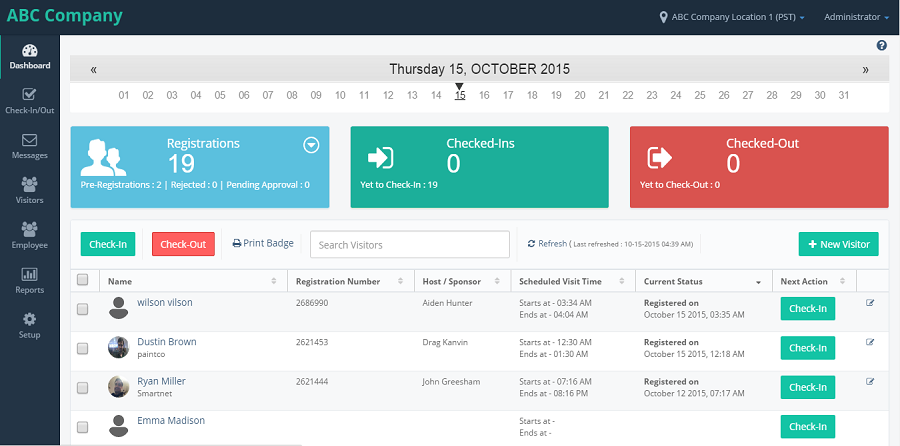
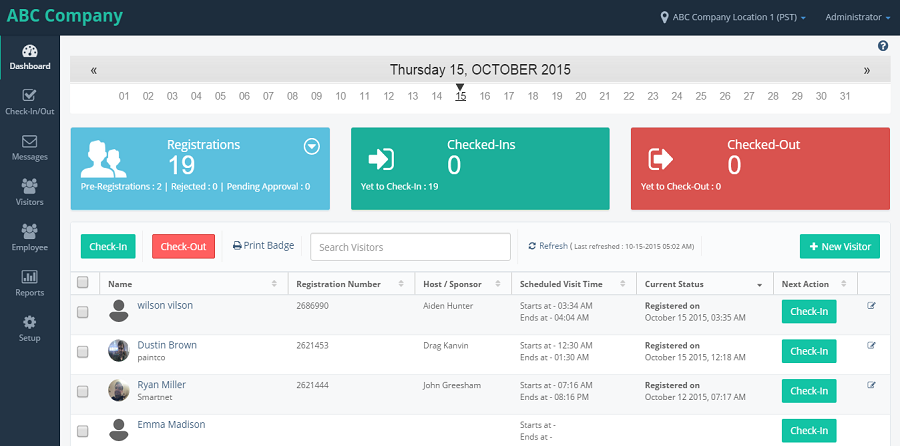
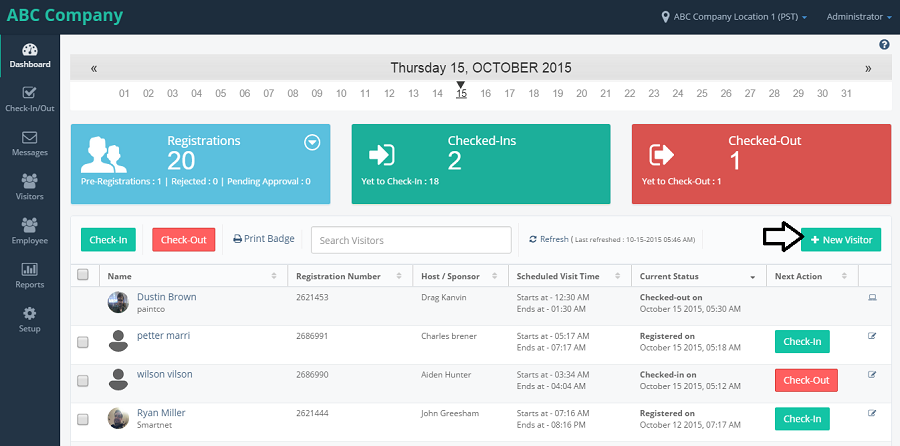
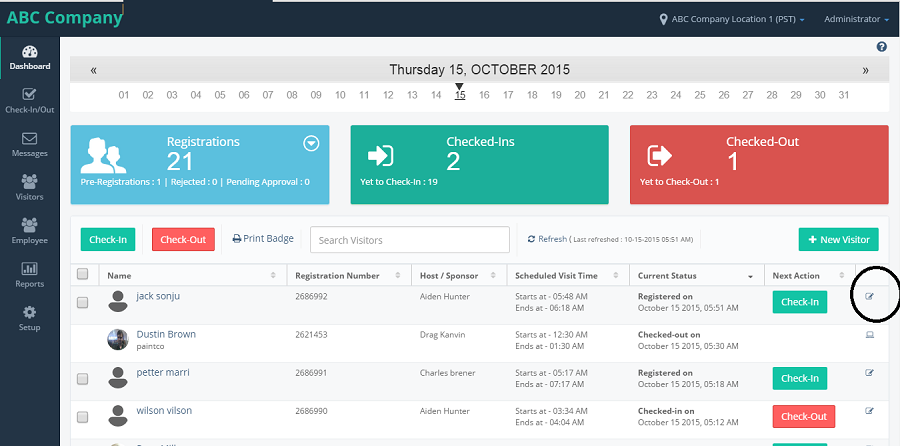
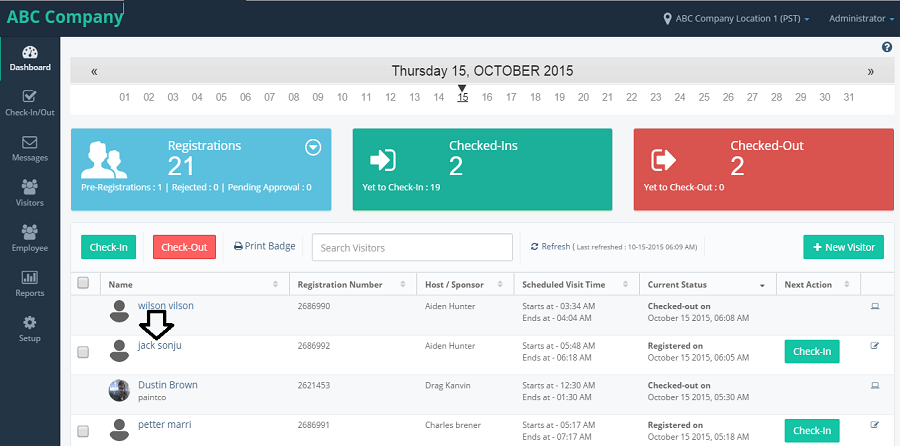
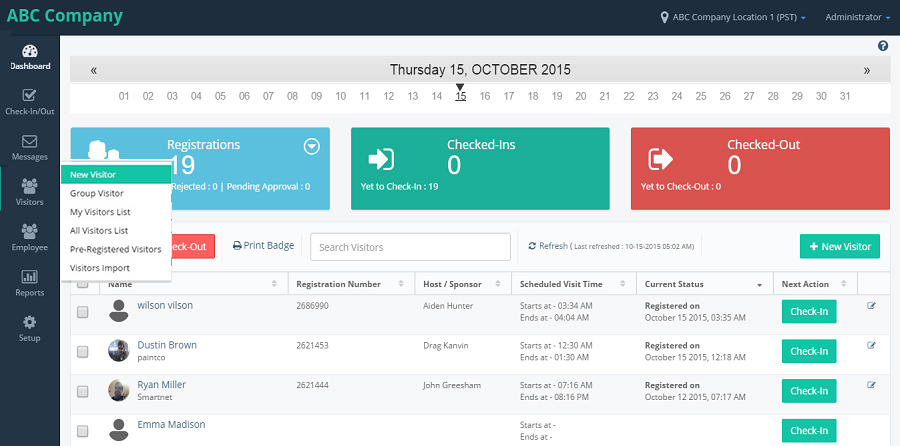
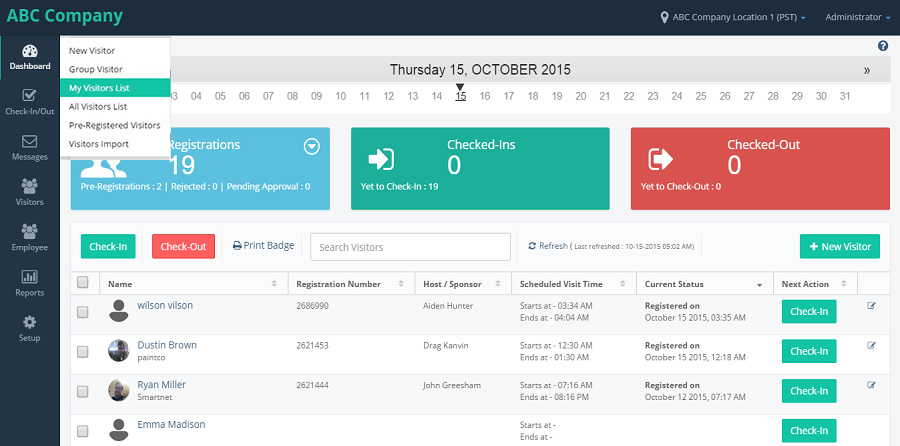
- Login to provider,select the location. It will navigate to dashboard screen displaying with the current month calander with pointing the current day,Registrations,Checked-ins and Checked-Out counts and check-in,checked-out,print badge and '+New visitor' buttons.
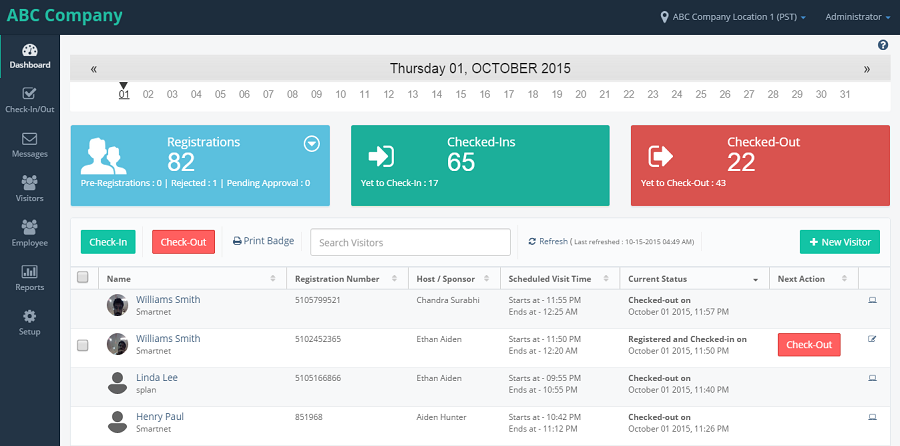
- We can click on any date to see the Registrations,check-ins,check-outs of that particular day. Example: click on Day1. For that particular day the total registrations are 82 and total no.of check-ins are 65 and no.of check-outs are22.
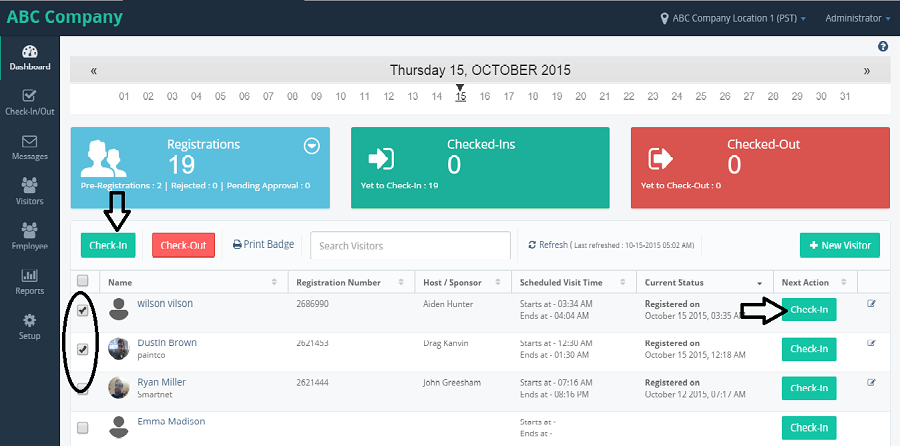
- Click on Registrations,it will display the visitors who are registered for the particular day.
- select the check boxes which are beside to the visitors name for whom it is showing as check-in buttons beside with in the 'Next Action' column. if we select the multiple visitors to check-in at a time the click on the check boxes and click on the check-in button which is present above to the table. If we want to checkin only a particular visitor the click on the check box and click on the check-in button beside the visitor.
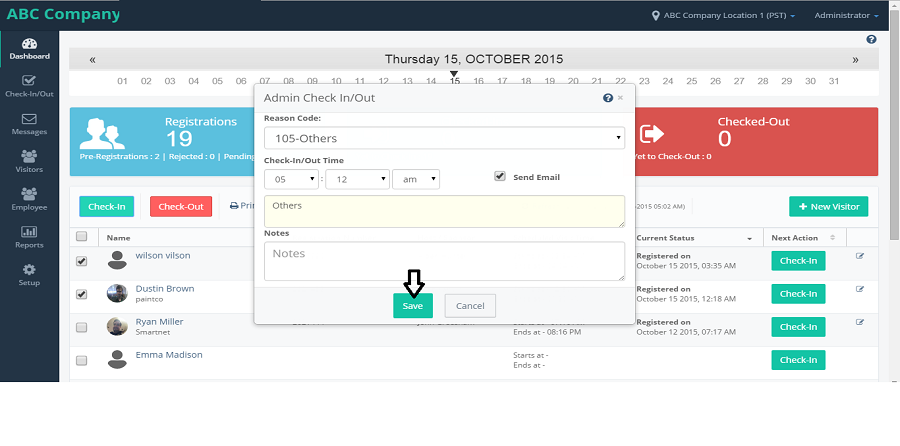
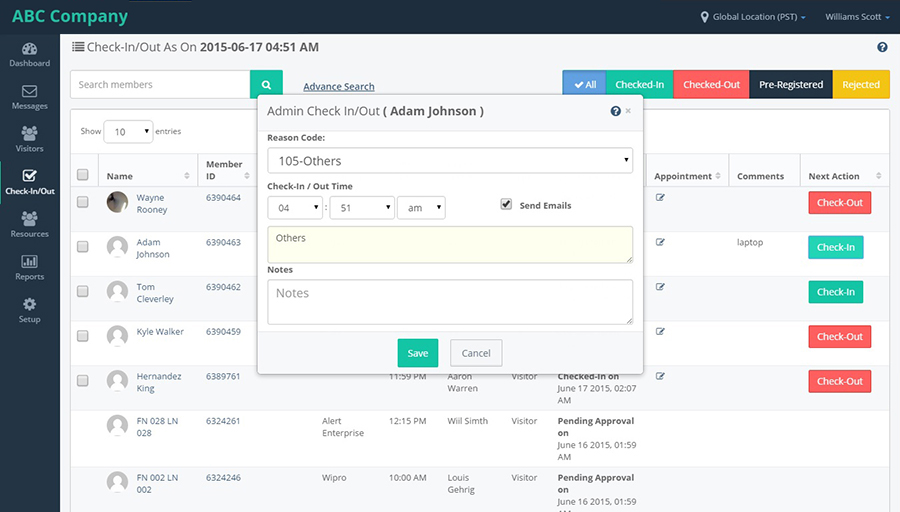
- A popup window is displayed with the Reason code,check-in/out time,send email check box,notes, save and cancel buttons.fill the details and click on save.
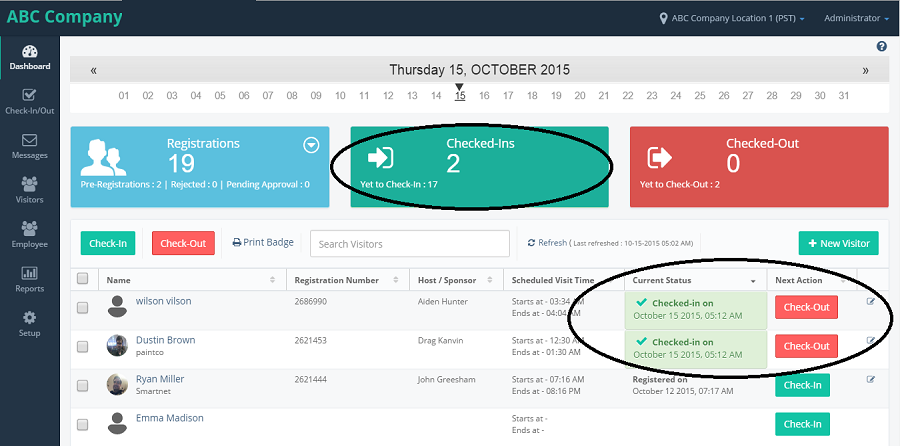
- Now,the count will be increased in the checked-ins pod and 'yet to check-in' count will be decreased and the check-in button which is besid to the visitor is converted to check-out button and in the current status column ,it will be changed from "Registered time and date" to "checked-in on time and date"
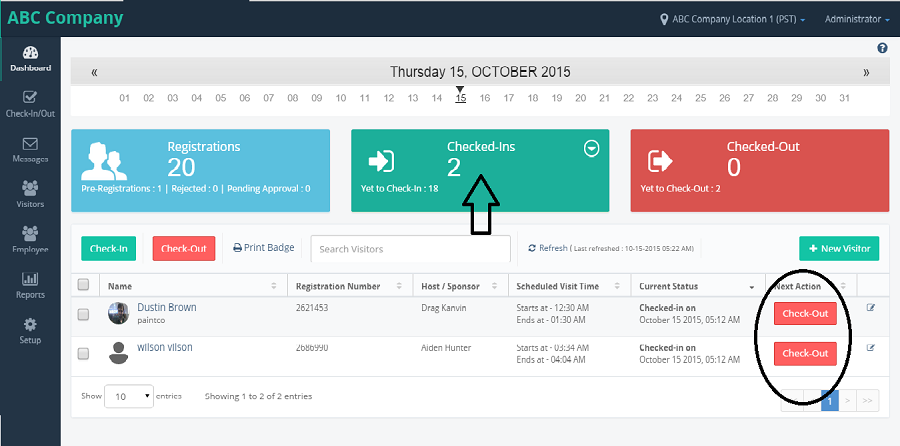
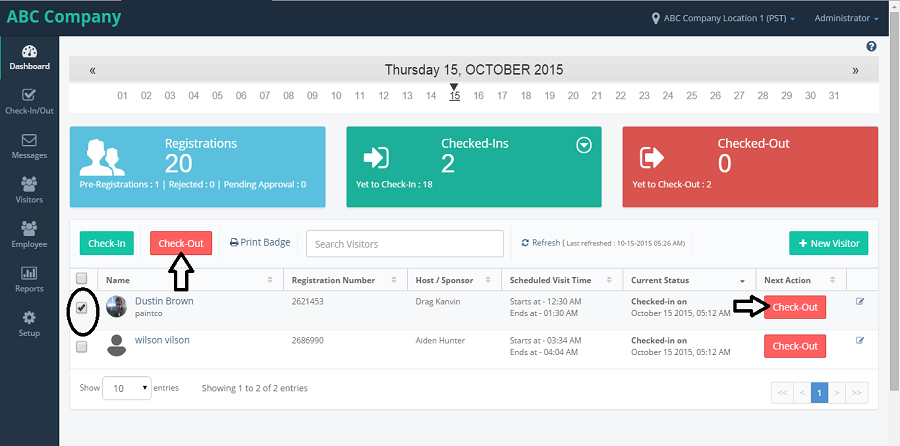
- now click on the checked-ins pod,it displays all the visitors who are checked-in. In this we find only checked-out buttons in the NEXT ACTION column and we don't find the check-in buttons beside the visitor's as they were alredy checked-in.
- Now click on the check boxes for the visitors whom we need to check-out. if we select the multiple visitors to check-out at a time the click on the check boxes and click on the check-out button which is present above to the table. If we want to check-out only a particular visitor the click on the check box and click on the check-in button beside the visitor.
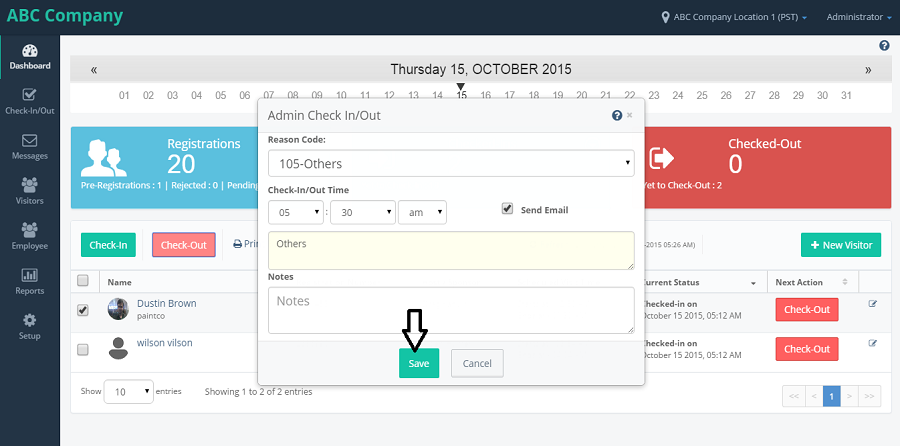
- After clicking on the check-out button,the Admin check-in/out popup window is displayed with Reason code checkin-in/out time,send email checkbox,notes, save and cancel buttons.fill the details and click on save button.
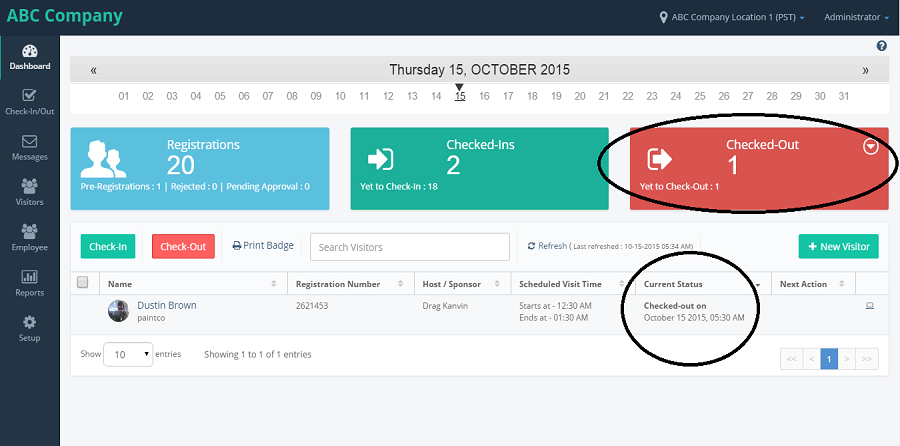
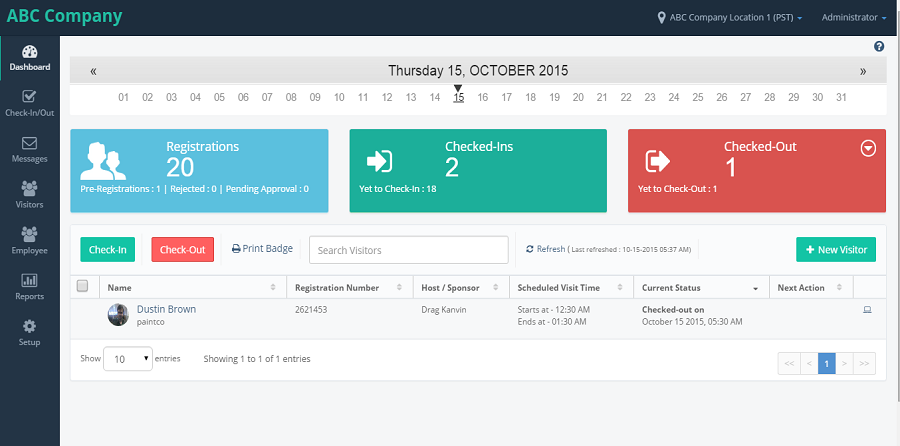
- now,the checked-out pod is increased and 'yet to check-out' count is decreased and the CURRENT STATUS column is changed from 'check-in on date and time' to 'checked-out on date and time' for the visitors who are checked-out. Leaving the NEXT ACTION column empty.
- click on the checked-out pod,it will display all the visitors who are checked-out.
- click on the '+New visitor' button from the dash board.
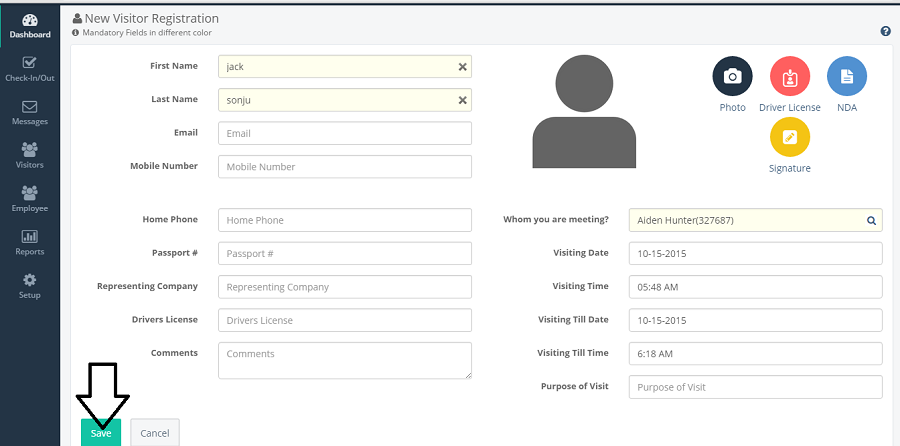
- It displays the new visitor registration form.fill the details and click on save button.
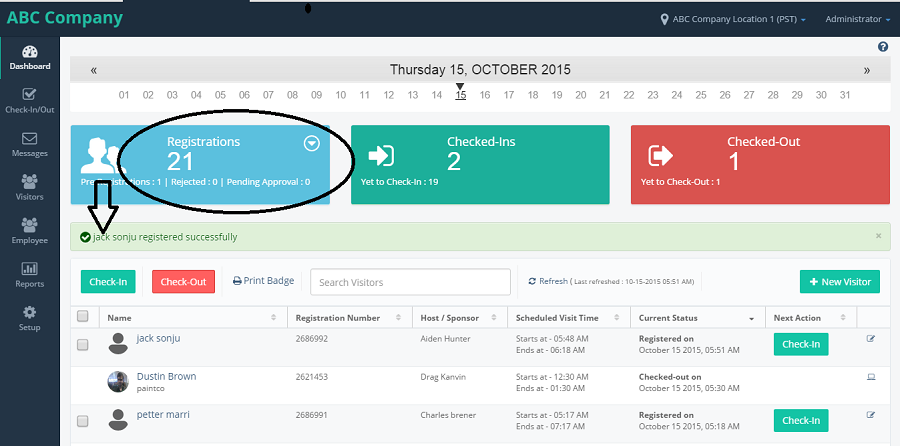
- The count in the 'Registrations' pod gets increased and it displays the success message as 'visitor registered successfully.' with the registered name.
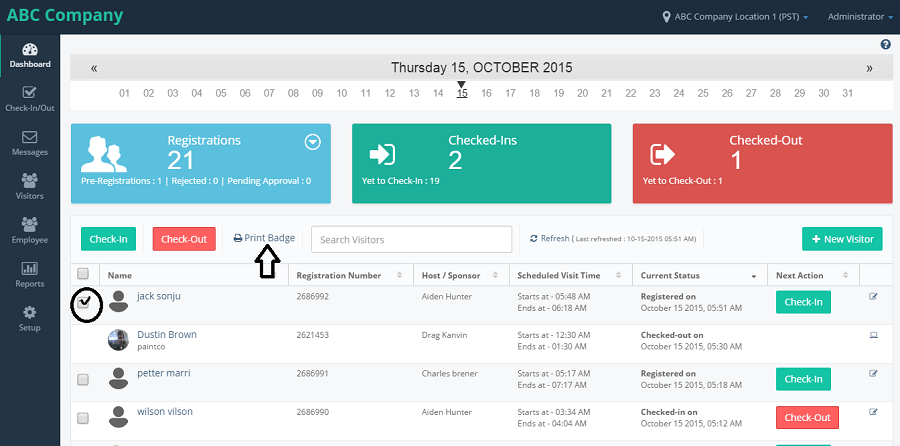
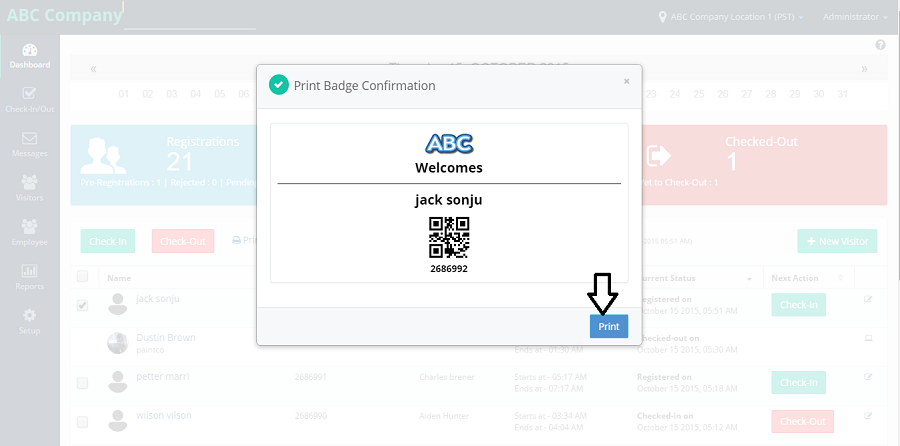
- print badge: Tick the checkbox beside the visitor for whom the badge should be printed and click on the 'print badge' above the table.
- It displays the popup window as 'print badge conformation'.with the persons name,company,QR code.
- click on Edit button beside the visitor name in the last column.
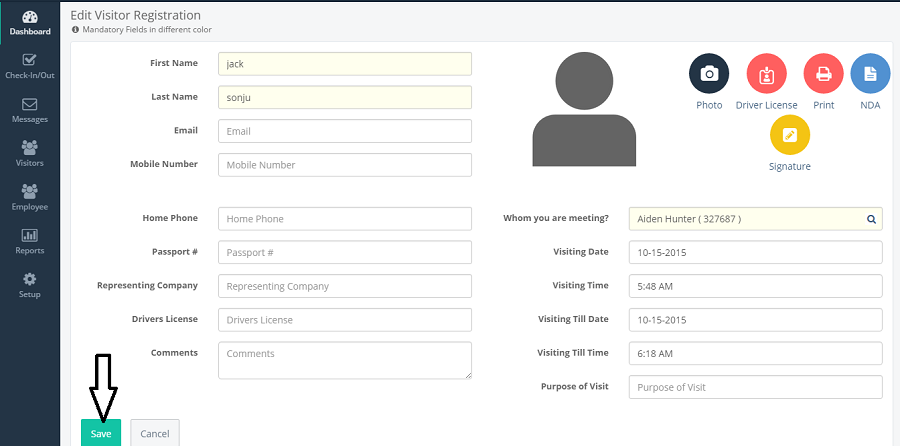
- It will navigate to the "Edit visitor Registration" form.after modifing the details click on save button.
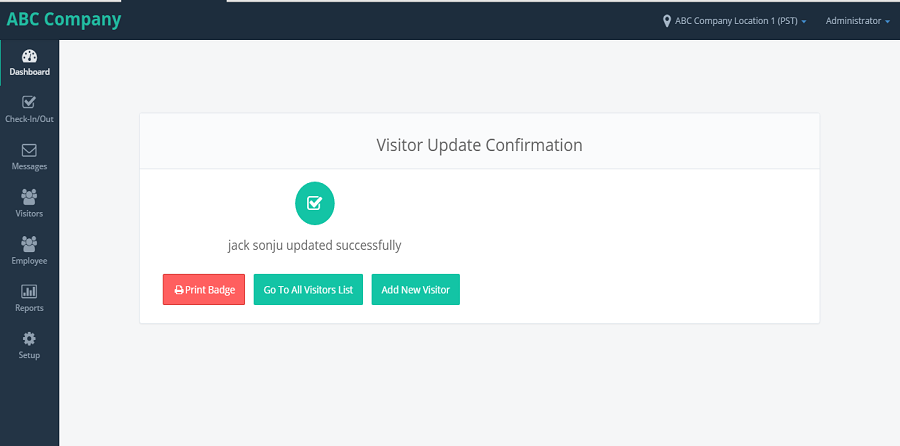
- After saving the form, it displays the 'visitor update conformation' with the print badge,Go to all visitor list,add new visitor buttons.
- Click on print badge,the badge gets printed. Click on Go to all visitors,it will navigates to the all visitors page.
- click on add new visitor,it will navigate to the 'New visitor registration' form.
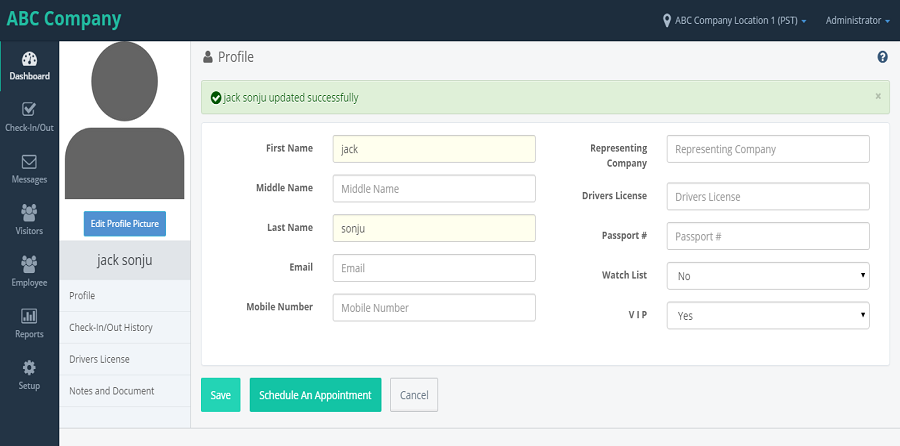
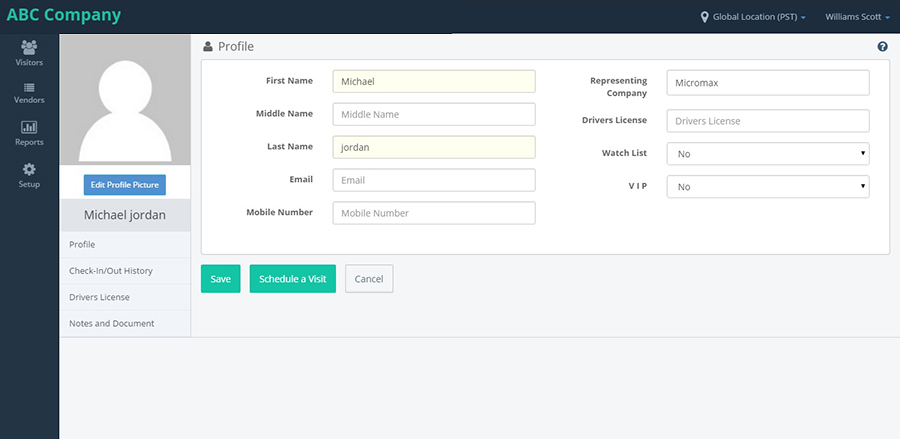
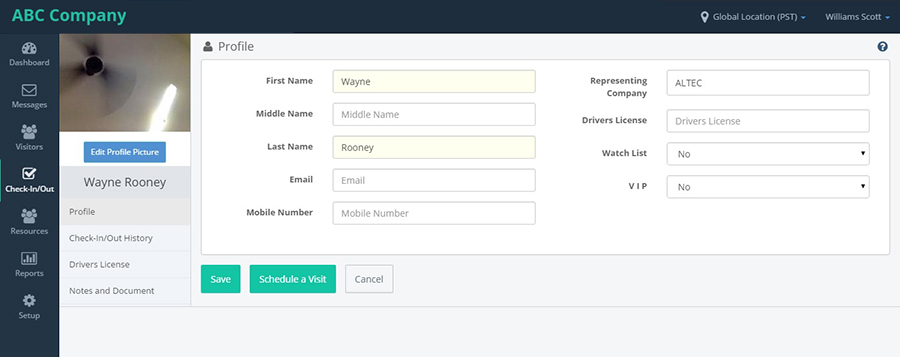
- Go to Dashboard.click on the visitor name.
- It will navigate to the "profile" page of the visitor with profile,check-in/out history,drivers license and Notes and documents in the left pannel.and displays all the details at right side with save,schedule an appointment and cancel buttons. Select the 'yes' option for the VIP and save.
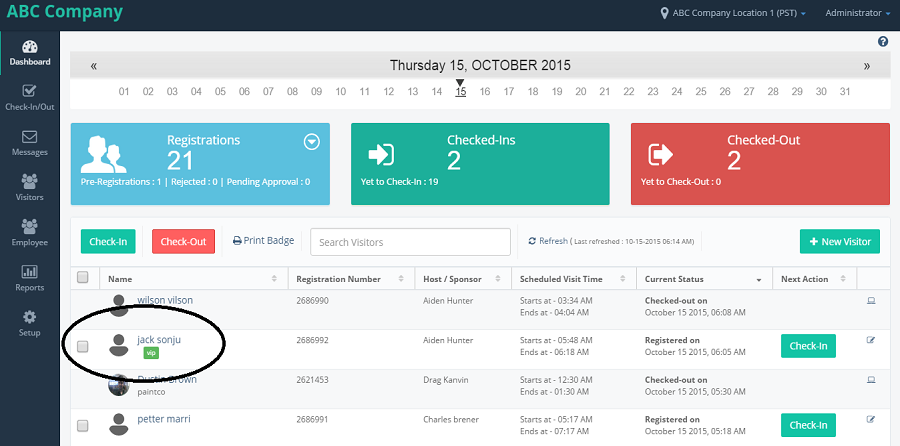
- Now go to Dashboard.we can see the visitor highlighted as VIP down to his name.

VISITOR
visitor module has options like 'New Visitor', 'Group Visitor', 'My Visitor List', 'All Visitor List', 'Pre-Registered Visitors' and 'Visitor Imports'.
-
NEW VISITOR
-
GROUP VISITOR
-
MY VISITOR LIST
-
ALL VISITOR LIST
-
PRE-REGISTERED VISITOR LIST
-
VISITOR IMPORT
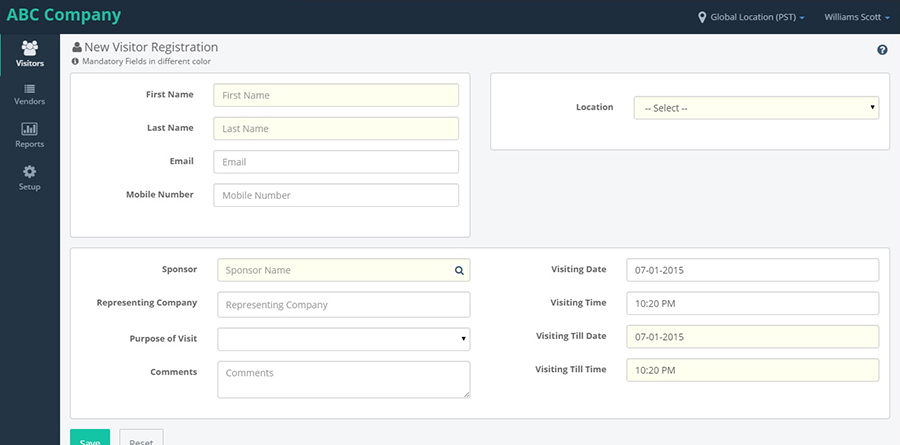
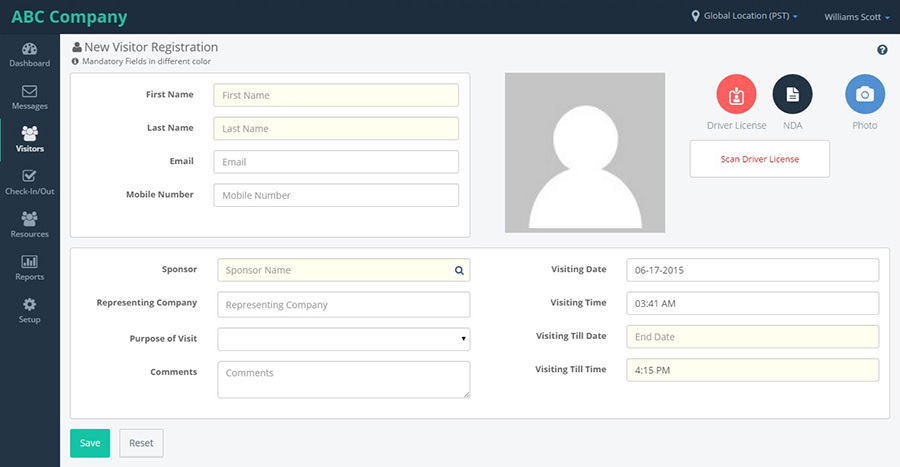
When LA click on New Visitor, it opens up a new form and by filling the details and click on save, an appointment of a visitor will be created.
When LA login with particular location the following screen will be shown.

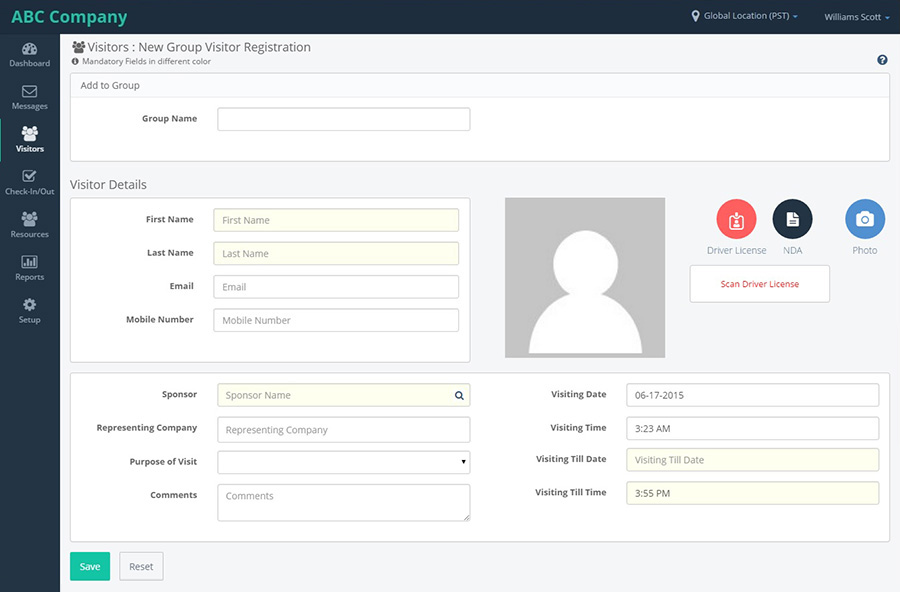
When LA click on new visitor form, it will open the Registration form to fill the details with photo capture option.
Fill the details with photo captured and click on save.

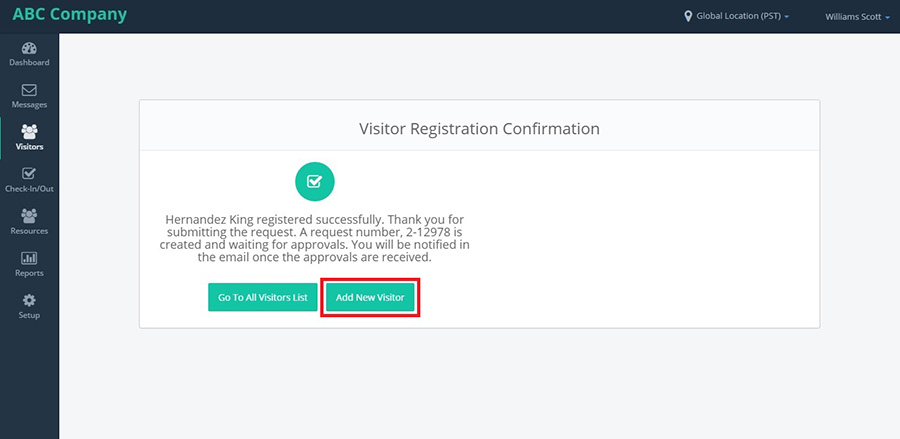
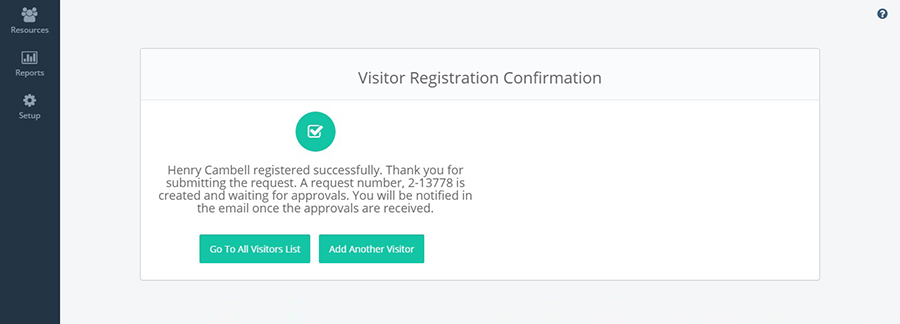
After filling all details, when LA clicks on 'Save' button, a confirmation page will be displayed.
If many people come to meet an Escort for the same reason, then LA can group all the people together and create a visit as part of the group.
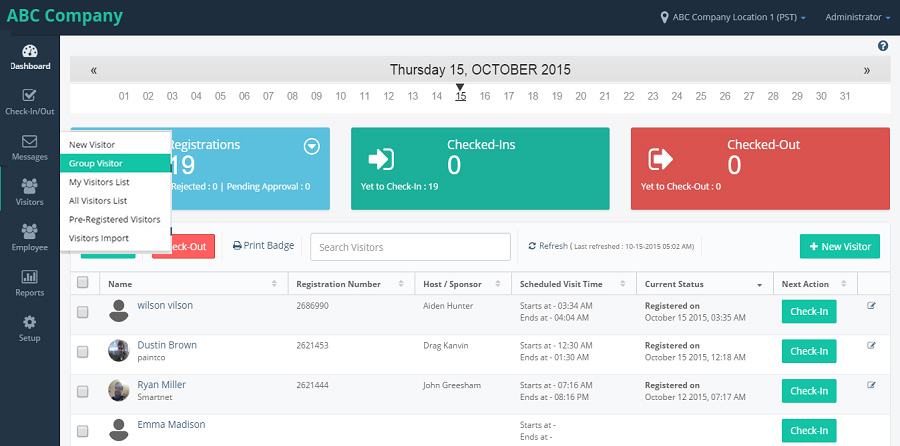
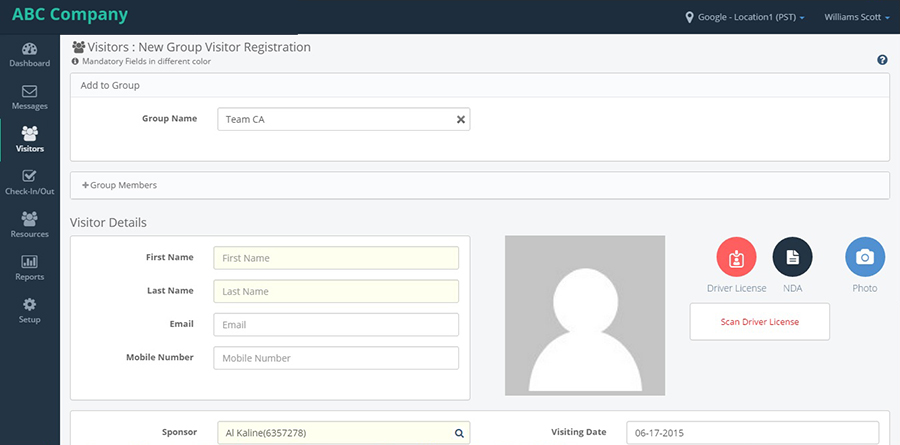
On clicking "Group Visitor" link, Group Registration page will be displayed with a form to fill the details of a Visitor along with a group name. After filling the form and clicking on save, a confirmation page will be displayed.
On confirmation page there is an option to add more Visitors to the same visit by clicking on "Add Another Visitor" button.
When click on "Add Another Visitor", it again opens the form to enter the details of next visitor with Group name pre-populated.
When a user logs in to the system, upon clicking on 'My Visitor List', all the visitors who have come to visit logged in user will be displayed in this page. Current logged in user will be an Escort and the visitors for this escort will be displayed.
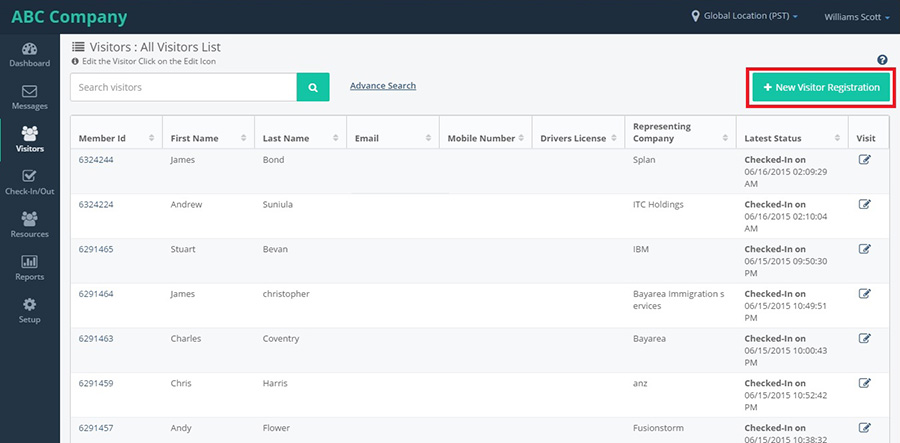
On clicking of "My Visitors" link, it opens the "My Visitors List" page with Search box, Search button, Advance search button and "New Visitor Registration" button.
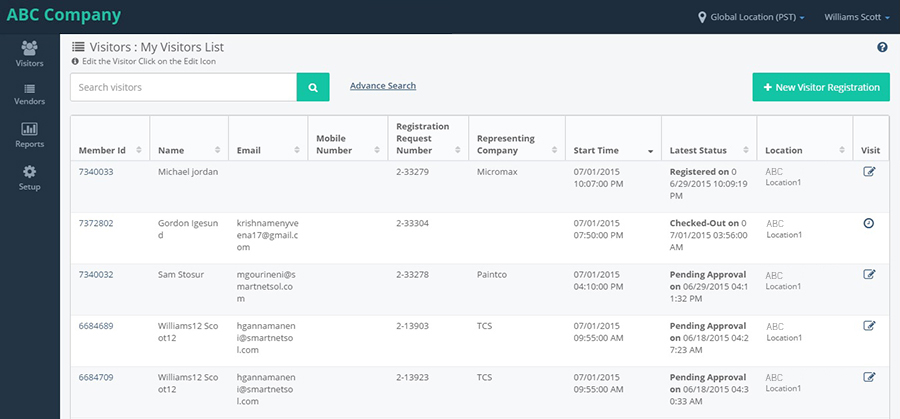
The below screen comes when we navigate from the normal location.
LA can add a visitor from my visitor list by clicking on New Visitor Registration button. It'll direct to new visitor registration page with photo capture option.
On Clicking of Search, the list of visitors matching the search criteria will be displayed.
Enter any one of the member details in the respective field and click on search. It will give the particular member list.
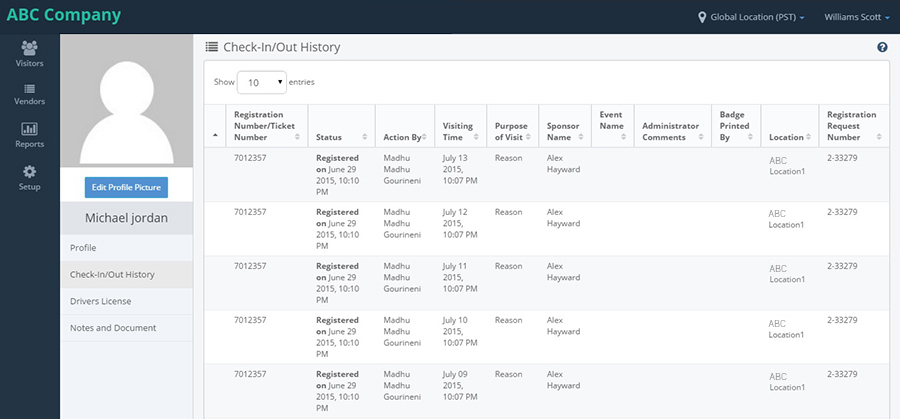
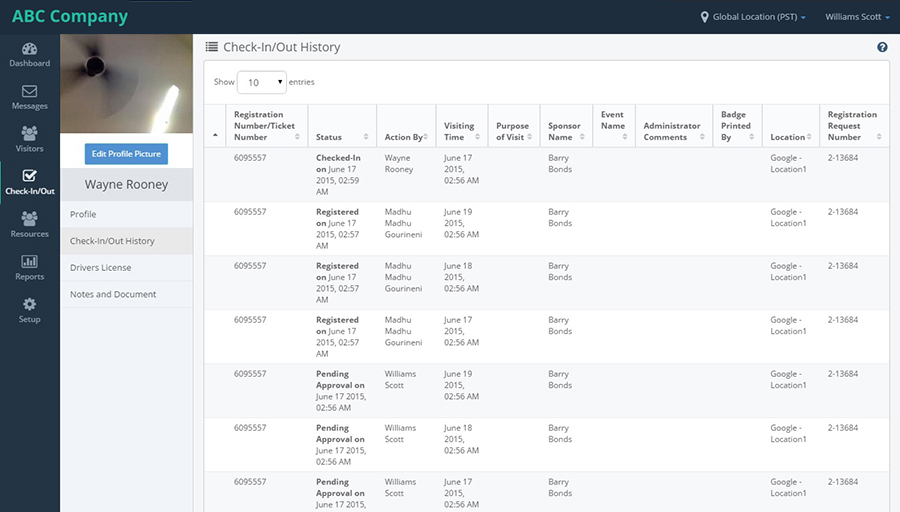
When we click on Member ID it will navigate to the visitor profile screen having four tabs on the left navigation,they are 1)Profile,2)Checkin/Out history,3)Driver's License and 4)Notes and documents.
When we click on the Checkin/out history it navigates to the visitor checkin/out history screen.
When we click on the Drivers License it navigates to the visitor's driver license.
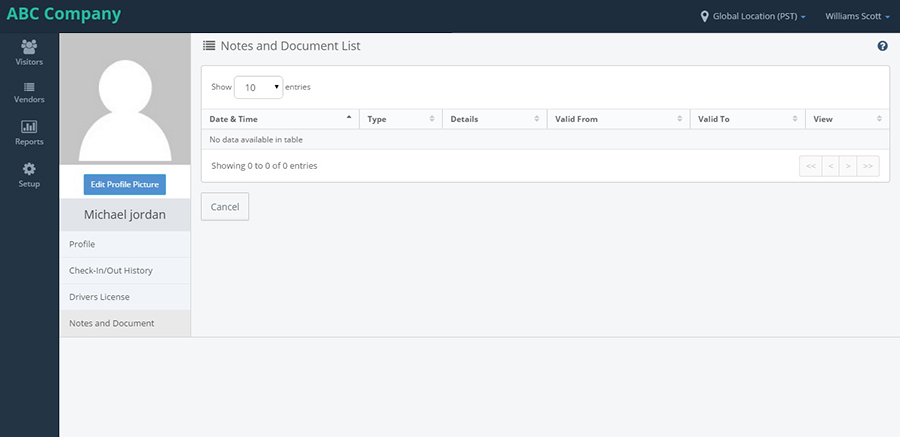
When we click on the Notes and Documents it navigates to the visitors Notes and documents screen with the information.
To search for a specific visitor Advance Search option can be used. Provide the details of a visitor and click on Search button will display all the visitor with that search criteria.
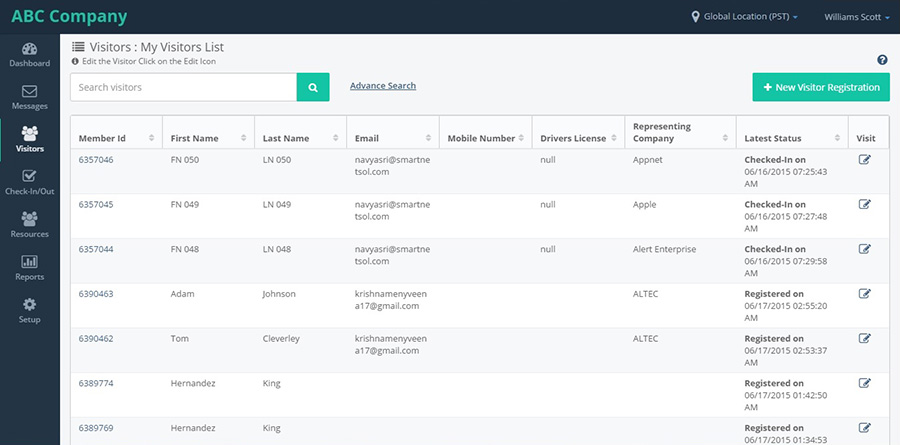
When LA login with the particular location the functionality remains same and left navigation changes.
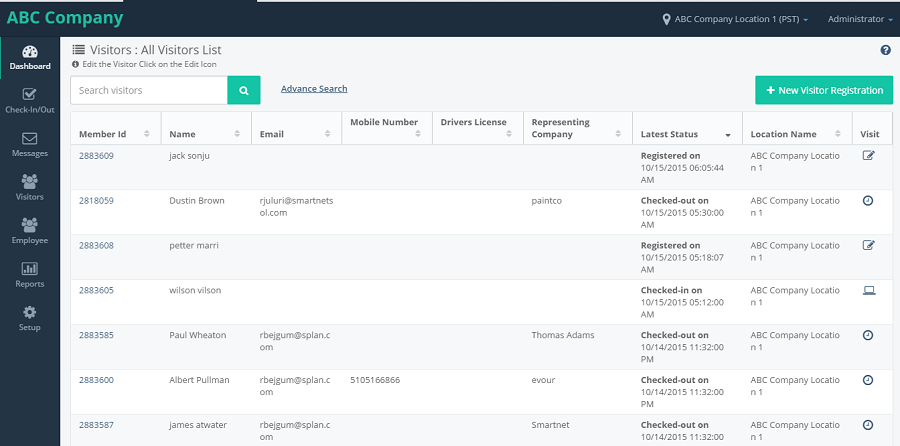
It shows the list of all the Visitors who came for a visit for the Location.
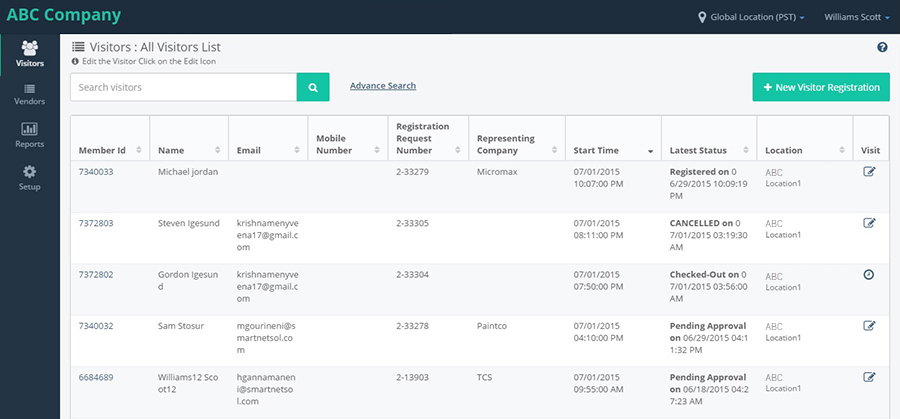
The below screen comes when we navigate from the normal location.
On clicking on "All Visitors" link, it opens the visitor's page, with Search box, Search button, Advance Search button and "New Visitor Registration" button.
On clicking of Search button, it shows the list of first 50 visitors. An option to view next set of Visitors will be available.
To find details of any visitor, "Advance Search" can be used.
On clicking of "Advance Search" button, a form is opened to enter the details of the required visitor with Search and Cancel buttons.
Enter the details and click on Search. It shows the list of matched records.
When we click on Member ID it will navigate to the visitor profile screen having four tabs on the left navigation,they are 1)Profile,2)Checkin/Out history,3)Driver's License and 4)Notes and documents.
When we click on the Checkin/out history it navigates to the visitor checkin/out history screen.
When we click on the Drivers License it navigates to the visitor's driver license.
When we click on the Notes and Documents it navigates to the visitors Notes and documents screen with the information.
To search for a specific visitor Advance Search option can be used. Provide the details of a visitor and click on Search button will display all the visitor with that search criteria.
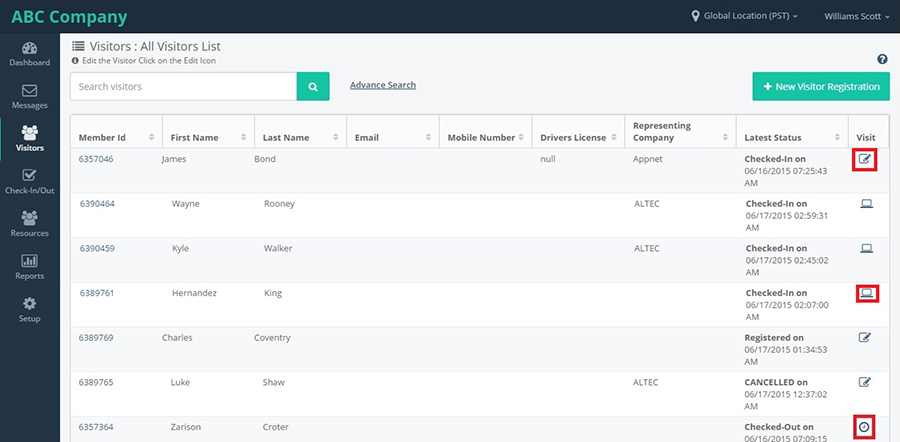
When LA login with the particular location the functionality remains same and left navigation changes.
It shows the list of all the visitors for whom appointments are created before the meeting time.
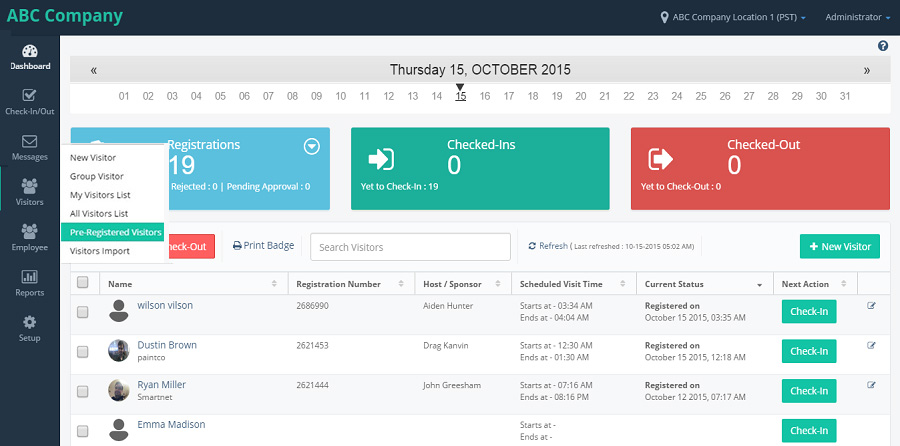
On clicking on "Pre-Registered Visitors" link, it opens the check-in/out page with the Pre-Registered visitor toggle button selected and Search box, Advance search and it also has "All", "Checked-in", "Checked-out" toggle buttons and "Check-in", "Check-out" and "Print badge" buttons below the page and "Check-in" button in the next action column.
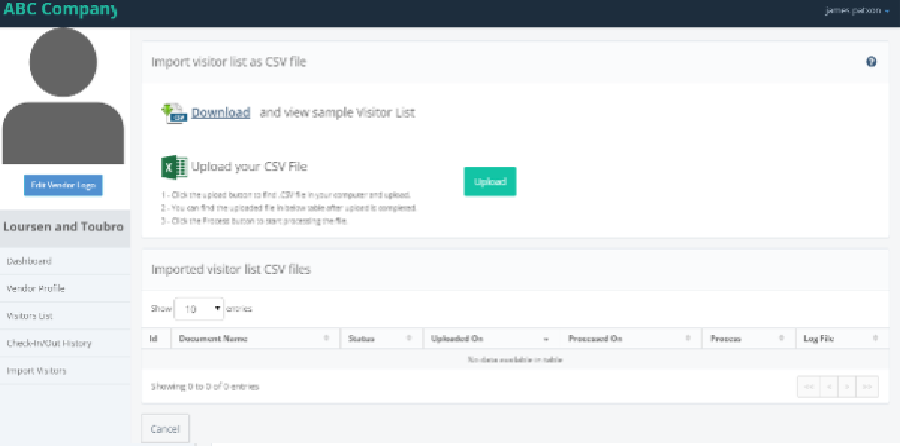
On clicking on Visitor Import from the left navigation of Visitors, it navigates to "Upload Visitors" page with Download and Upload options.
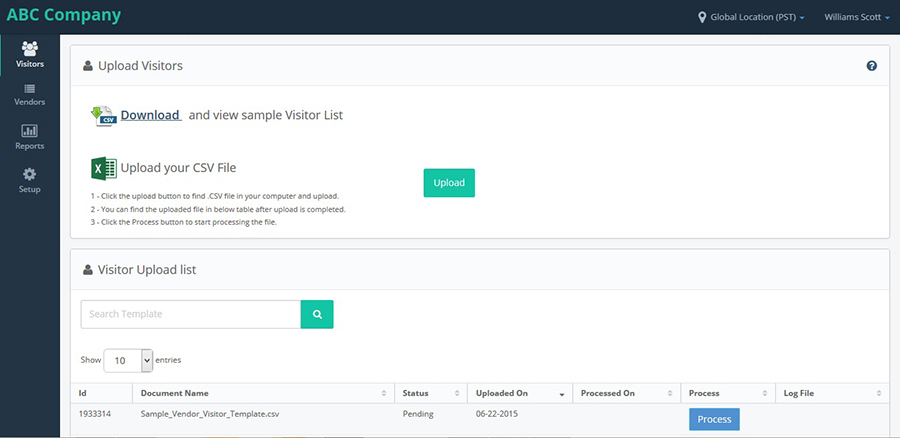
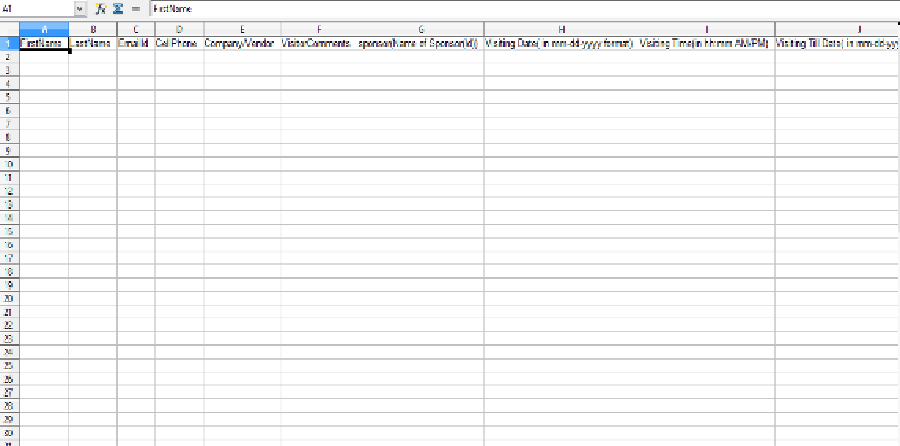
On clicking on "Download" option, it downloads a sample template, to insert detials of the Visitors into the file and upload it.
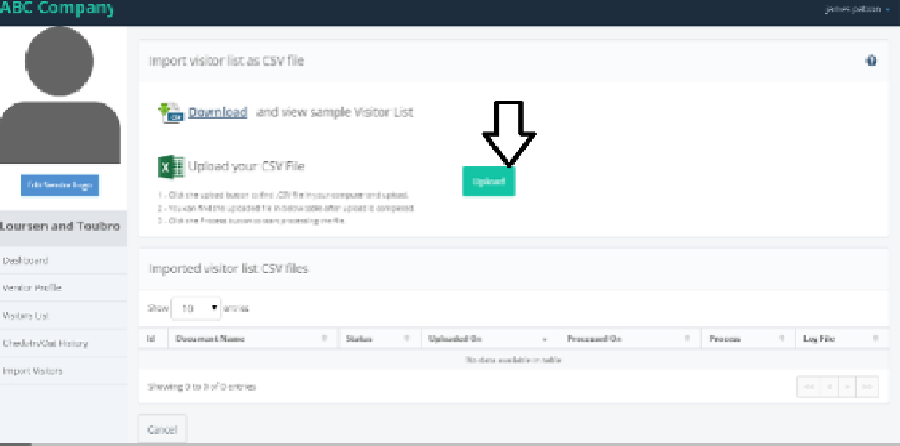
On clicking on Upload button, it opens a pop-up to select a file to upload After uploading the file, the file name will be shown in the "Visitor Upload list" in pending state in the Process column.
On clicking on Process button, the file will be processed and Download button will be displayed in the Log file column.

On clicking on Download button from the "Visitor Upload list", the file will be downloaded.
VENDORS
After logging into the Application, there is a component available on the left navigation bar 'Vendors', this feature is available only at the Global location.
Hover on Vendor, it displays options like 'New Vendor', 'Vendors list', 'Vendor Coordinators' and 'Vendors & Coordinators Import'.
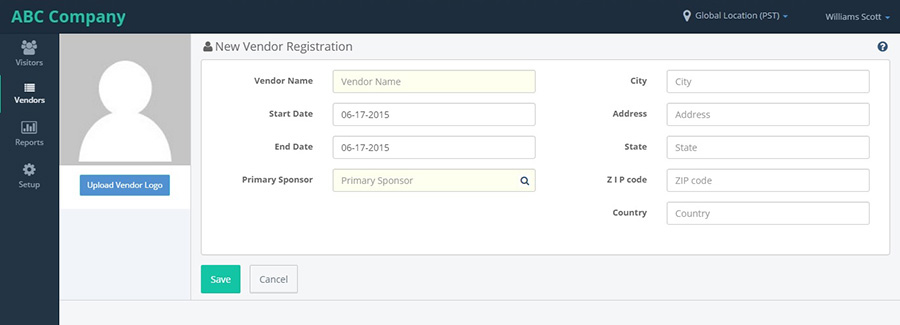
Click on 'New Vendor', navigates to New Vendor Registration page to add a Vendor with Save and Cancel buttons.
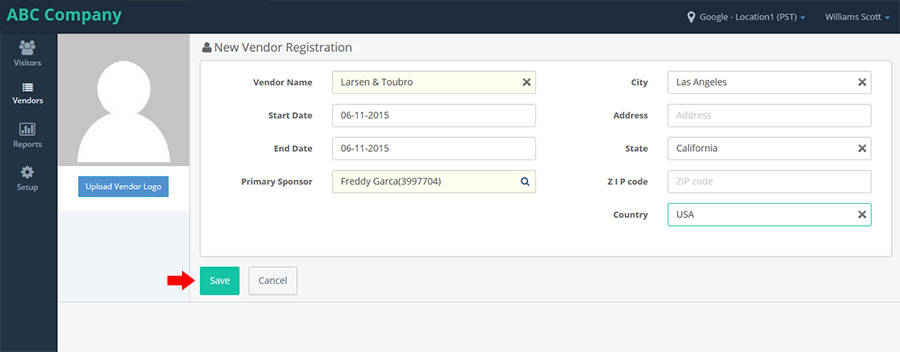
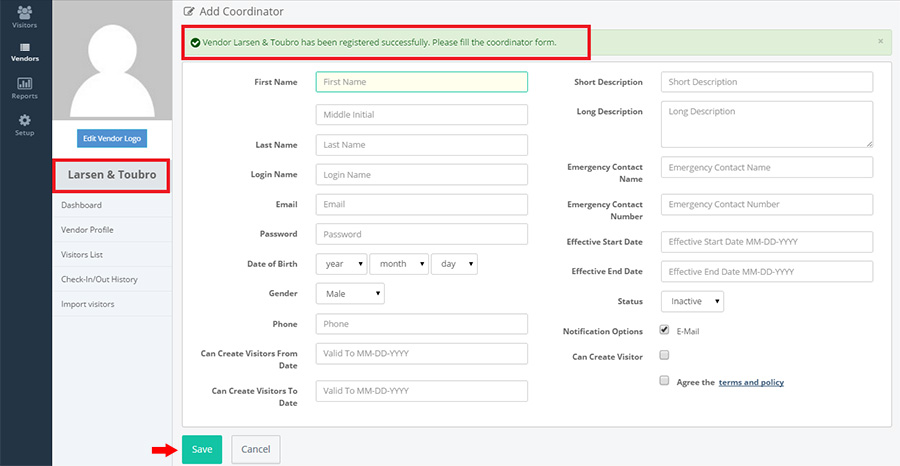
After filling all the details of a Vendor and click on Save, it creates Vendor and displays a screen were coordinator details can be provided to the Vendor and once coordinator details are provided Vendor creation success message is displayed.
As part of vendor registration, a sponsor should be chosen for the vendor.
Once the Vendor is created, a success message is displayed. Vendor Coordinator details need to be provided.
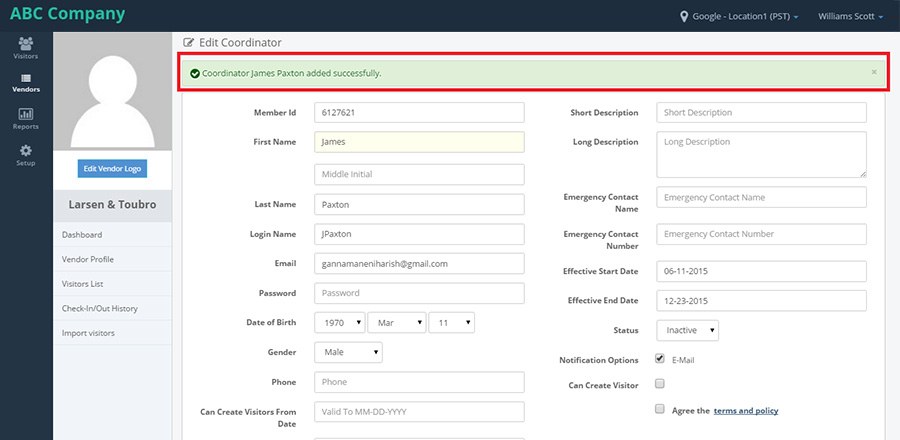
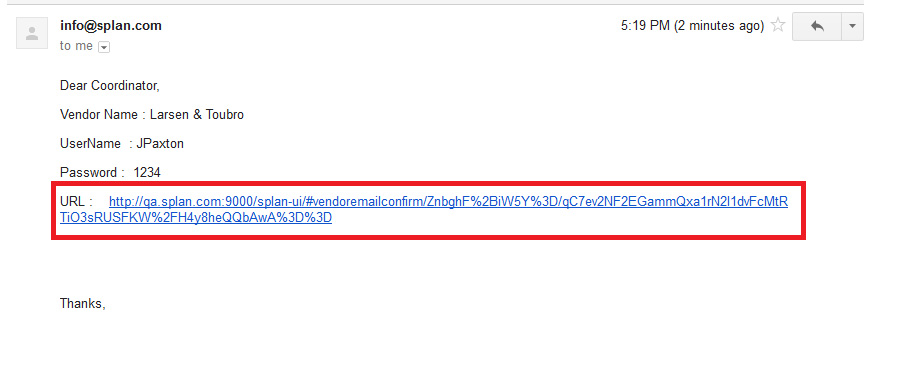
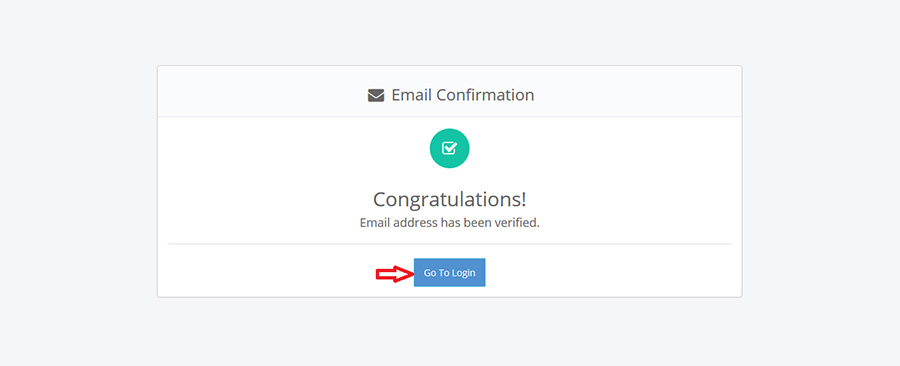
Once the details are provided and a vendor is created, an email is sent to the email-id provided for the Vendor Coordinator. The email consists a link, upon clicking on this link, it takes to the application where the vendor is activated. After clicking the URL it navigates the Email Confirmation page.
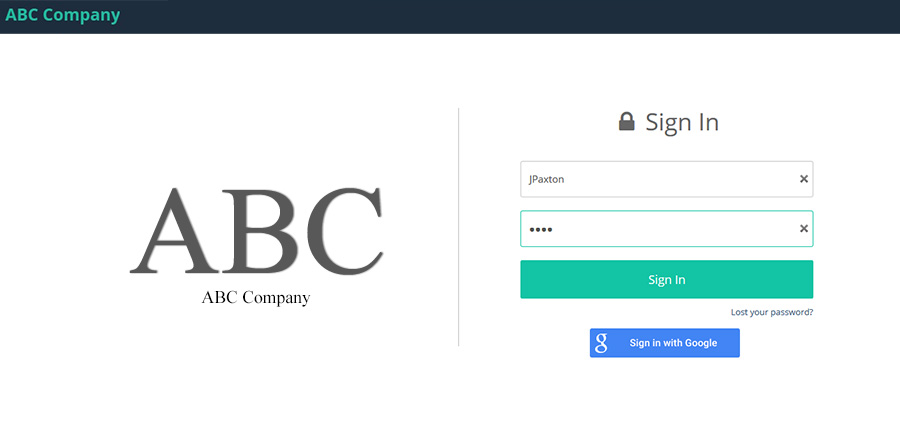
Upon clicking on 'Go To Login' button in the Email Confirmation page, a login page will be displayed were Vendor coordinator can login by providing login details which was sent in email.
Click on sign with Google button it navigates to Google sign-in page.
After entering the details in Google sign in page and click on sign in it navigates the screen with the for acceptance and click on Accept button it navigates the sign in page.
After entering the user id and password it navigates the terms and conditions page and click on continue button.
In terms and condition page after clicking on continue button it navigates to the change password.
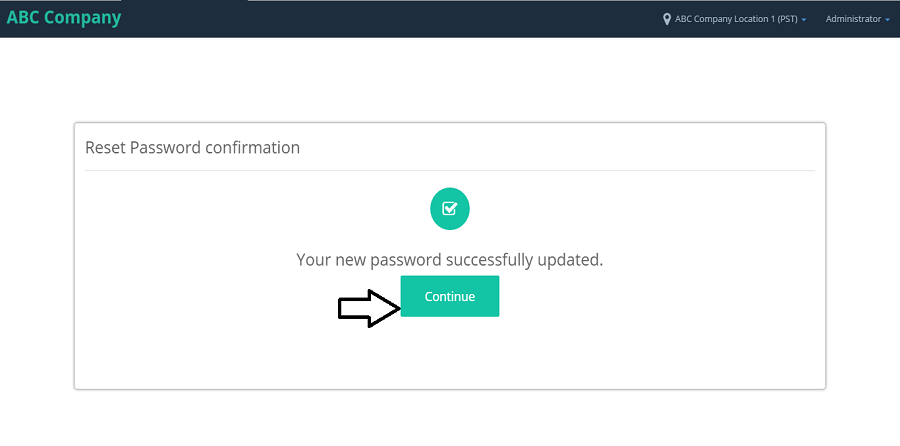
After changing the password it navigates to the reset password confirmation page.
Click on continue it navigate to the coordinator profile dashboard.
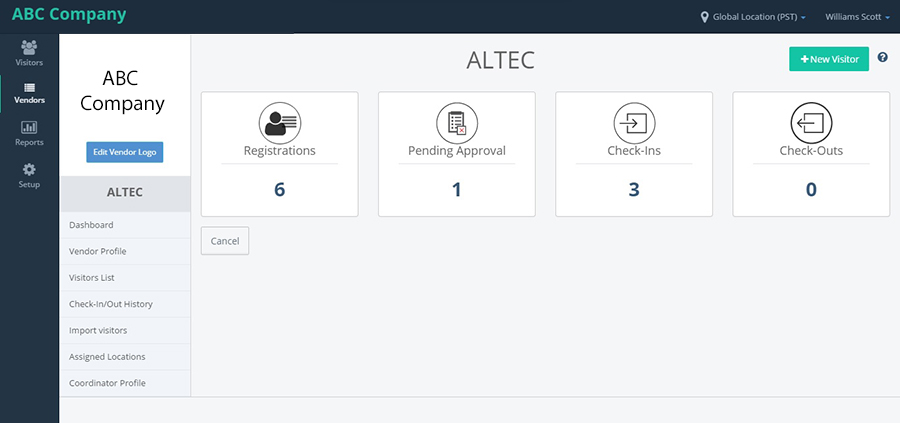
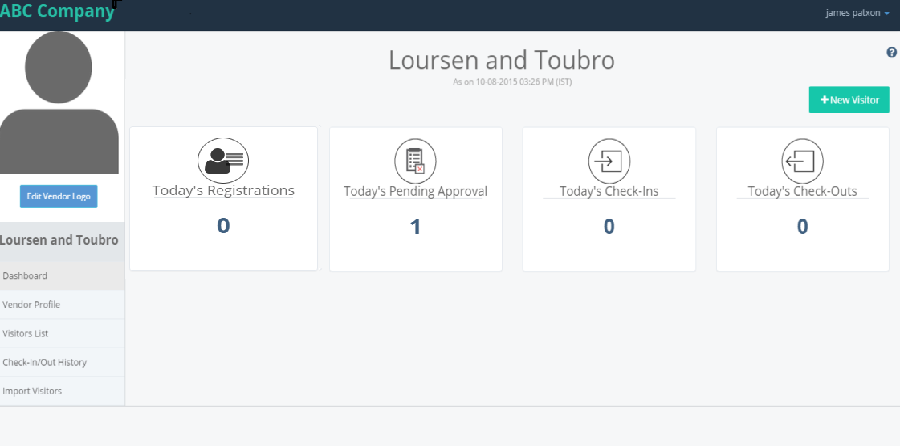
Profile dashboard displays the list of Visitors registered, Pending Approval, Check-Ins and Check-Outs.
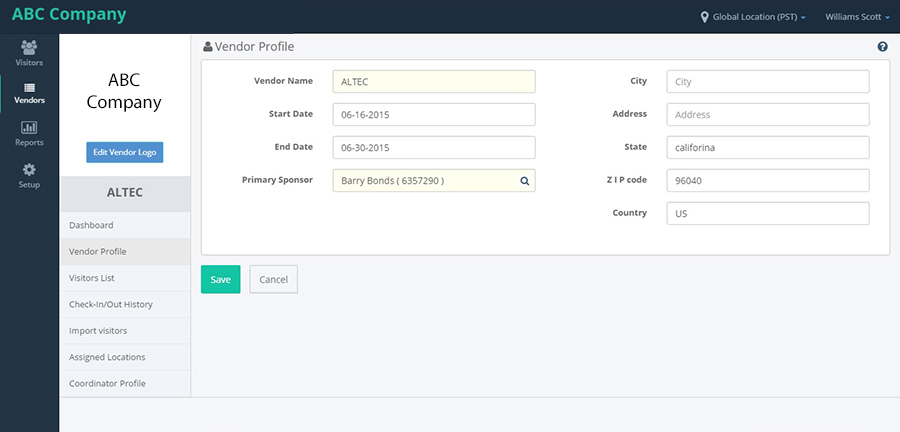
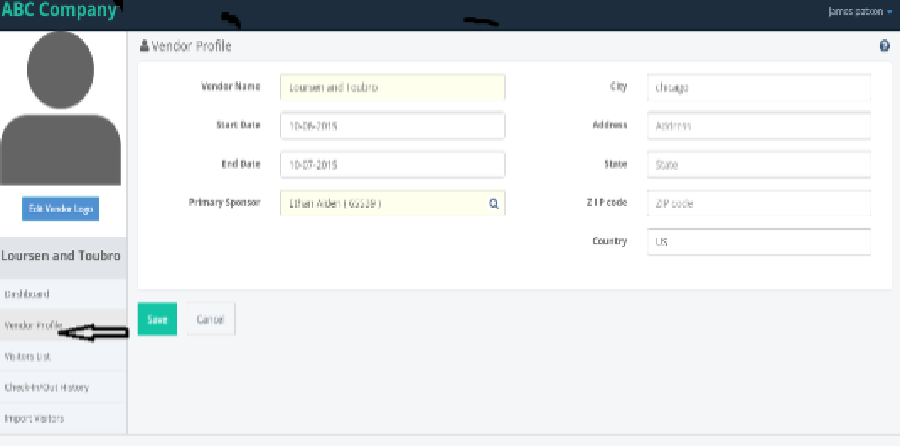
Vendor profile displays all the profile related information for the Vendor.
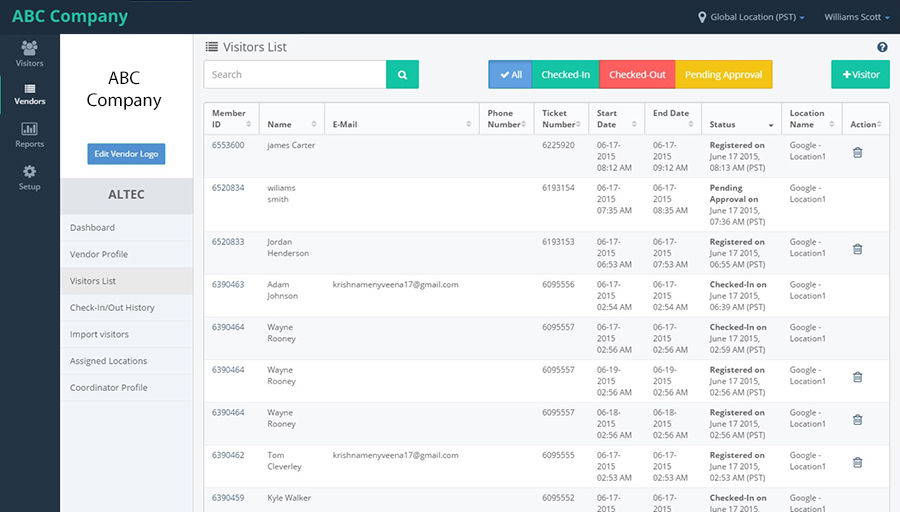
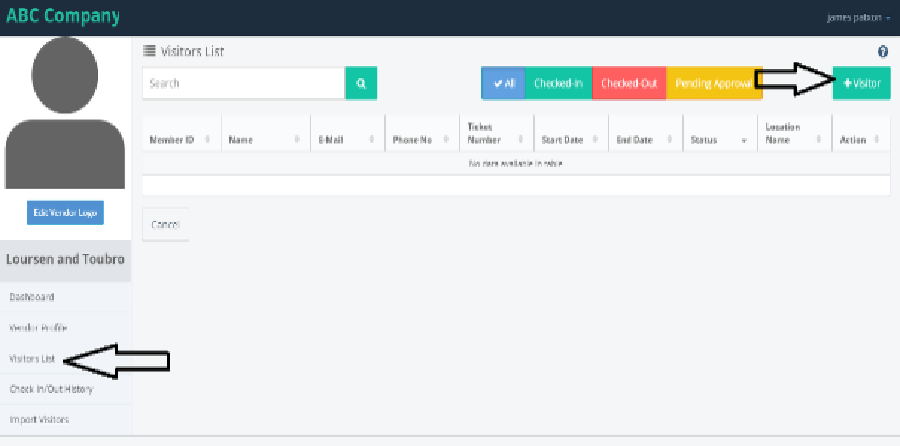
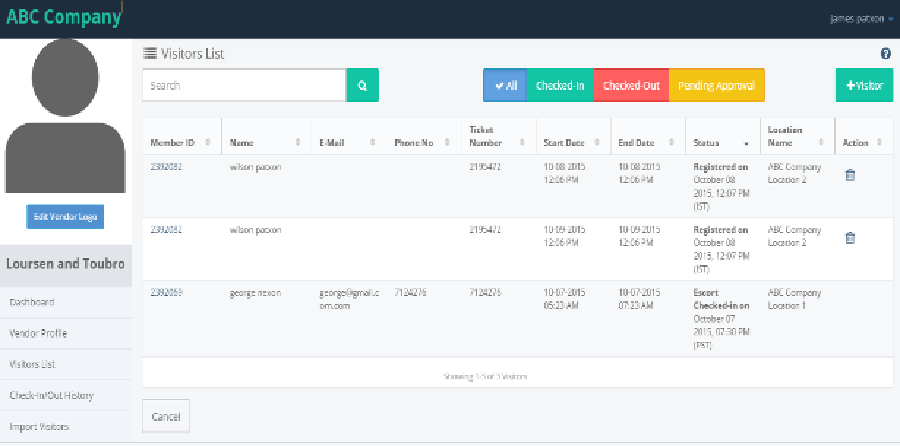
Visitor list displays list of all the visitors who has a visit for the location.
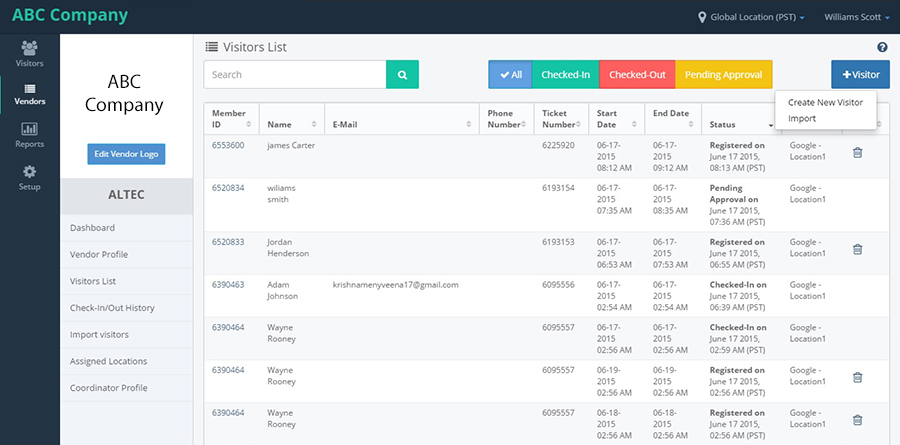
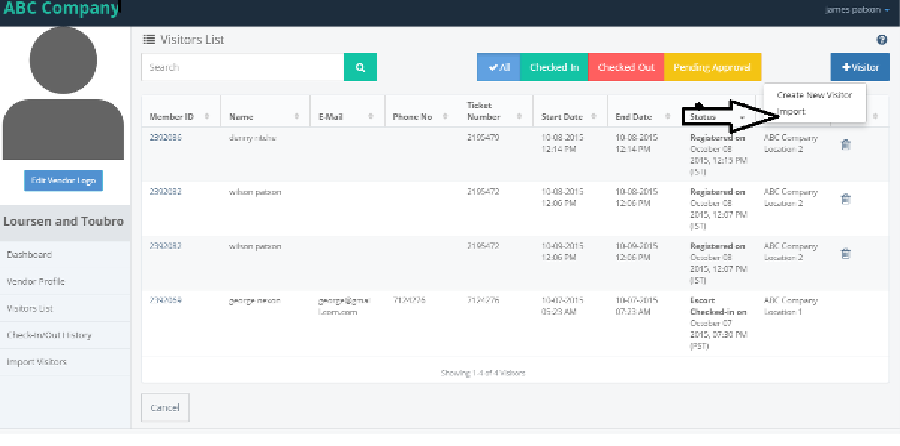
Upon clicking on the +Visitor, an option to either create new visitor or an option to import visitors are displayed.
In coordinator profile click on vendor profile link updated the fields and click on save button it shows the success message.
Click on visitor list
After saving the Vendor, it navigates to the Vendor profile page with Registrations, Check-ins and Check-out pods and a left panel with links.
- Dashboard
- Vendor profile
- Visitors list
- Checkout history
- Import Visitors
- Assigned locations
- Coordinator profile
On clicking on Visitor list, it navigates to the list of Visitors for that Vendor. It also has Search text box, "All", "Checked-in" and "Checked-out" toggle buttons and "+Visitor" button.
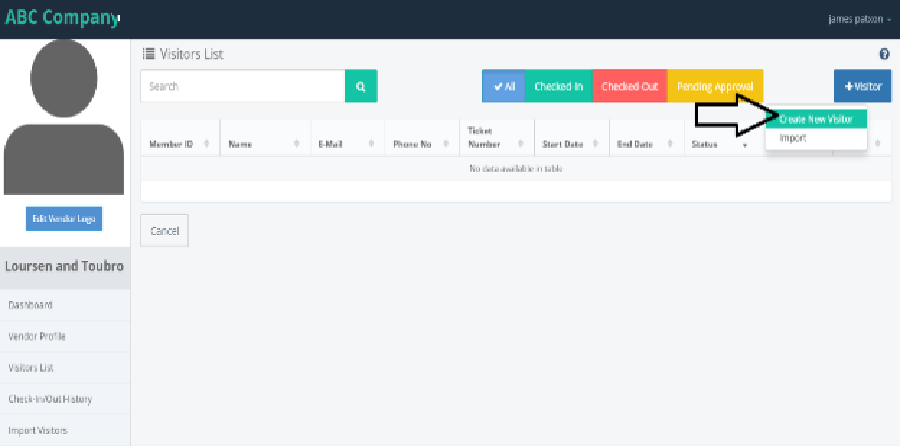
Click on "+Visitor" button, in the Visitor list page, it shows options like "Create New Visitor" and "Import" links.
Click on "Create New Visitor" link, it navigates to New Visitor Registration page with Save and Cancel buttons.
Click on save, the Visitor will be added to the Vendor.
Click on import link from the "+New Visitor" button, it navigates to Import Visitor page, where visitors can be imported.
Click on Upload button, a pop-up is displayed to select the file to upload.
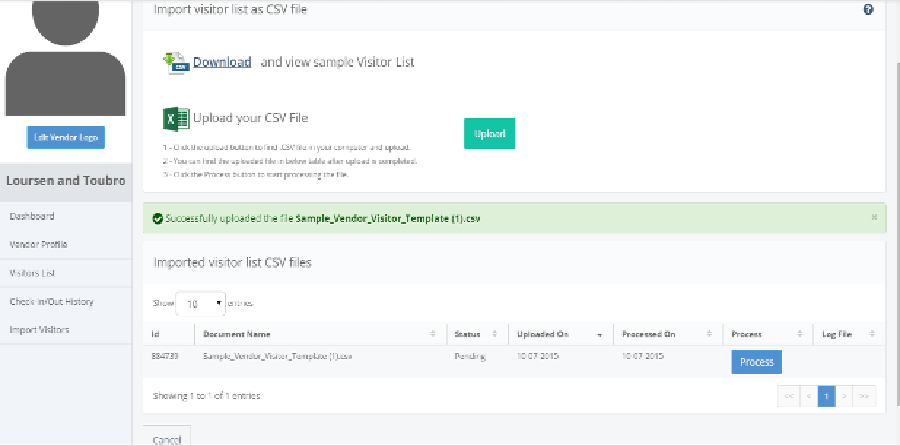
Choose any file and click on open button, the file will be uploaded successfully and shows a success message and 'Process' button will be shown next to the file name.
Click on Process button, the file will be processed and download button will be shown and the process button will be disappeared.
On clicking on download button, the file will be downloaded and once it is opened, all the records will be displayed.
Click on download button, the sample template will be downloaded.
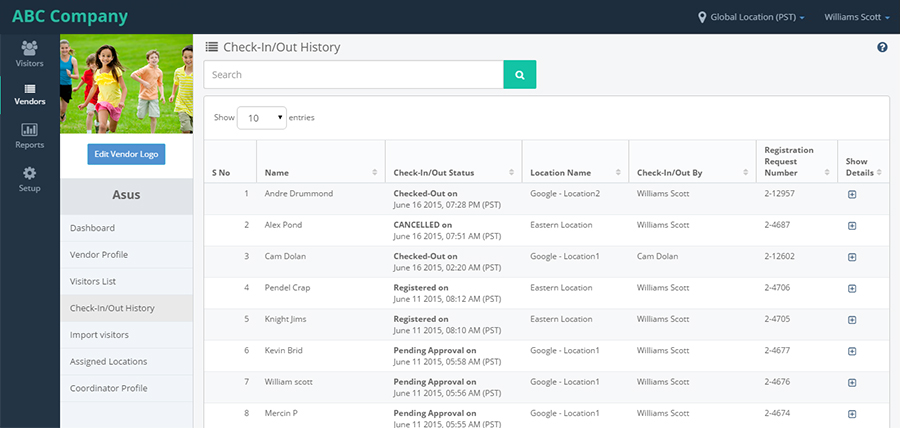
Click on check-in/out History from the left pane, it navigates to Check-in/out history page of that Vendor.
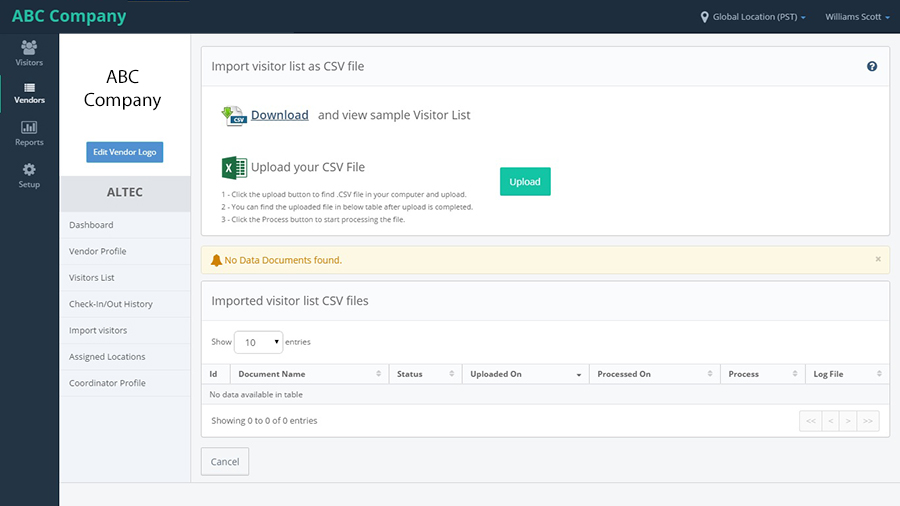
Click on import visitor tab from the left tab. It navigates to Import Visitors page where Import visitors option is available with download and upload buttons.
Click on download button, it downloads a sample template, this sample template can be used to fill in the data and upload it in the system.
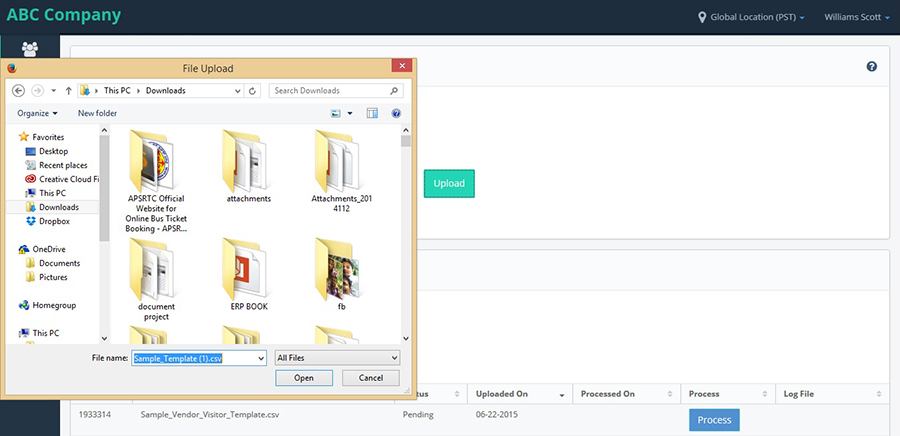
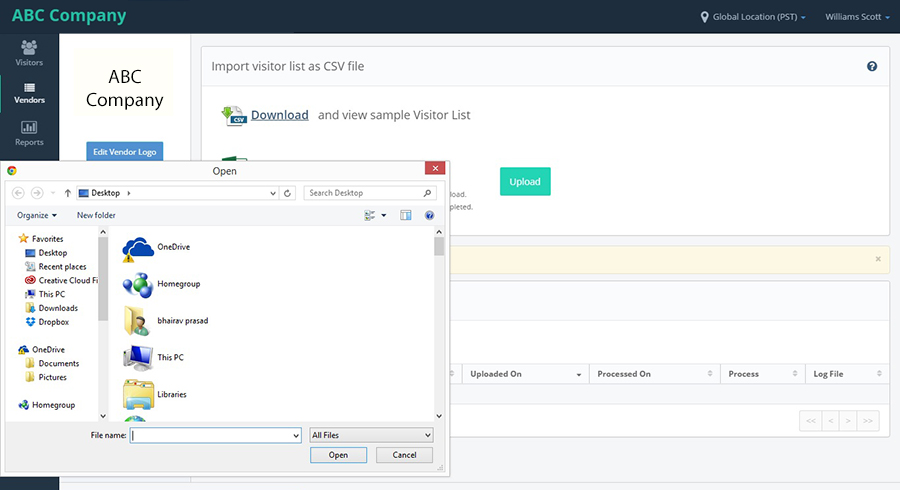
Click on upload button, it opens the folder to choose a file.
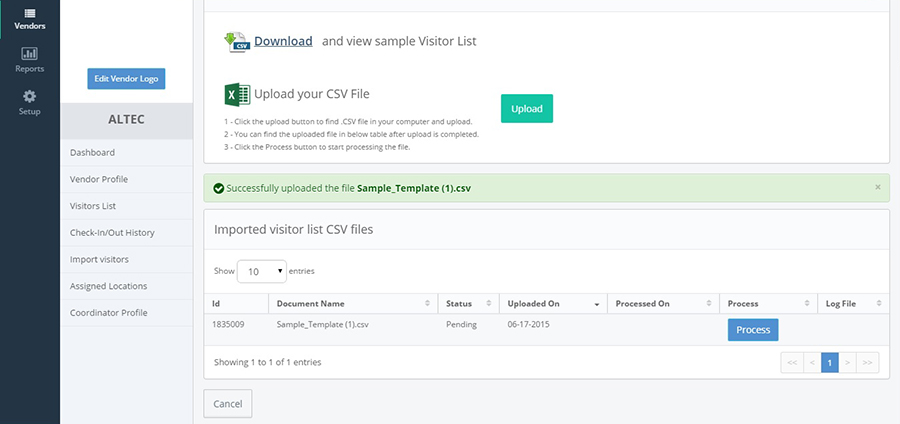
Select a file and click on Open button, the file will be uploaded with a success message and Process button will be displayed next to the file name and the latest of the files will be displayed at top of the screen.
On clicking on Process button, the file will be processed and download button will be displayed in the log file column.
On clicking on Download button, the file will be downloaded.
Click on assigned location from the left tab. It navigates to Assigned Locations page, where we can assign different locations for the vendor with Save and Cancel.
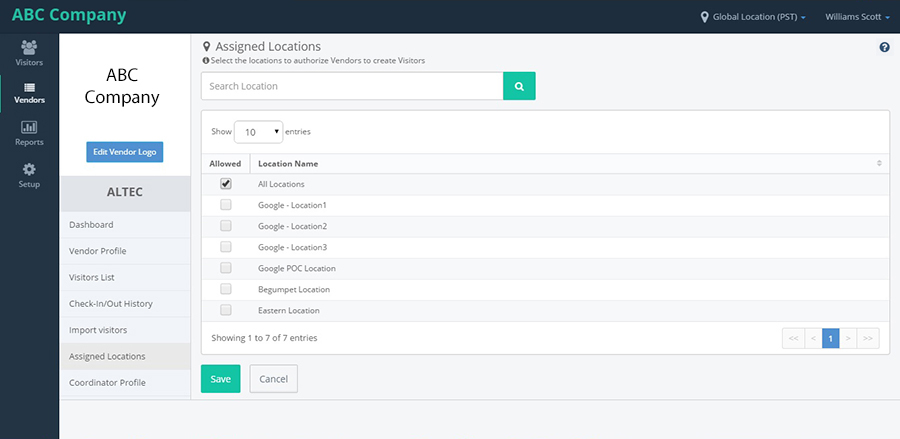
Whichever the location is selected, the Vendor will be available for that location.
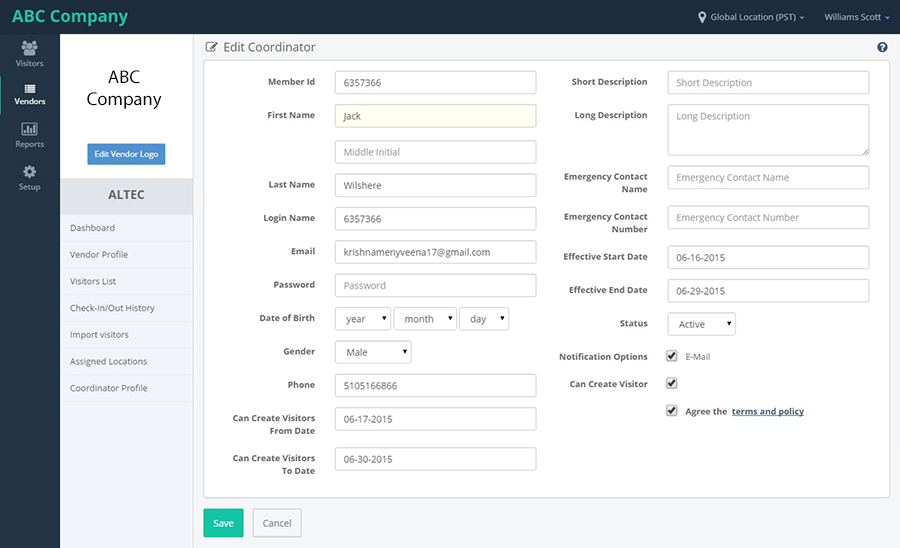
Click on Coordinator profile from the left tab, it navigates to Edit Co-ordinator page with all the values pre-populated along with Save and Cancel buttons.
VENDORS LIST
Vendor list is the next link in the Vendors.
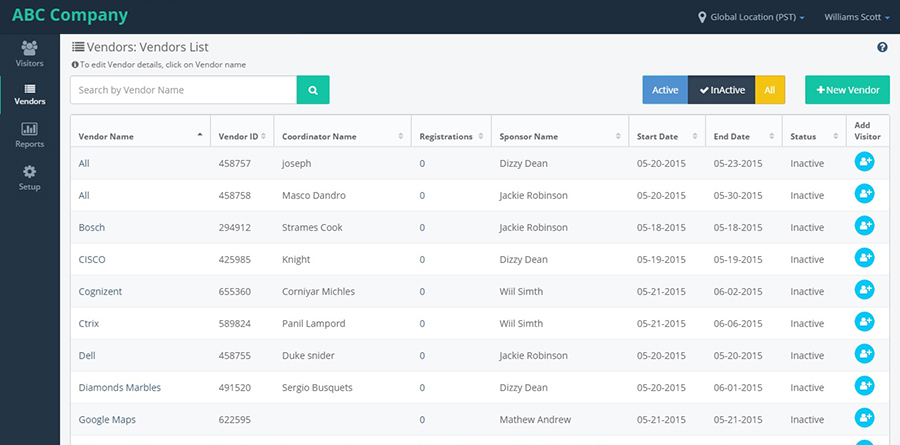
On clicking on Vendors list link, it navigates to Vendors list page, which shows the list of Vendors available for that location with Search text box, "Active", "Inactive" and "All" toggle buttons along with "+New Vendor" button.
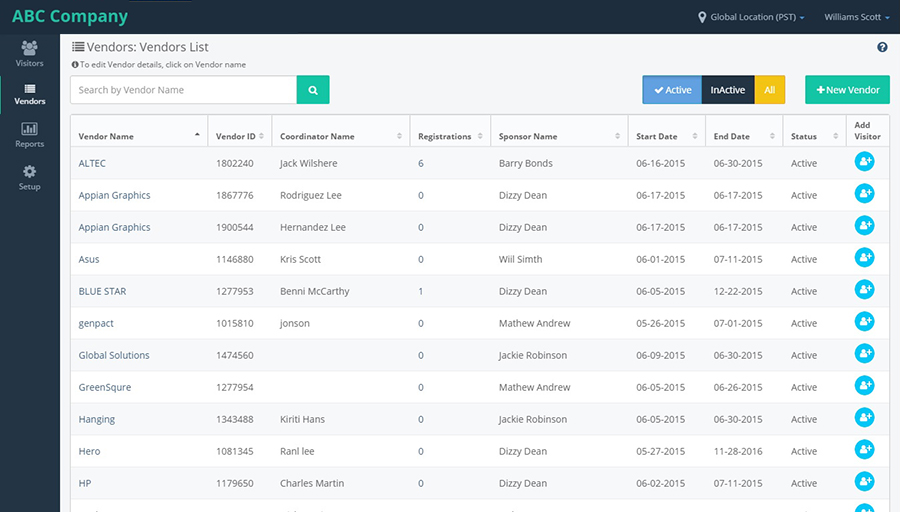
When a Vendor List is launched, by default it shows all the active Vendors with "Active" toggle button selected.
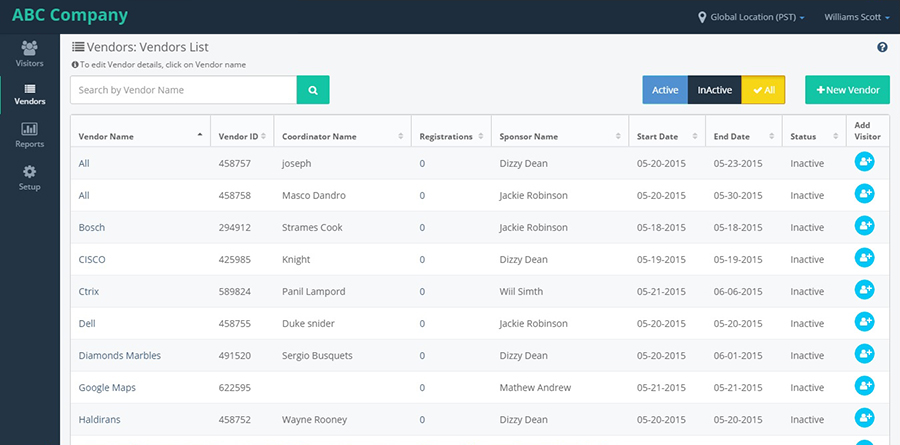
Click on "Inactive" toggle button, it shows the list of Inactive vendors.
When we click on "All" toggle button, it shows the list of all Active and Inactive vendors.
VENDORS COORDINATOR LIST
Hover on the Vendor component, it shows link "Vendor Coordinators".
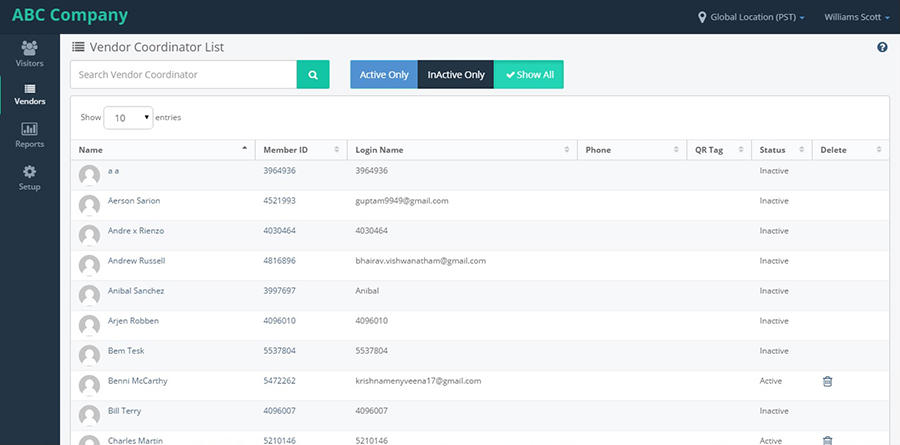
Upon clicking on 'Vendor coordinators' link, a page is opened with list of all the Vendor Coordinators for that provider, by default it shows the list of active Vendors.
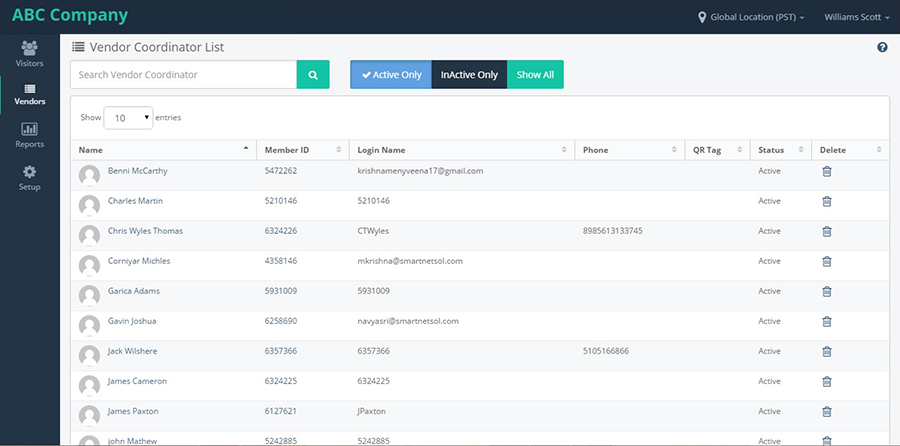
It has "Active Only", "Inactive Only" and "Show All" toggle buttons.
Upon clicking on Inactive only option, it displays list of inactive members.
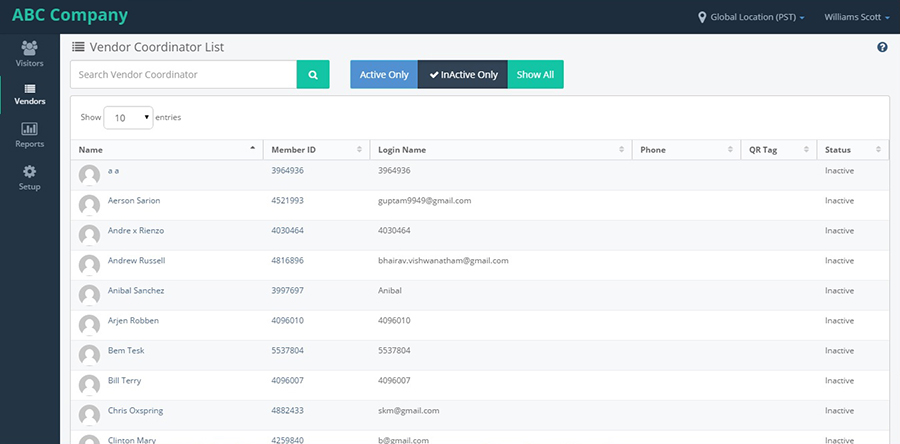
On clicking on Show All toggle button, it shows the list of Active and Inactive Vendor coordinators list.
VENDORS & COORDINATOR IMPORT
On clicking on Vendors & Coordinators import link, it navigates to Upload Vendors and Coordinators page where Vendors and Coordinators can be imported into the system.
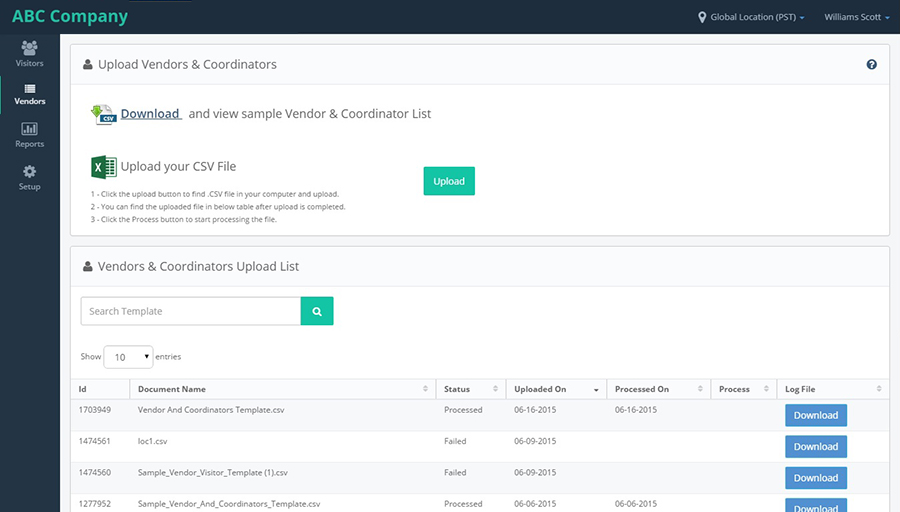
Click on Download button from the page, a sample template will be downloaded upon which changes can be made and uploaded.
Click on upload button to add a template
On clicking on Upload button, it opens a file chooser to choose a file.
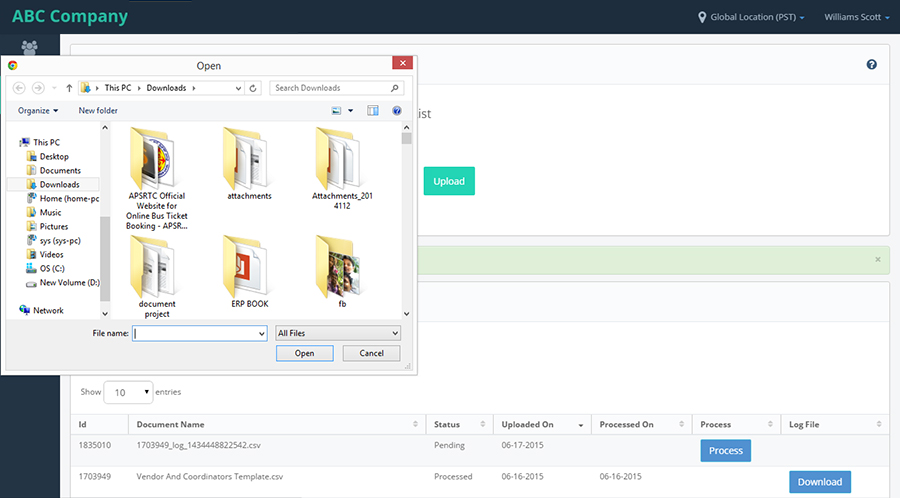
Choose a file and click on Open button, the file will be uploaded and processed along with success message and download button will be shown next to the filename.
Click on Process button, the file will be processed and Download button will be displayed.
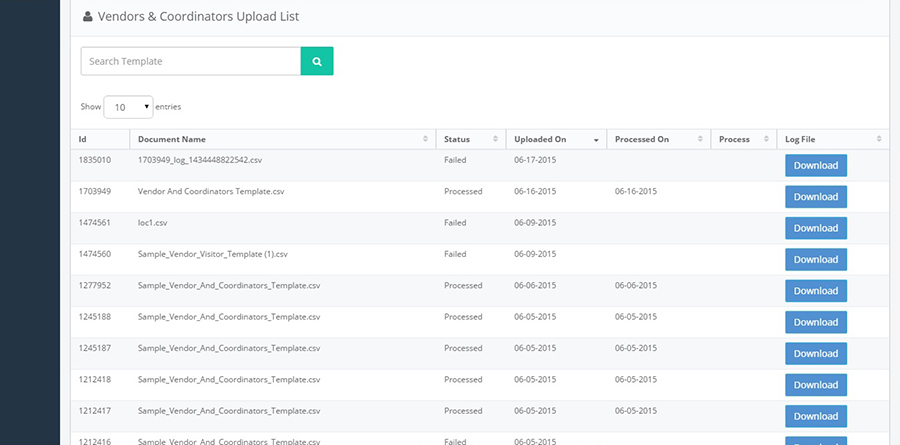
Click on download button, from the log file column, the file will be downloaded and the details of the Visitors are displayed.
On clicking Download, the file will be downloaded and the data which has been uploaded is displayed.
CHECK-IN/OUT
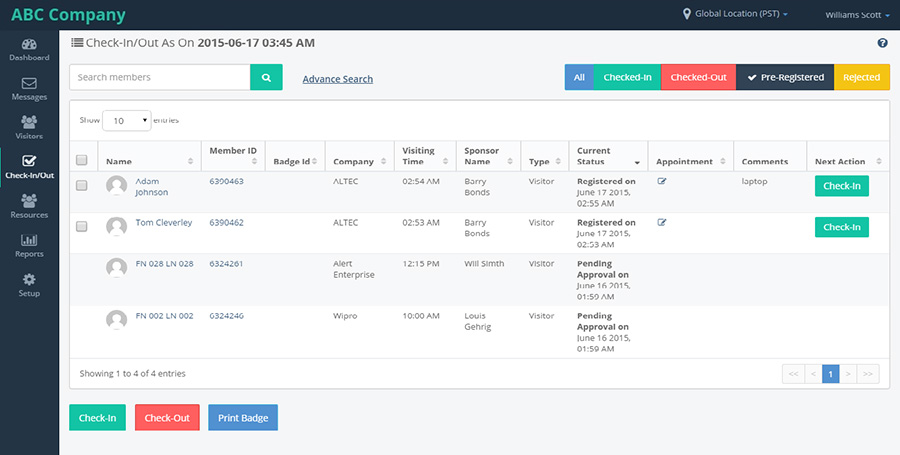
Upon clicking on the 'Check-in/Out' link on the left navigation panel, will display check-in/check-out information for all the Visitors. To perform an admin check-out, click on the 'Check-Out' button, next to each visitor/staff. To check-out multiple visitors/staff at the same time, select the boxes next to each visitor/staff on the left, and then click on the 'Check-Out' button at the bottom of the screen.
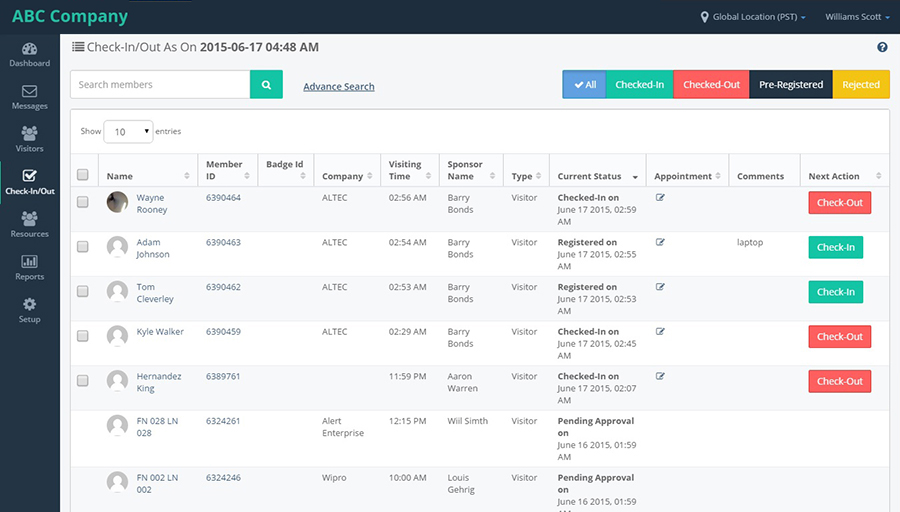
Similarly, to perform an LA check-in, click on the green 'Check-In' button next to the visitor/staff information. Also, to check-in multiple visitors/staff at the same time, select the boxes next to each visitor/staff on the left, and then click on the green 'Check-In' button at the bottom of the screen.
LA can check in or checkout a visitor/staff using Check in/out module from provider.
For the staff, LA have two states during Check In/Out i. e. Check In and Check-Out.
When LA click on the name of the Staff in the Check In/Out page, it opens the profile of the Staff with three options profile, privileges, check in/out history.
On the left tab, LA have another option called 'Check in/out history'. When LA click on that, it opens the Check in/out page of the Staff with all the Check in/out history of that particular Staff with more history button on the top right.
Once you click on the button, you will see a pop-up window, where you need to enter an appropriate reason and then click on the 'Save' button to finish the process. In this window, the current time is displayed by default. If you know the exact time the visitor/staff was checked in or checked out, you can specify the time here in 'Check-in/Out Time' field.
A successful check-in/check-out message is displayed.
When LA click on the name of the Visitor in the Check in/out page, it opens the profile of the Visitor.
Here in the profile, LA have the options of New Appointment and editing the details etc. When LA click on New Appointment, it opens up the new appointment page with all the details pre populated.
LA has an options to changing the visitor to VIP or Watch list.
Scenarios to edit an appointment:
When LA keep hover on Registered person, it shows Edit appointment.
When LA keep hover on Checked in person, it shows Edit Visitor Details.
When hover on Escort Checked in person, Edit Visitor Details will be displayed if the appointment is eligible for editing.
RESOURCES/EMPLOYEE
We have another component called, "Resources". Resources has link "Employee".
Employee :
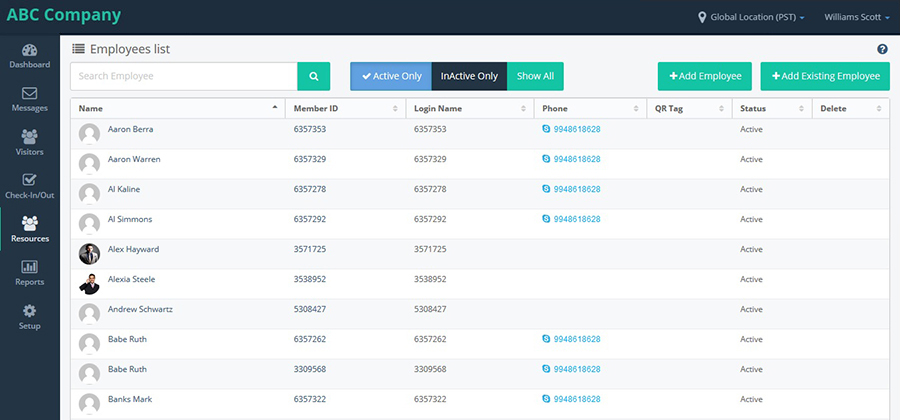
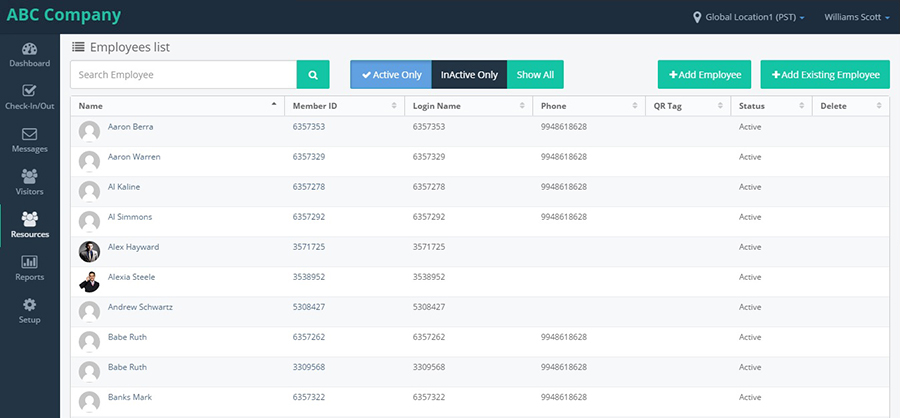
- On clicking on "Employee" link, it navigates to "Employee list" page, which shows the list of Employees available for that location.
- The Employee list page has "Search text", "Active","Inactive" and "Show All" toggle buttons and "Add Employee" and "Add Existing Employee" buttons.
- On clicking on Active toggle button, it displays the list of Active employees. On clicking on Inactive toggle button, it displays the list of Inactive employees and in the “Show All” toggle button, it shows the list of all Active and Inactive employees.
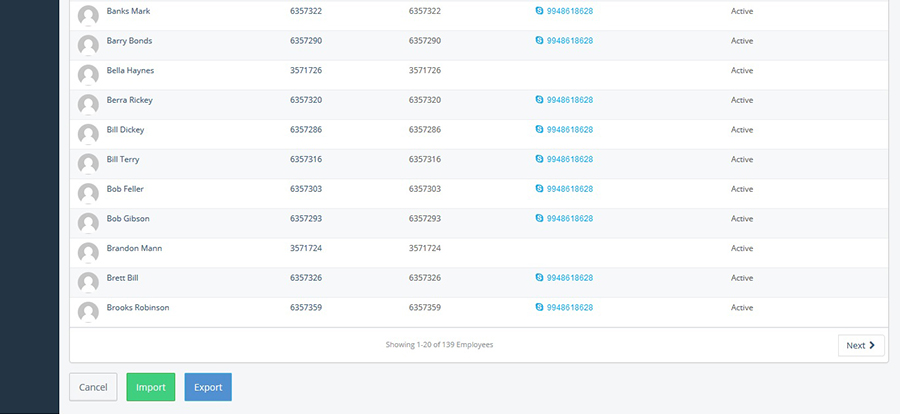
- Enter some data and click on "Search" box, it displays the records matching with the data entered in the search box.
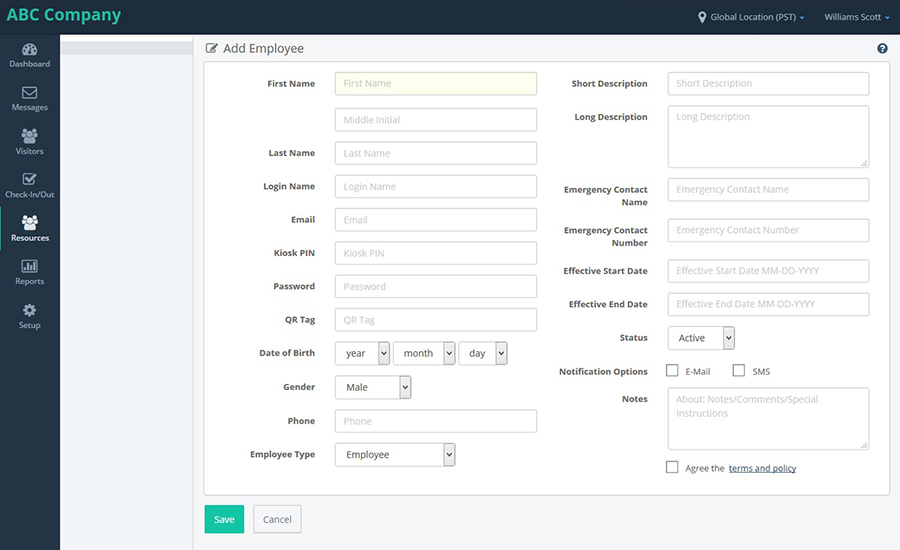
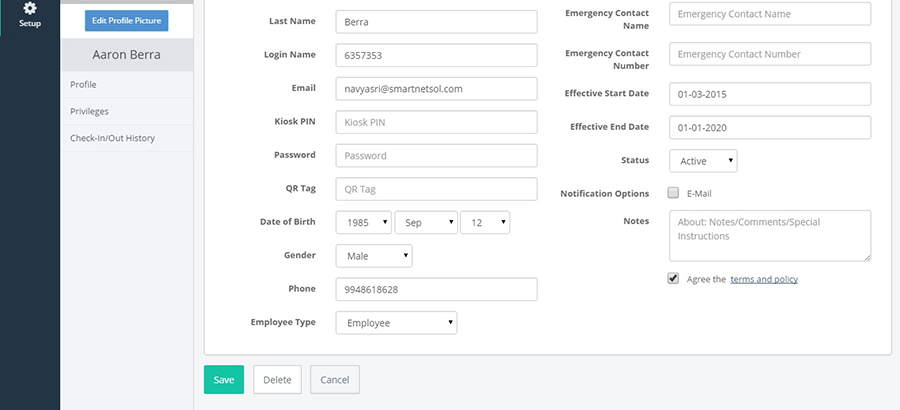
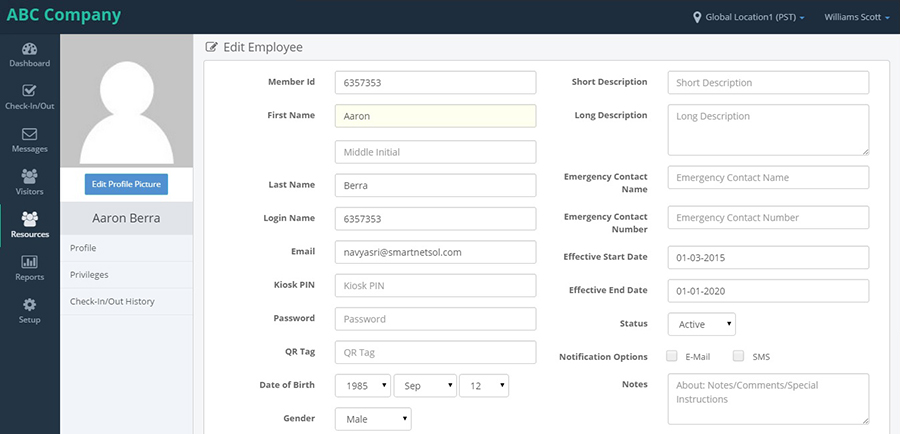
- On clicking on "Add Employee" button, it navigates to "Add Employee" page to fill the details and add an employee to the list along with Save and Cancel buttons.
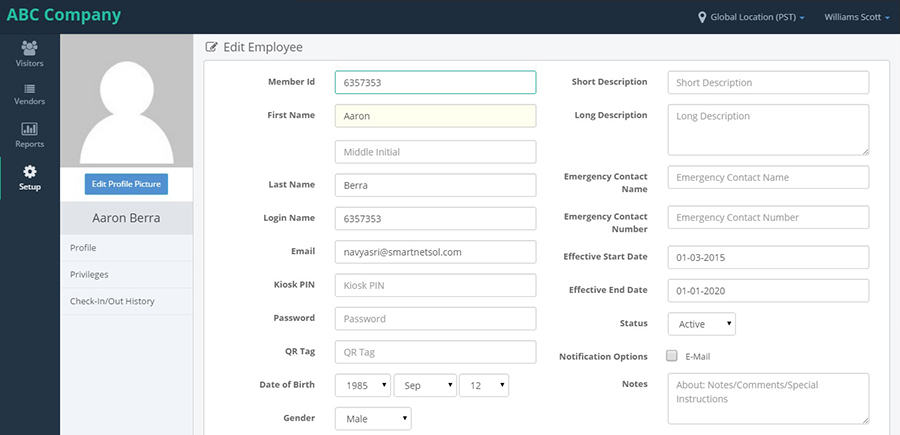
- On clicking on the member ID it navigates to the employee profile screen with left navigation having three links,they are 1)profile,2)privileges,3)checkin/out history.
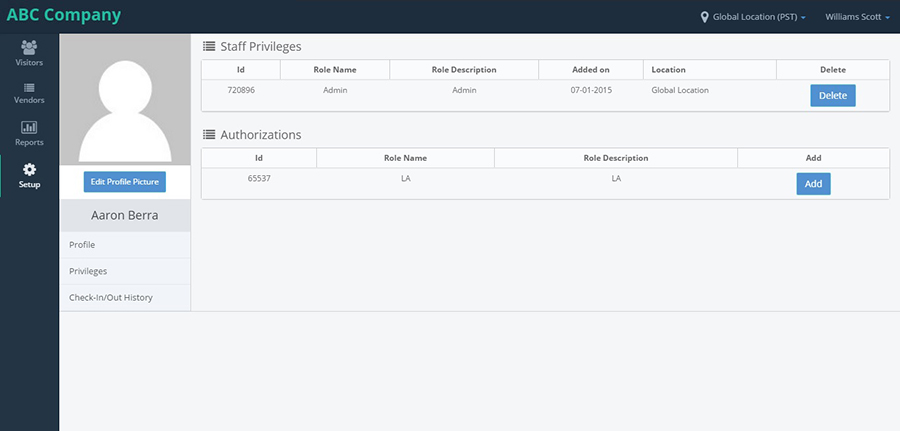
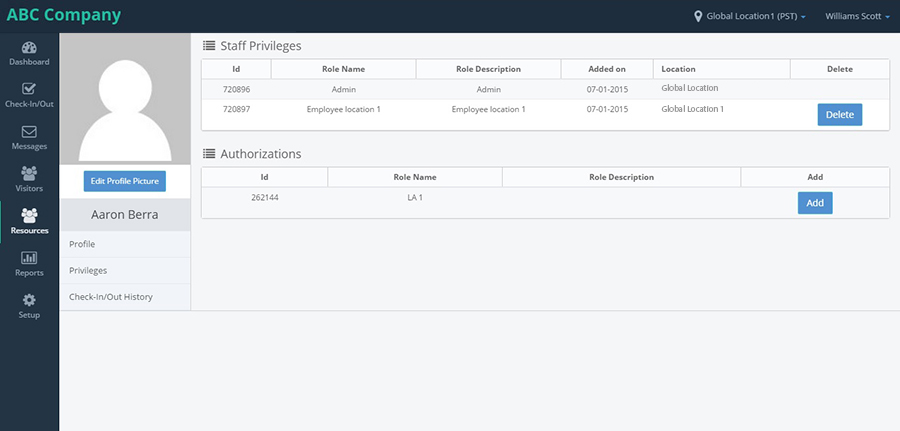
- On click on the privileges link it navigates to Employee privilegs.
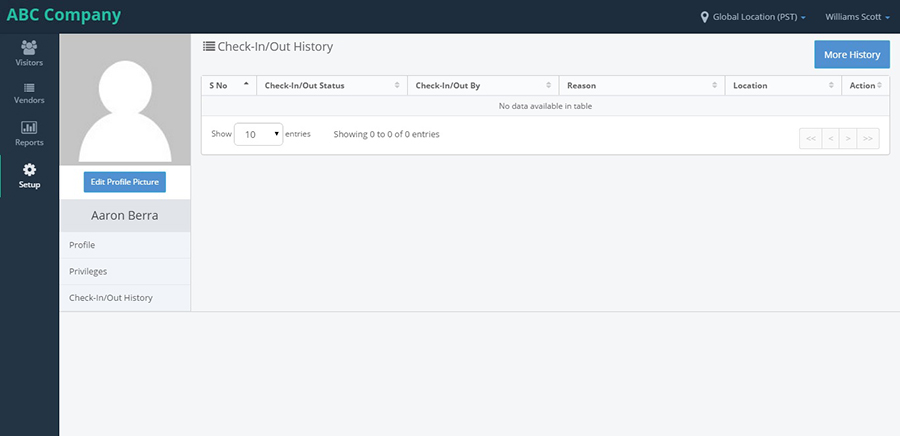
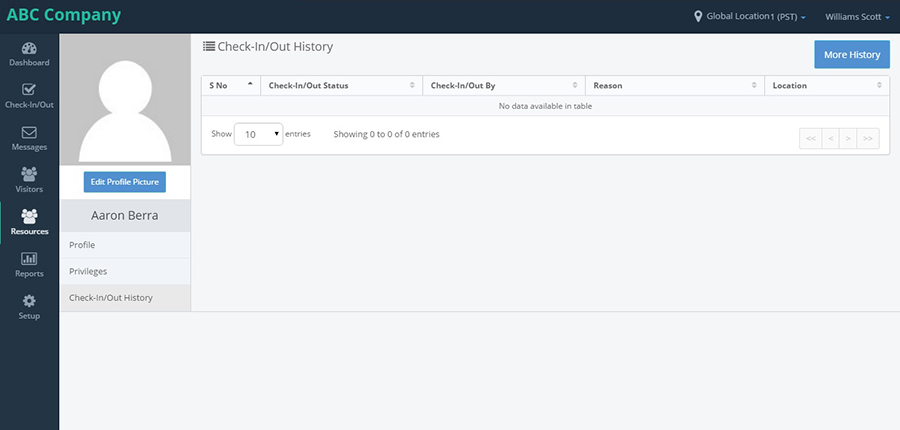
- On click on checkin/out history tab it navigates to the Checkin/Out History of the employee.
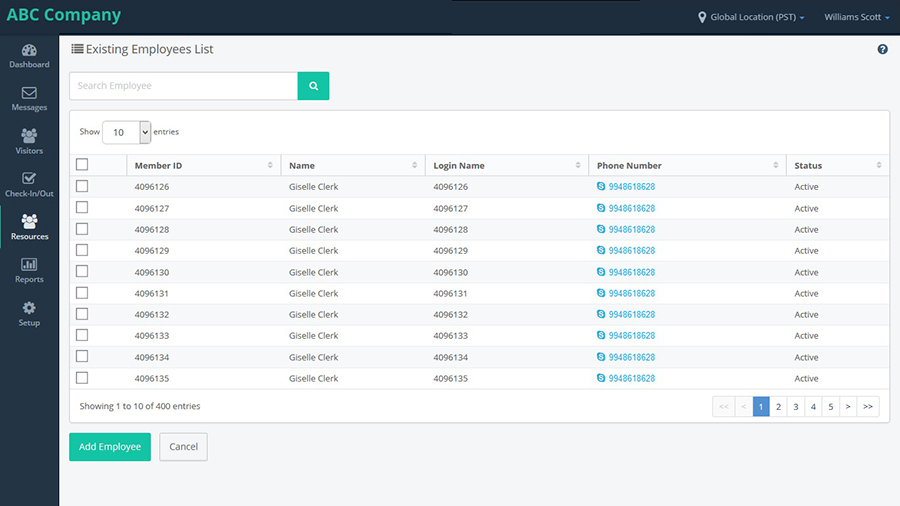
- On clicking on "Add Existing Employee" button, it navigates to "Existing Employee list" page which has the details of the Employees of other locations of the provider.
- Select any Employee and click on Save button, the employee will be added to the current location and will not be shown in the Existing Employee list anymore.
- When LA changes to particular location the following screen will showing with the same functionality.
REPORTS
>This section provides various details in the system. From the left pannel select reports component. Click on the view next to the report description.It'l opens a new window, fill the details and click on run.
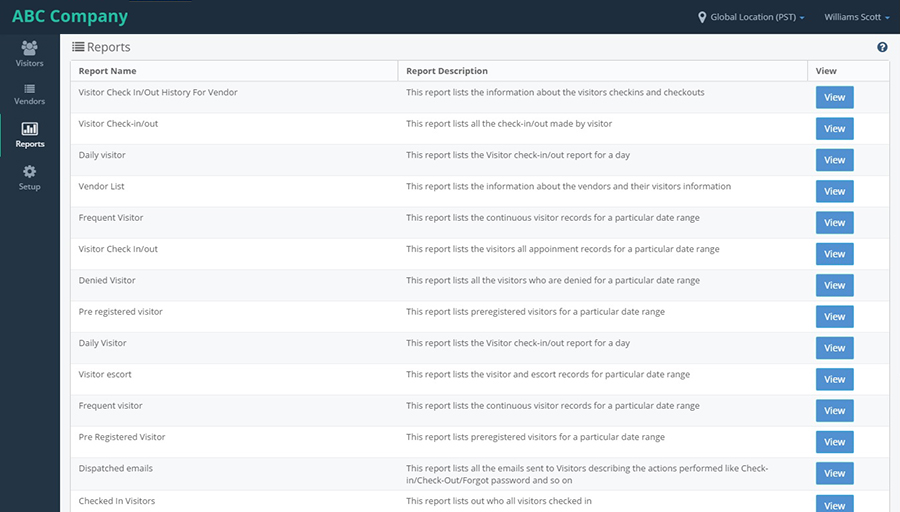
List of the reports available are:
- Daily Visitor Report
- Pre Registered Visitor Report
- Frequent Visitor Report
- Visitor Escort Report
- Visitor Check-In/Out Report
- Dispatched Emails Report
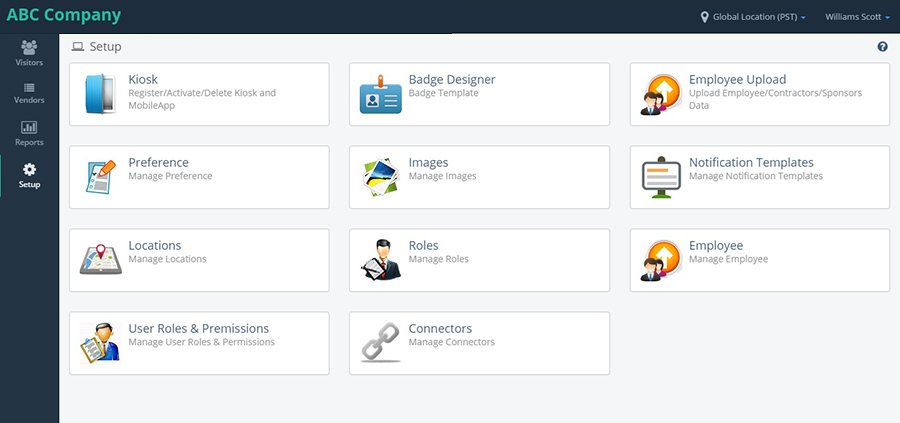
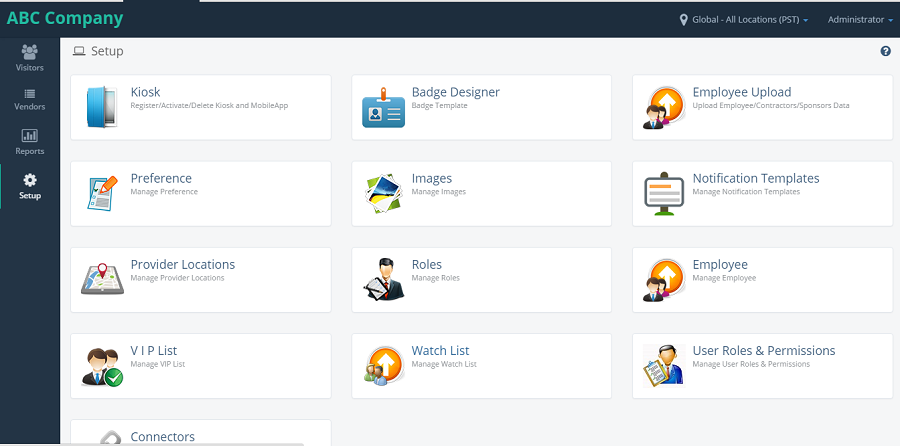
SETUP
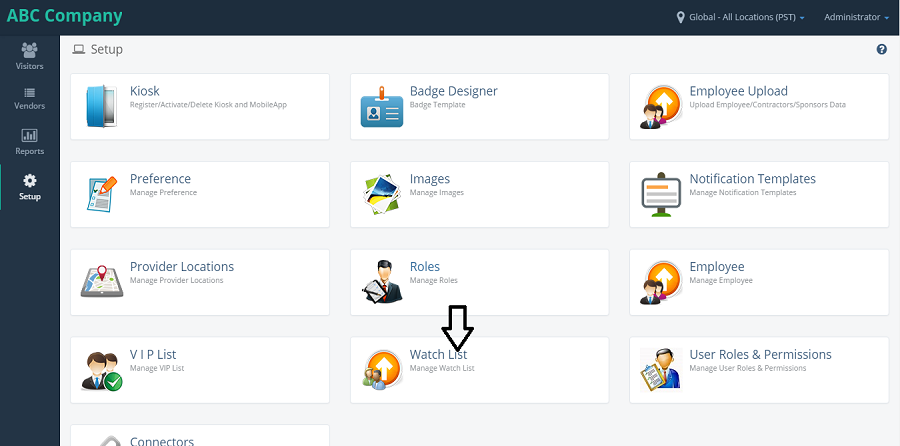
On clicking on 'Setup' on the left navigation this component is displayed. This component displays the list of the features which are available for that location.
- KIOSK
- Edit
- Delete
- Register (or) UnRegister.
Upon clicking on Kiosk, kiosk page will be displayed where kiosks for this application can be configured.
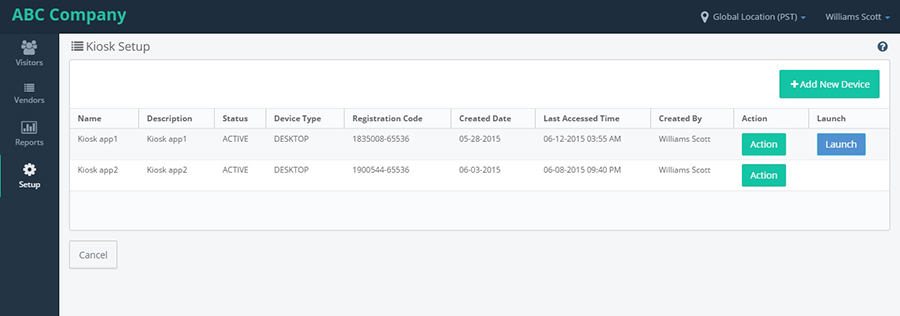
After clicking on kiosk it navigates to kiosk setup screen and click on Add new device button.
After clicking on add new device button it shows the below the new device screen and fill the details click on save button.
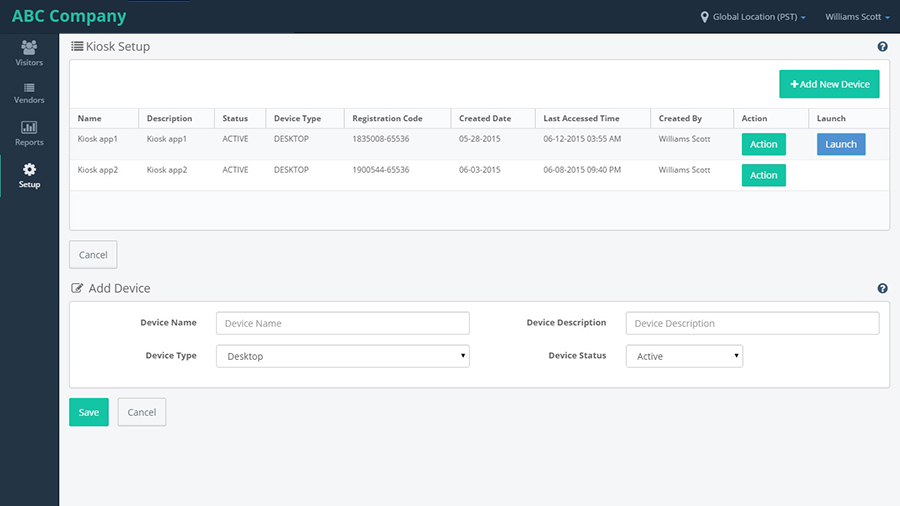
After clicking on save button the success message shows the device added successfully with device name.
Click on Action button.
In kiosk setup screen up on clicking on action button for any one of the device from kiosk list grid.
it shows three options:
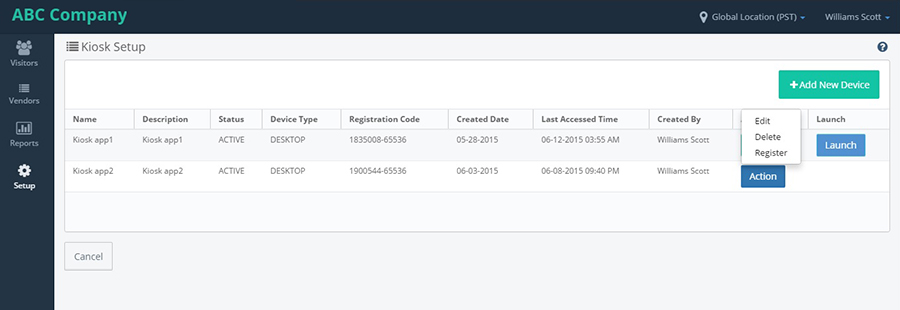
click on unregister link from the action drop down the device is unregistered and displays success message and for an unregistered device launch button is not displayed.
Click on delete option.
click on delete link from the action drop down the device will get deleted and displays success message.
Click on edit option.
click on edit link from the action drop down the device is it shows the edit device screen below the kiosk list grid by populating the device details along with save and cancel button.
After clicking on save button the success message shows the device was edit updated successfully.
BADGE DESIGNER
On clicking on badge template icon in setup page, Badge Template layout will be launched.
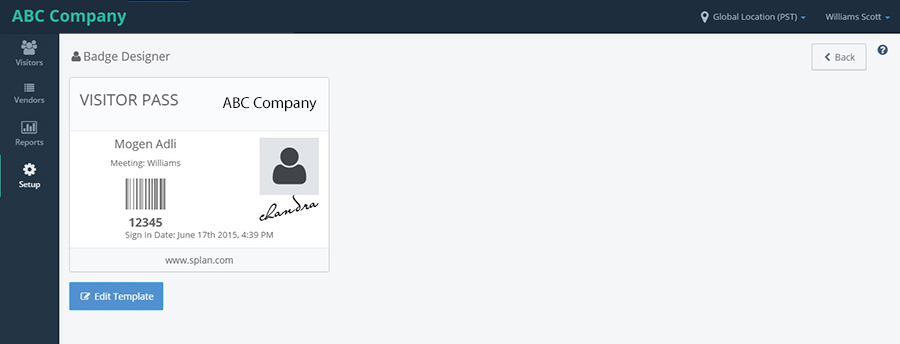
On clicking on Edit Template from below any of the badge, displays different types of badges available. One of the badge can be selected to print a badge.

By clicking on the radio button available next to a badge, that badge will be saved and the badges will be printed in that format.
EMPLOYEE UPLOAD
Click on Employee upload, it displays a page with upload button. Click on upload.
Click on choose file and choose a staff file and upload.
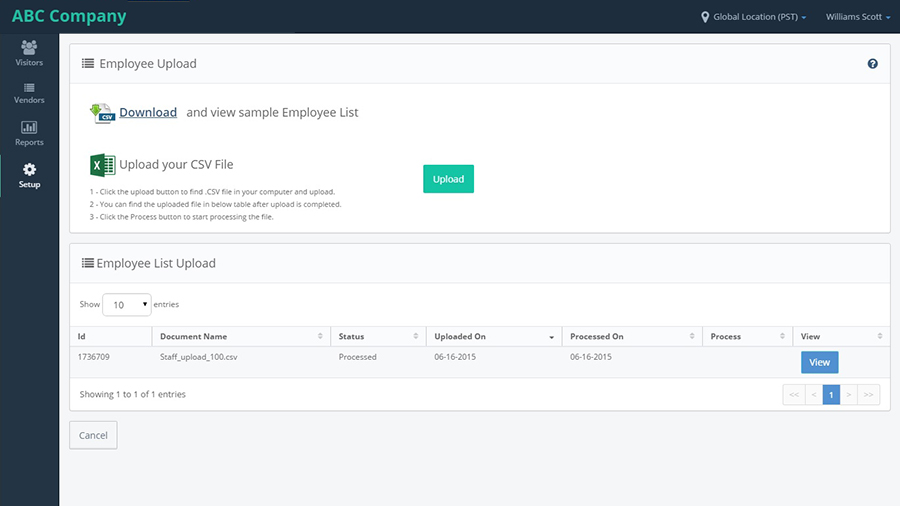
On clicking on Choose file, it opens the File upload option to select a file and upload it to the list.
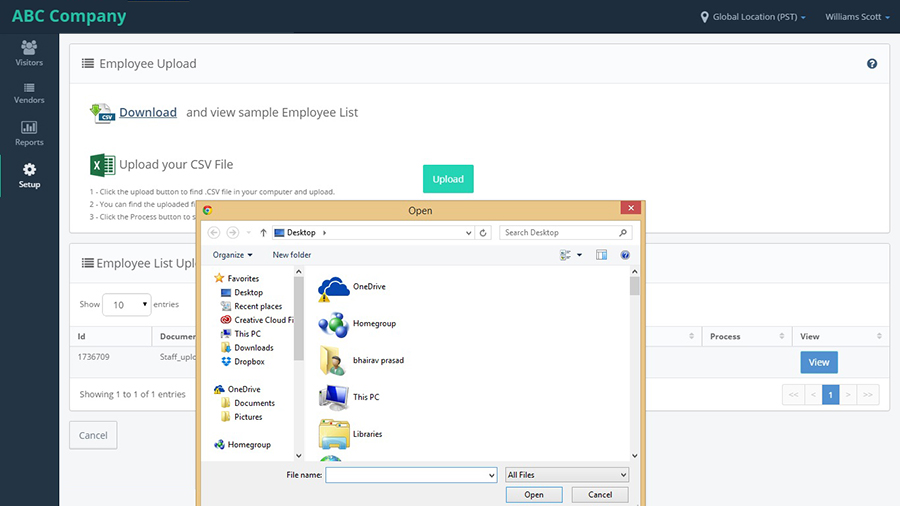
After uploading the file, it shows a success message and the file will be added to the list.
After uploading the sheet, the process button will be displayed. Once the file is processed, the View button is showed.
When we click on View, it opens the file which is uploaded.
PREFERENCES
From setup select preferences. Preferences page will be displayed. There LA can change the preference.

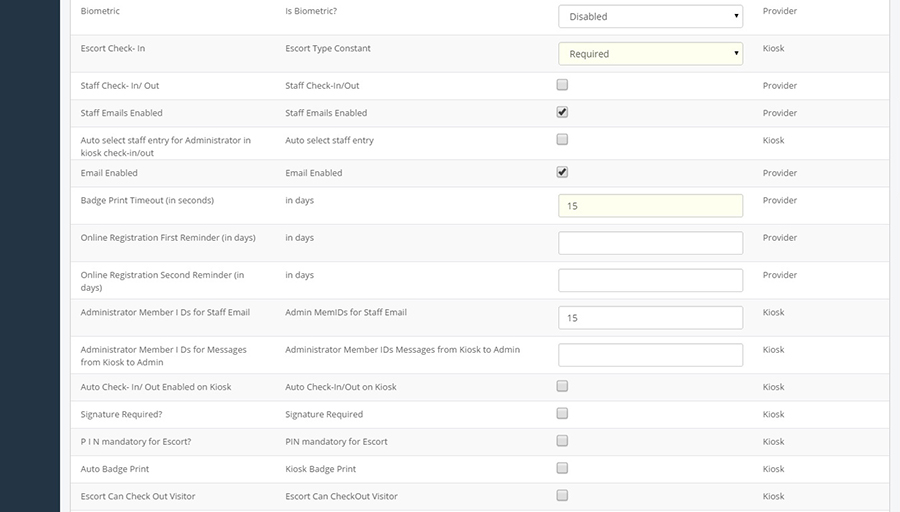
We have toggle buttons 'All', 'Provider' and 'Kiosk'. 'All' shows the preferences of both Kiosk and Provider.
- Buffer Check- In Time (in minutes) : this preference is used when the time is in between Registered time and Checkin time.
- Buffer Check- Out Time (in minutes) : this preference is used when the time is in between Registered time and Checkin time.
- Time Out (in seconds) : this preference is used, when the kisok should show timeout. i.e. after how much time of inactivation, the kiosk should timeout.
- Signature Pad : this is a dropdown. If it is enabled, then the Signature pad will be shown while registering a visitor.
- Auto Refresh Check- In/ Out Screen (in seconds) : this preference will refresh the Checkin/out page after the number of seconds specified in the preference.
- Badge Print : If the preference is enabled,then in the Checkin/out page the Badge print button should be shown and after registering the visitor from Kiosk, in confirmation page it should show badge print.
- Sponsor Required? : If this preference is enabled, then while visitor is registering, "Whom you are meeting" will be shown.
- D L Scanner : If this preference is enabled, then in the Visitor Registration form, it should show,"Driving License" button and "Scan your Driving license" message.
- N D A : If this preference is enabled, then in the Visitor Registration form, it should show,"NDA" button.
- Bio-metric: If this preference is enabled, then in the Visitor Registration form, it should show,"Bio-metric" button.
- Escort Check- In : If this value is "required", then after Visitor Checkin, next status will be Escort Checkin. If it is "not required", then after Visitor Checkin, next status will be checkout.
- Staff Check- In/ Out : If this is enabled, then the Staff records will be shown in Checkin/out page to perform any operations and in Dashboard also in Checkin and Checkout pods, it will show Staff.
- Staff Emails Enabled : If this is enabled, then after the Staff Checkin and Checkout, emails will go to the Administrator.
- Badge Print Timeout (in seconds) : After the specified seconds,the badge print should be disabled.
- Signature Required? : If this preference is enabled, then signature will be mandatory while registering the visitor.
- P I N mandatory for Escort?
IMAGES
Select images from setup and here LA can add/ edit/ delete provider logo/ kiosk images.
LA can delete/ edit provider logo ,LA can activate/ deactivate/ add new/ delete kiosk images.
Provider Logo Setup :
- Delete : On clicking of Delete button, the image present in the "Provider Logo Setup" block would be deleted.
- Edit : When you click on Edit button, it opens the File upload. Select any image and click on upload, that image will be uploaded and that image should be shown in the login page also.
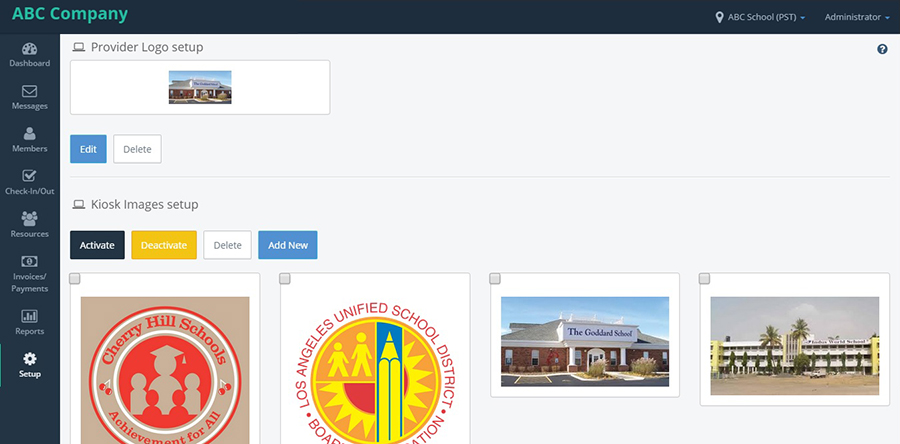
Kiosk Images Setup: It shows the bunch of images which will be shown in the Kiosk App or Web Kiosk.
The images will be shown with a box to tick the image to perform any actions.
- Activate : When you select any image and click on Activate button, the image will be activated and will be shown on the Kiosk app or web kiosk.
- If you select the Activated image and click on Activate button, it throws an error message saying,"Select only Deactive Images".
- Delete : On clicking of Delete button, the image will be deleted from the images block and will not be shown anywhere.
- Add New : On clicking of this button, it opens the File upload box to choose a new image and upload it.
NOTIFICATIONS
Select notification template from setup. This section allows to add/ edit/ delete notifications.
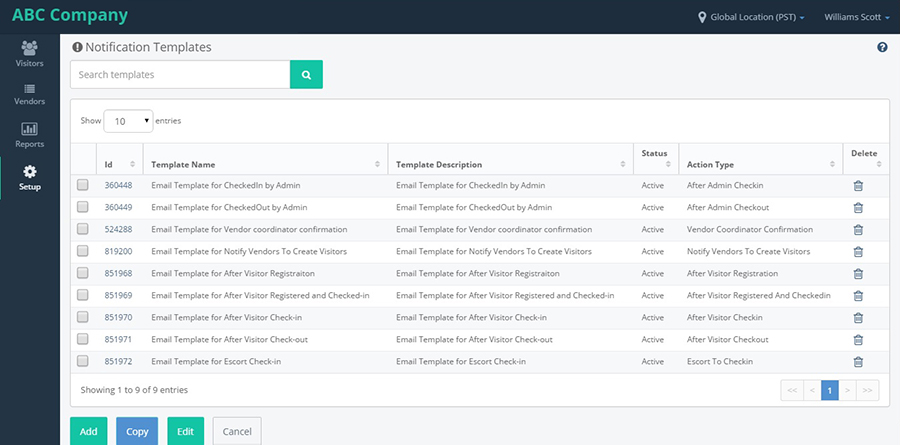
It also has "Add","Copy","Edit" and "Cancel" buttons.
To the left of template name, there will be a check-box, by selecting that box we can perform any actions.
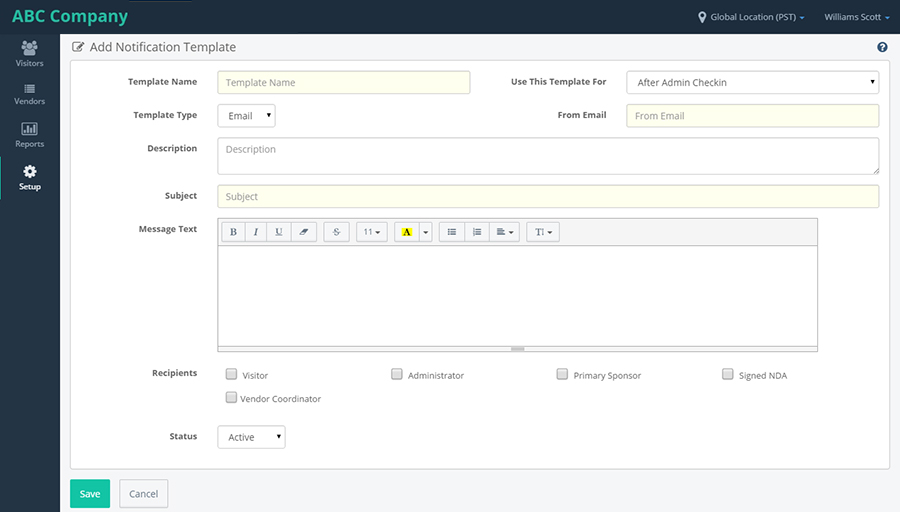
- Add : On clicking of Add Button, it opens a 'Add Notification Template' page with a form to fill and Save and Cancel buttons.
- Copy : Select any template and click on copy button, it makes the copy of the existing template with all the values and we can edit the values to make another template.
- Edit : Select any template and click on Edit button, it opens the "Edit Notification Template" page with all the values pre-populated with Save and Cancel buttons.
Fill the form and click on Save, the template will be added to the list.
On clicking on Cancel, it goes to the previous page.
On clicking on copy, it opens the copy of the selected template with all the values pre-populated with Save and Cancel buttons.
We can make any changes and click on save, the template will be added to the list.
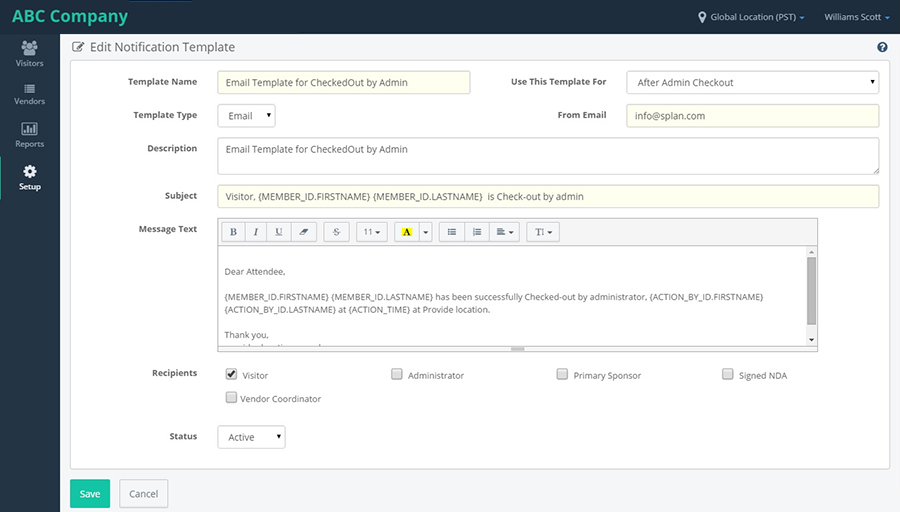
Edit the changes and click on Save, the Template would be edited successfully.
ROLES
Roles are the Privileges available for the Employee for that location. Whichever roles are being shown in the roles maintenance screen, that roles should be shown in the Employee privileges page Roles can be assigned to the Employee.
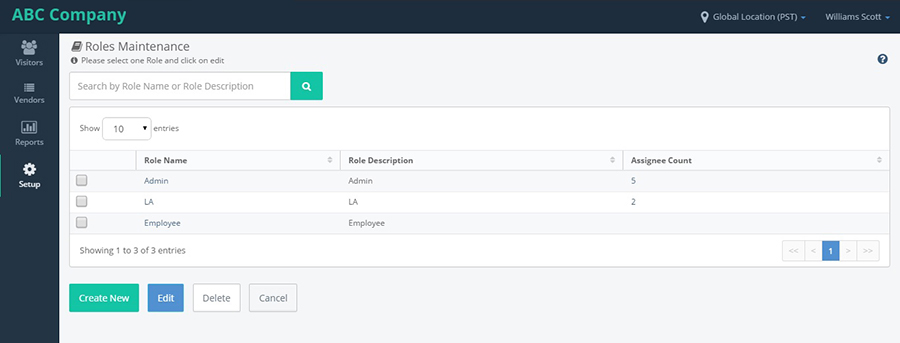
It also has "Create New","Edit","Delete" and "Cancel" buttons.
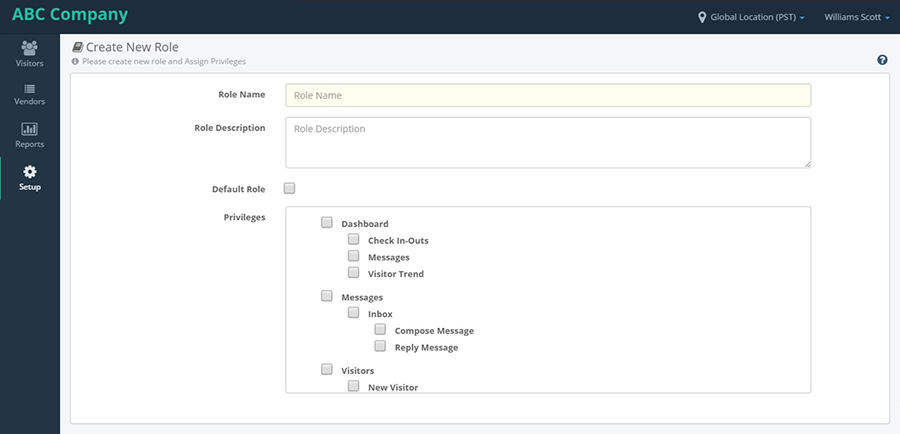
- Create New: On clicking of this button, it goes to "Create New Role" page to add a new role with Save and Cancel buttons.
Fill the form and click on Save, the role will be added.
The form contains "Default role" and "Privileges".
- Default role: If we select the default role and select any component from the Privileges block, then any Employee who has no privileges logins to the application, then the selected components should be shown.
- Privileges: Whichever components we select from the privileges block, only those components should be shown when the employee logs in.
- Edit : Select any role and click on Edit button, it navigates to the Edit role page with all the values pre-populated with Save and Cancel buttons.
- Delete: Select any role and click on Delete button, then the Role will be deleted from the list.
- Cancel : On clicking of Cancel button, it navigates to the Setup page.
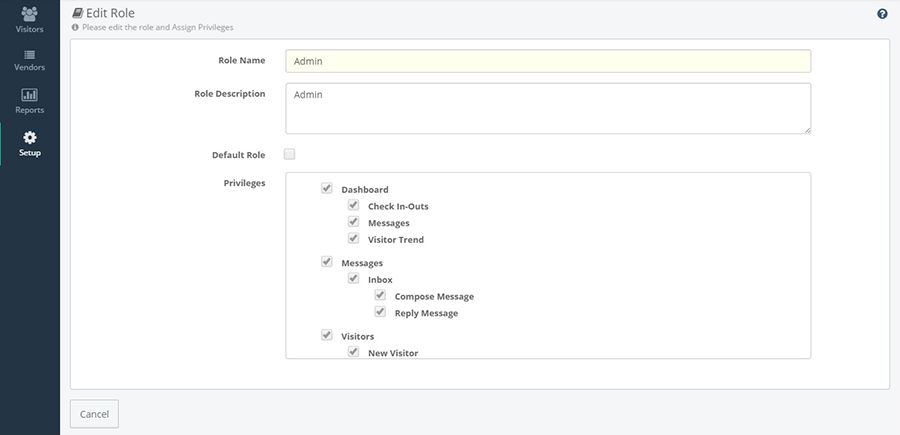
Fill the form and click on Save, then the Role will be updated successfully.
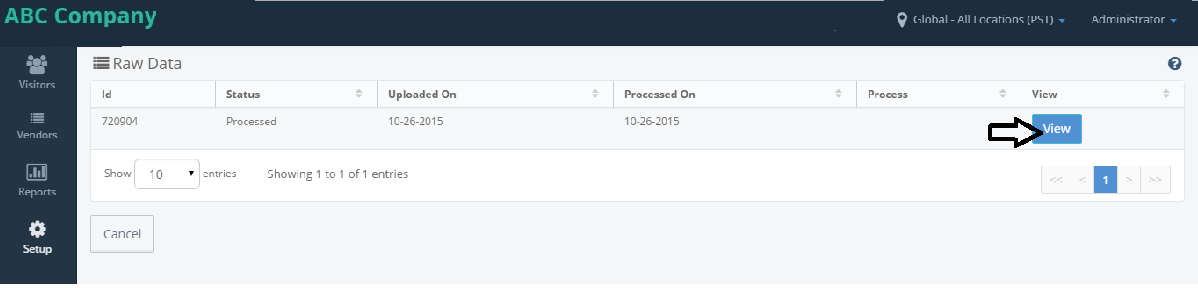
Raw Data
- click on view in the employee upload page,it will navigate to the Raw Data page. click on view.
- it will navigate to the edit employee page.
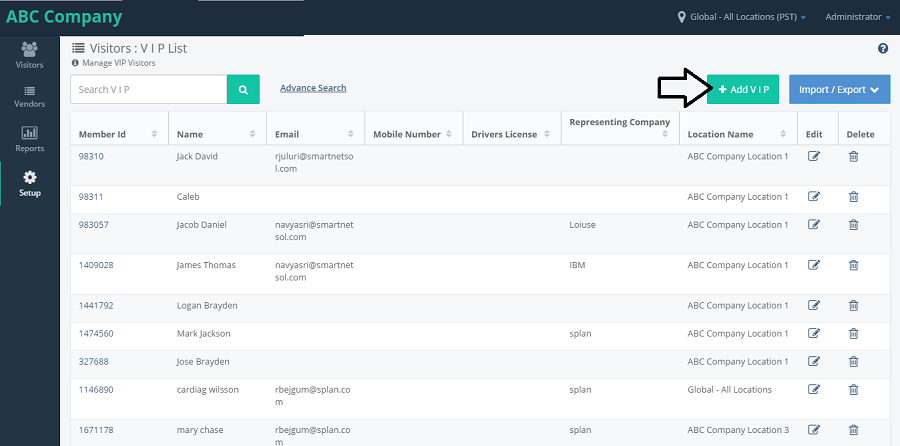
VIP LIST
- Click on VIP LIST from the setup component.
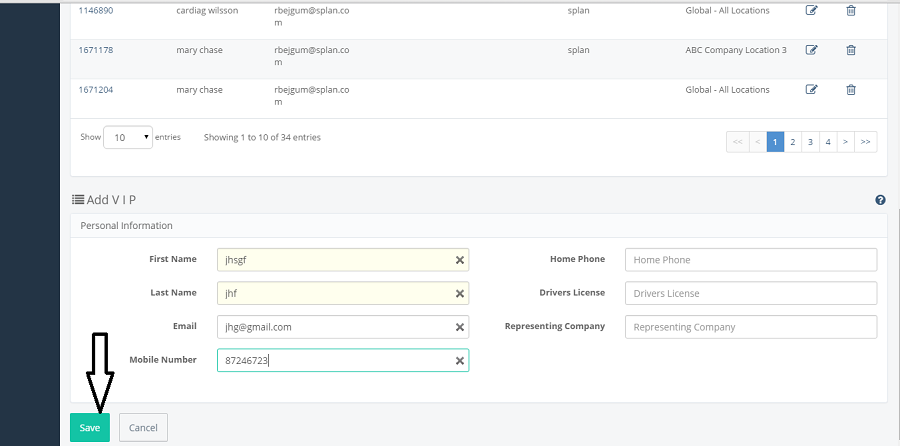
- It will navigate to Vistors: VIP LIST. Click on 'Add VIP' button.
- It will show the add vip form below the Visitors: VIP LIST page.fill the details and click on save.
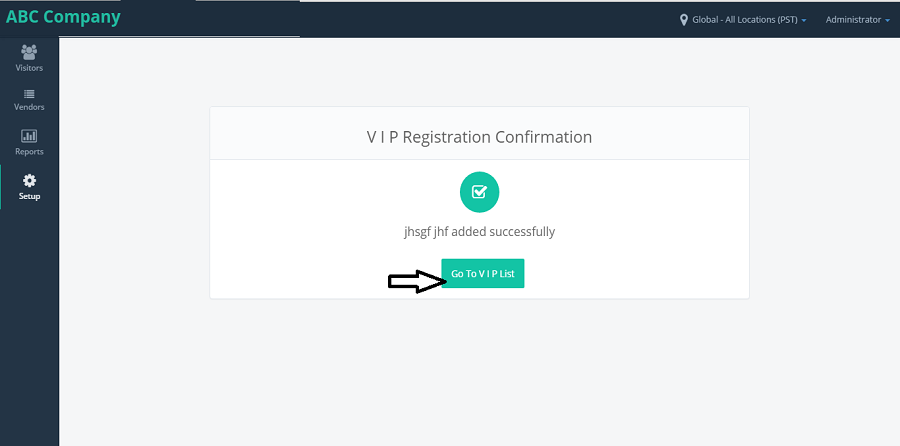
- It displays the 'VIP Registration Confirmation' message. Click on 'Go to VIP' List button.
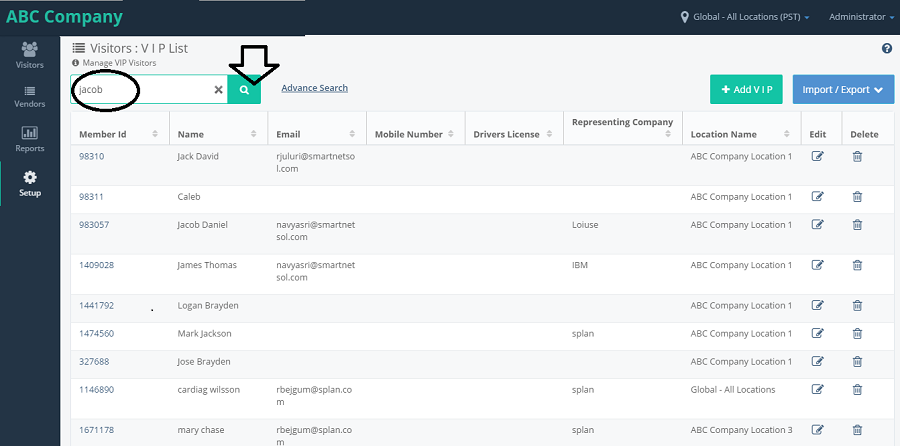
- It will navigate to Visitors: VIP LIST. Enter the name in serchBox and click on serch icon.
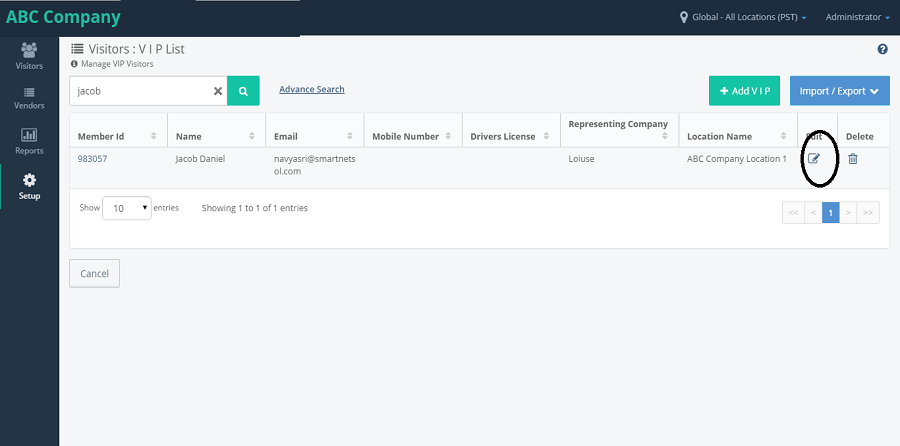
- It will displays the VIP record which we have added . Click on edit icon.
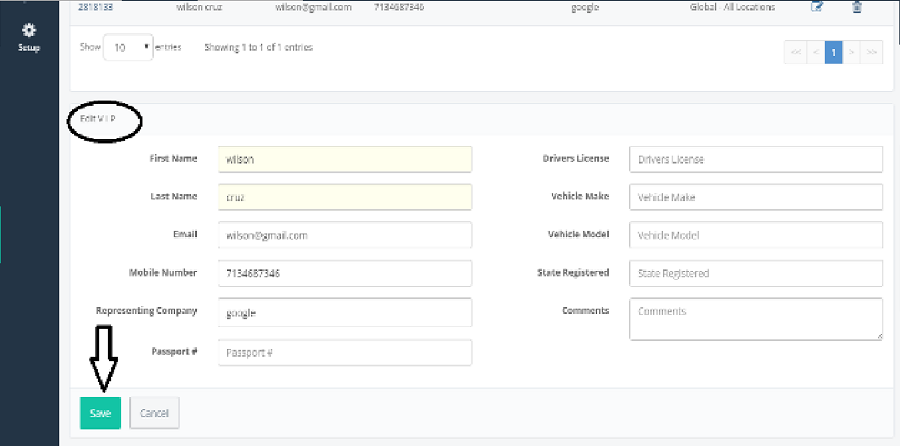
- It will display the Edit VIP form with prepopulated details.after modifing the values,click on save.
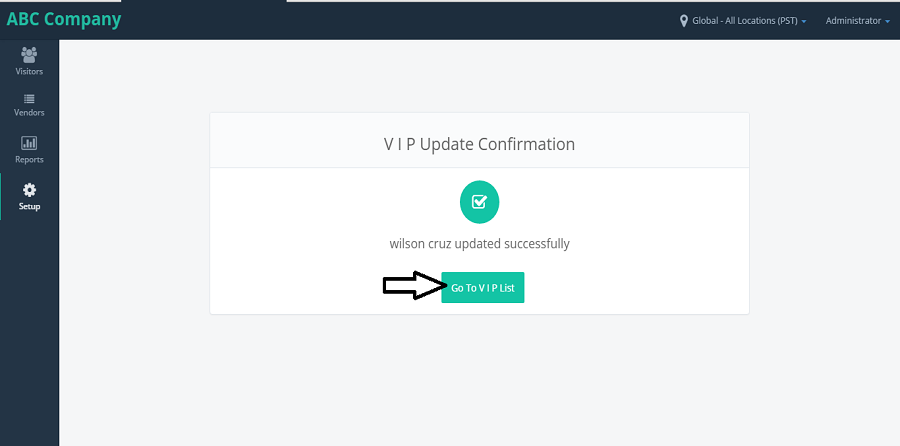
- It will display the 'VIP Update Conformation' message. Click on 'Go To VIP LIST' button.
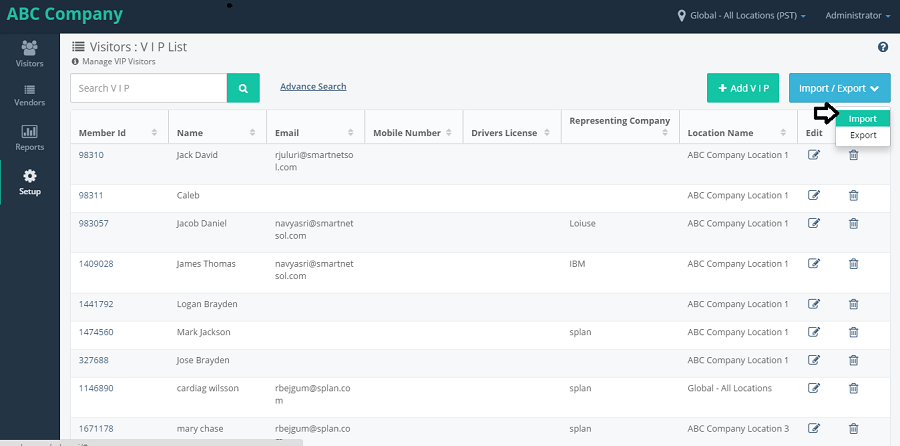
- It will display the Visitors VIP LIST.click on import/export,select import from the dropdown list.
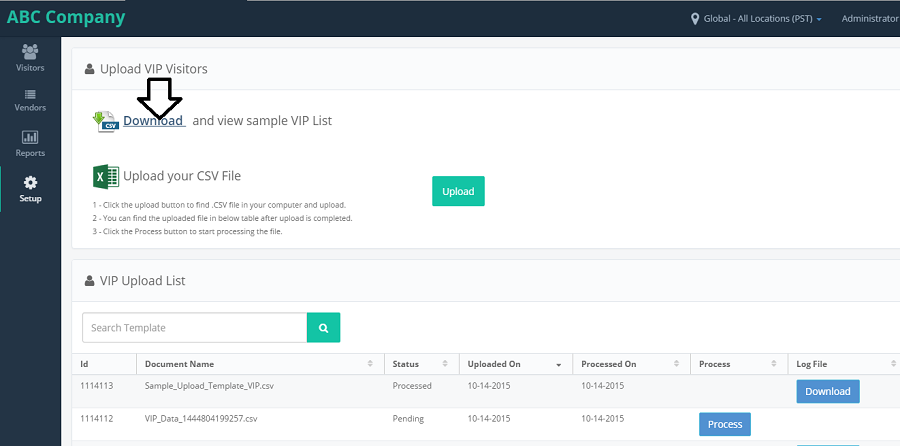
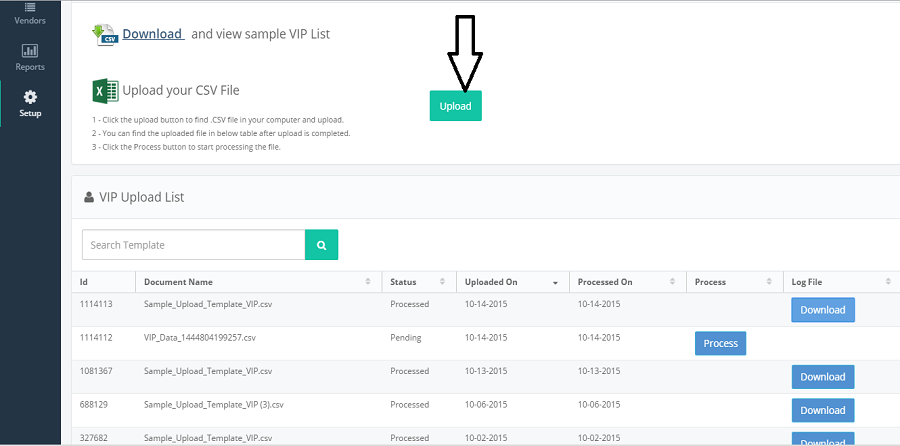
- It will navigate to Upload VIP Visitors page.click on download.
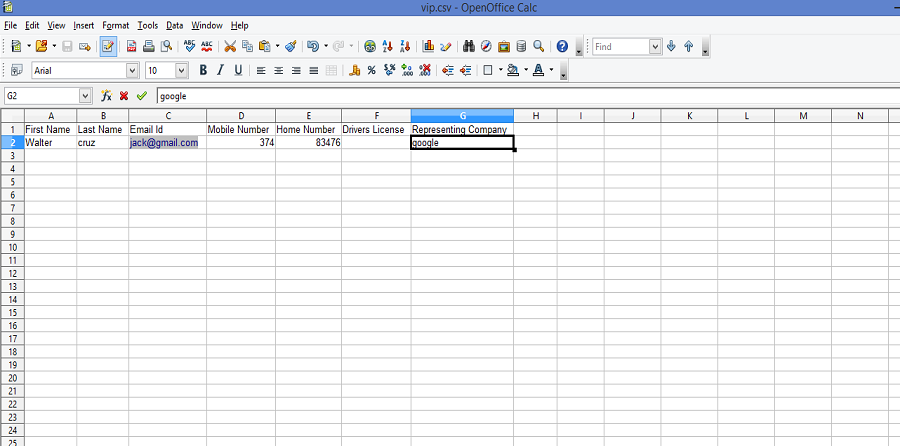
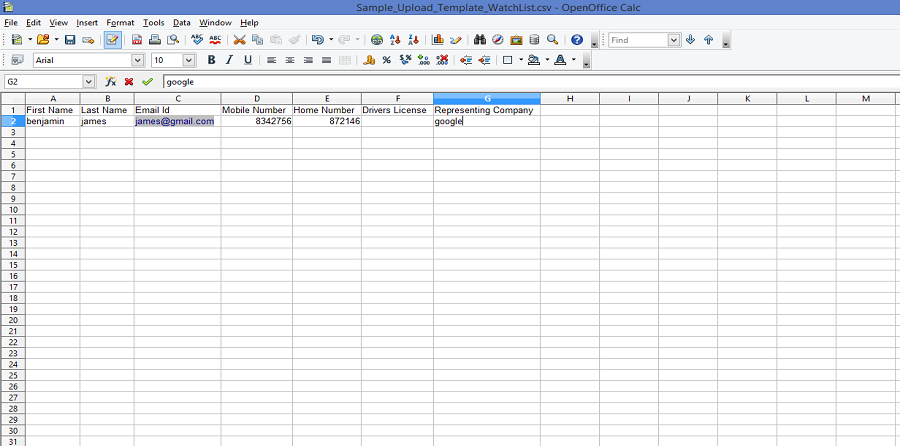
- Csv upload sample file is downloaded. Open the file and add the visitors details and save the file.
- Come back to the application,and now click on upload button.
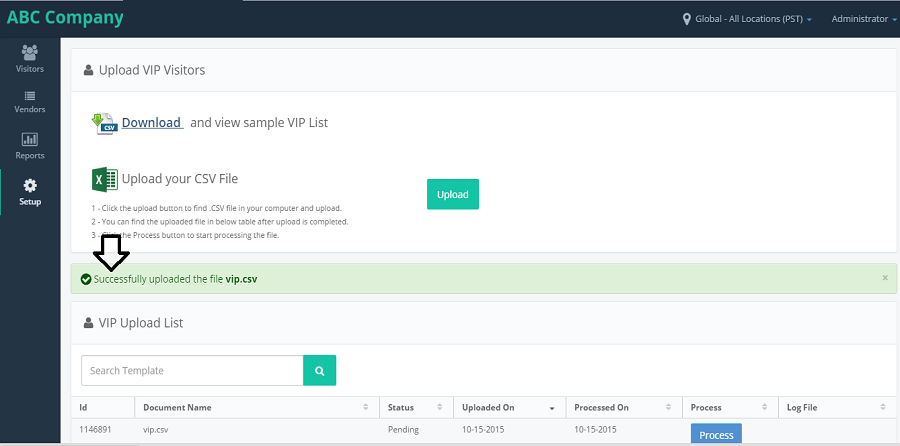
- A pop-up is displayed to select the file to upload. Choose the file which is to be uploded and click on open button, the file will be uploaded.
- file will be uploaded successfully and shows a success message and 'Process' button will be shown next to the file name.and it shows the status as "pending"
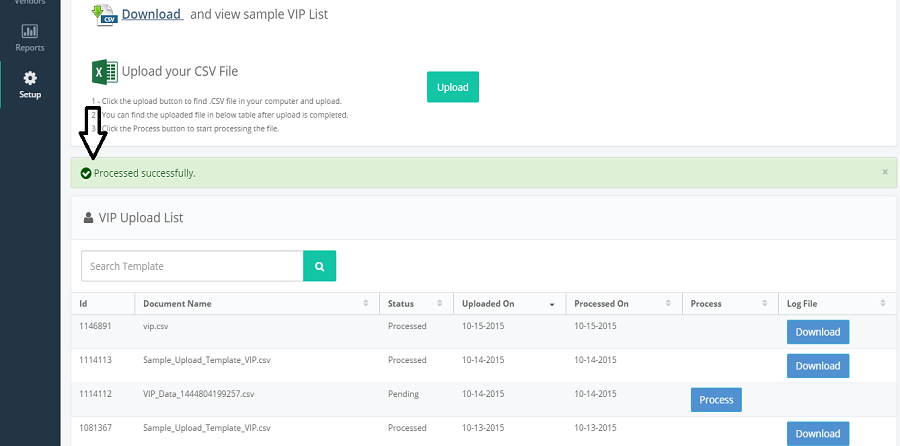
- Click on Process button, the file will be processed and download button will be shown and the process button will be disappeared. Click on Download button to view the records uploaded.
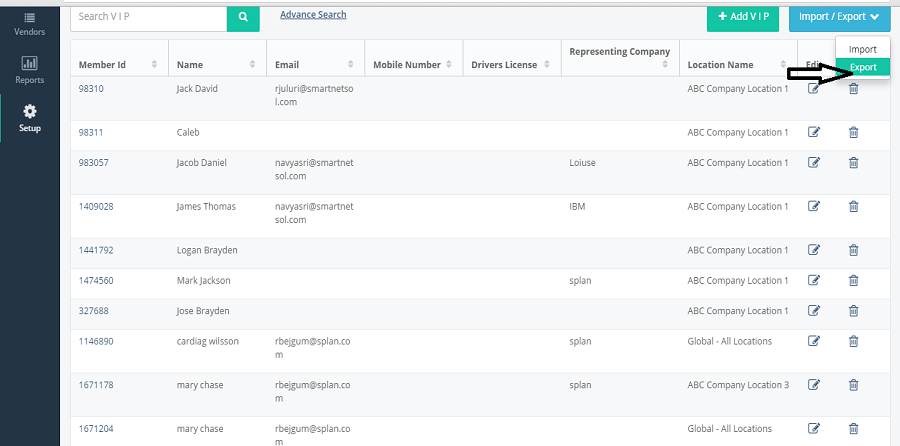
- Now, select the Export from the import/export dropdownload list.it will download the file with the VIP List visitor details.

WATCH LIST
- Click on WATCH LIST from the setup component.
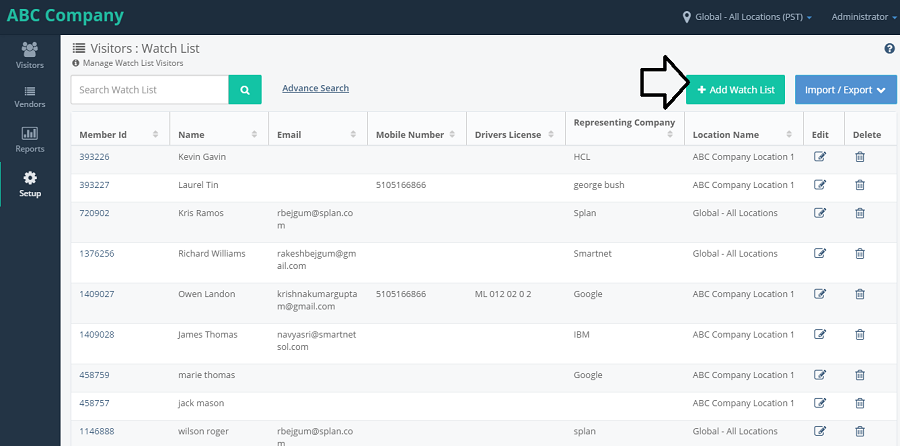
- It will navigate to Vistors: WATCH LIST. Click on 'Add Watch List' button.
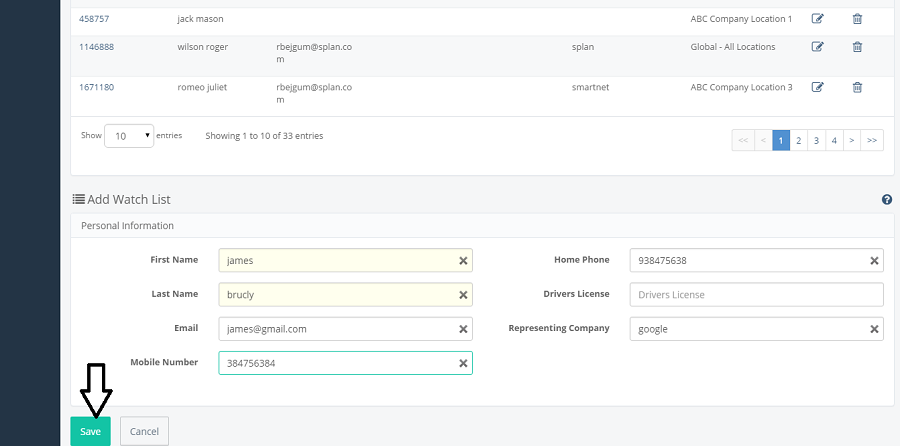
- It will show the '+Add watch list' form below the Visitors: WATCH LIST page.fill the details and click on save.
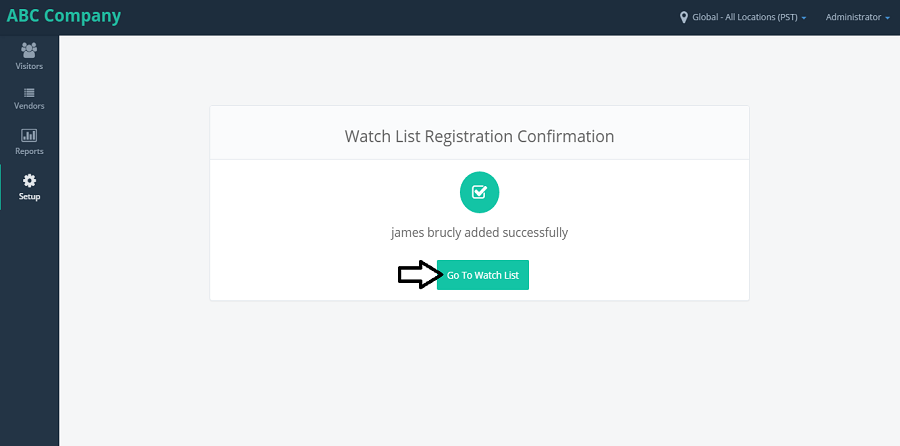
- It displays the 'Watch List'Registration Confirmation' message. Click on 'Go to Watch List' List button.
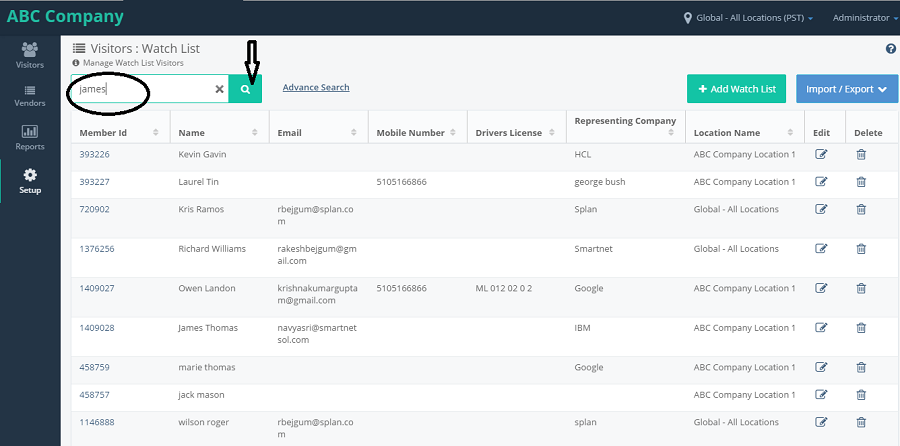
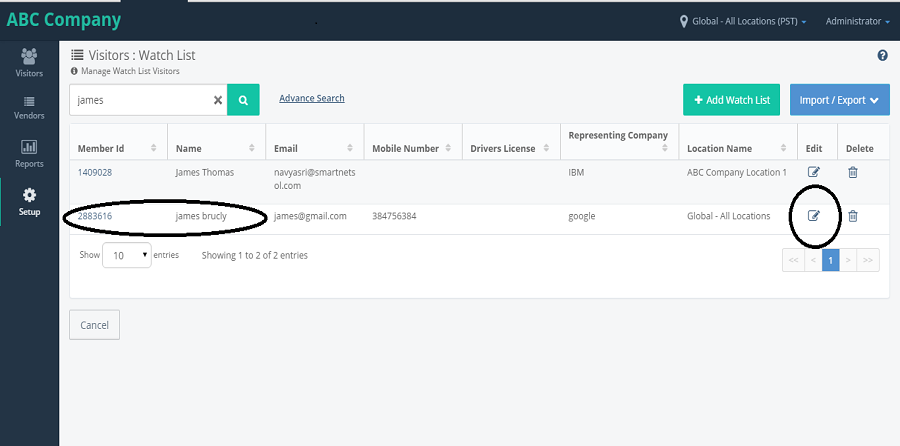
- It will navigate to Visitors: Watch List List. Enter the name in serchBox and click on serch icon.
- it will displays the Watch List record which we have added . Click on edit icon.
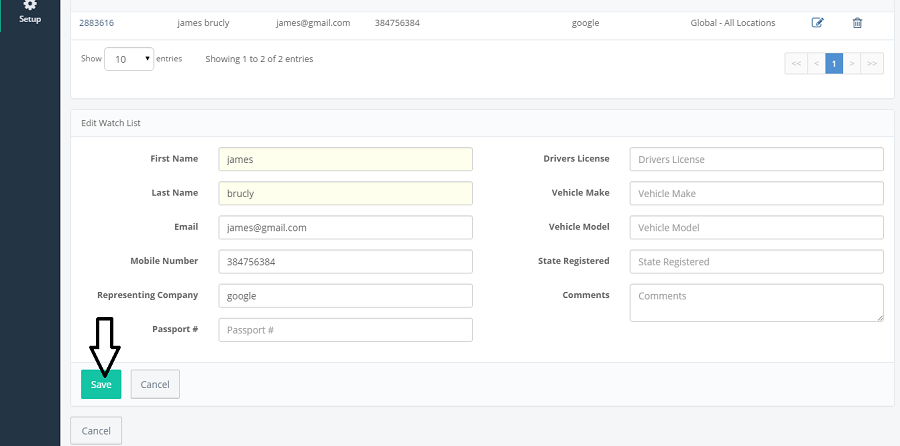
- It will display the Edit Watch List form with prepopulated details.after modifing the values,click on save.
- It will display the 'Watch List Update Conformation' message. Click on 'Go To Watch List' button.
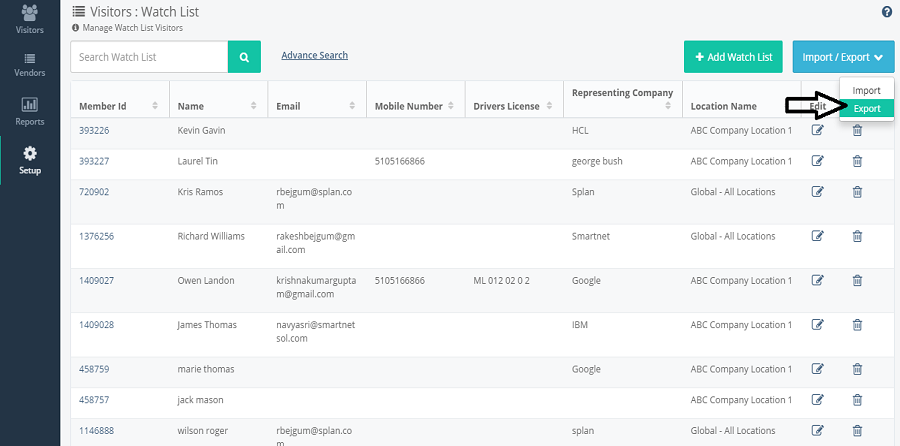
- It will display the Visitors Watch List.click on import/export,select import from the dropdown list.
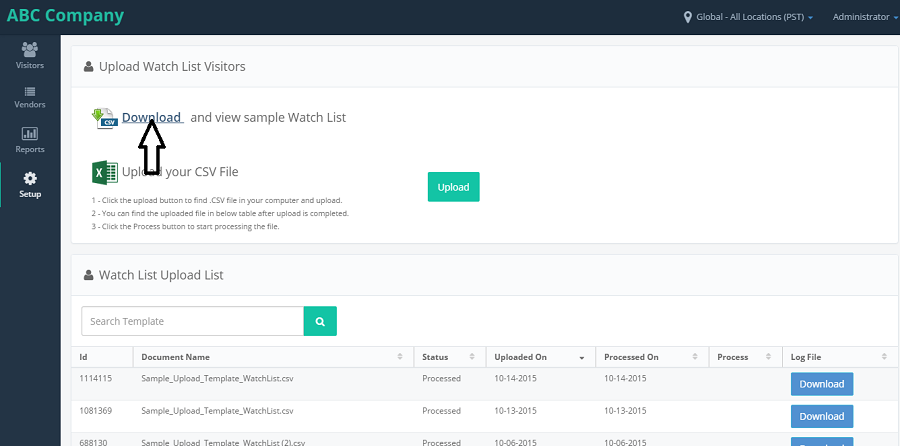
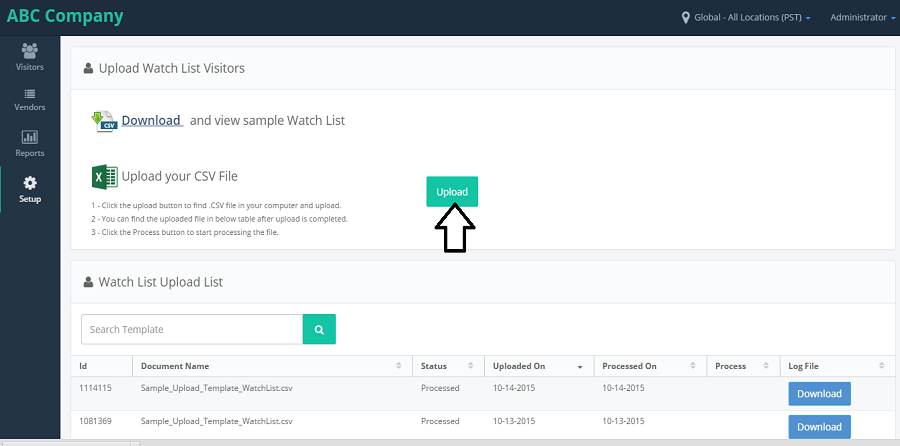
- It will navigate to Upload Watch List Visitors page.click on download.
- Csv upload sample file is downloaded. Open the file and add the visitors details and save the file.
- Come back to the application,and now click on upload button.
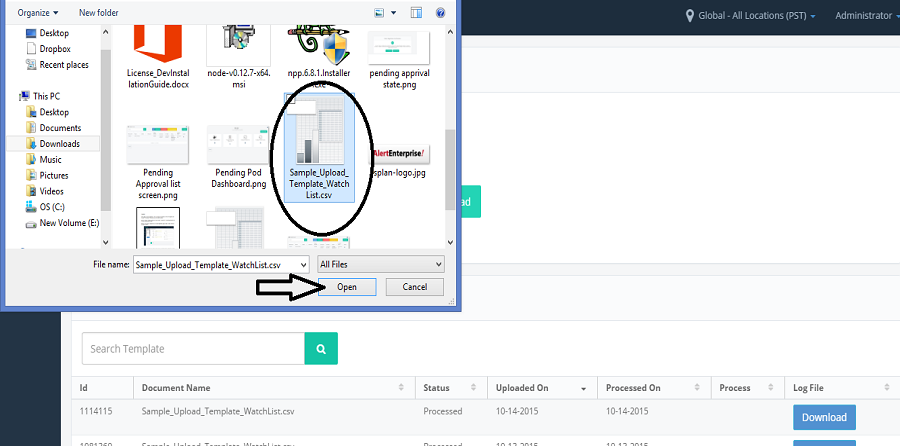
- A pop-up is displayed to select the file to upload. Choose the file which is to be uploded and click on open button, the file will be uploaded.
- A pop-up is displayed to select the file to upload. Choose the file which is to be uploded and click on open button, the file will be uploaded.
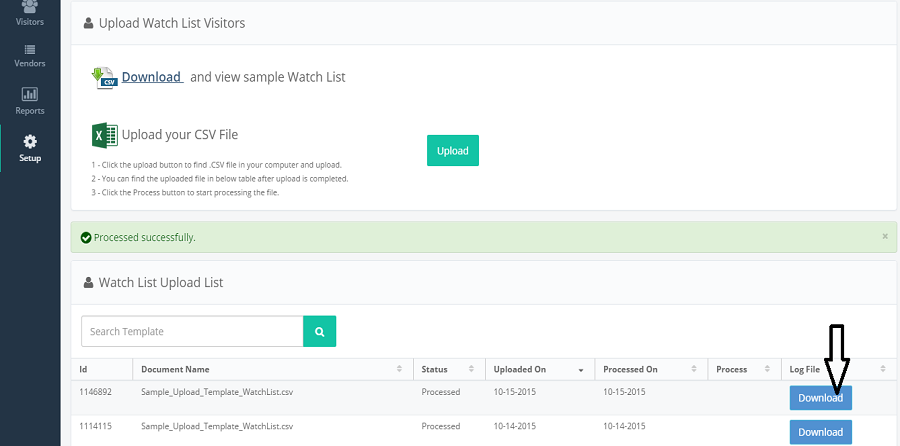
- Click on Process button, the file will be processed and download button will be shown and the process button will be disappeared. Click on Download button to view the records uploaded.
- Now, select the Export from the import/export dropdownload list.it will download the file with the visitor Watch List details.
-
USER ROLES AND PERMISSIONS
- On clicking on Create New button, opens a Create New User role page, to add a role to a Employee along with Save and Cancel buttons.
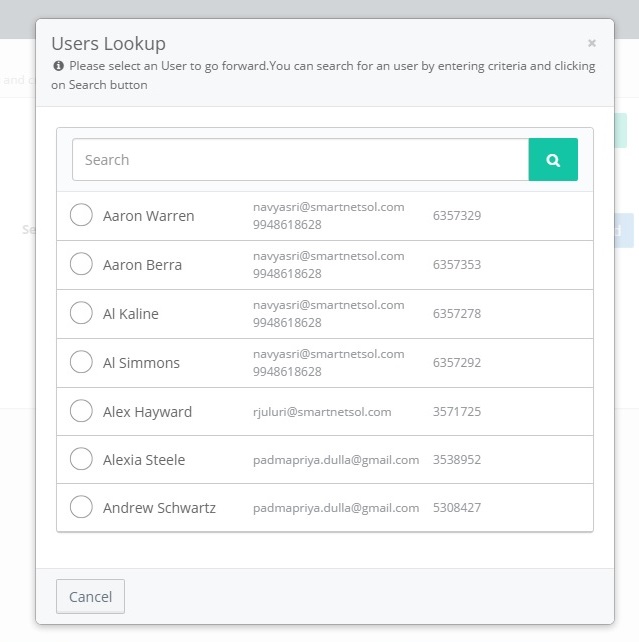
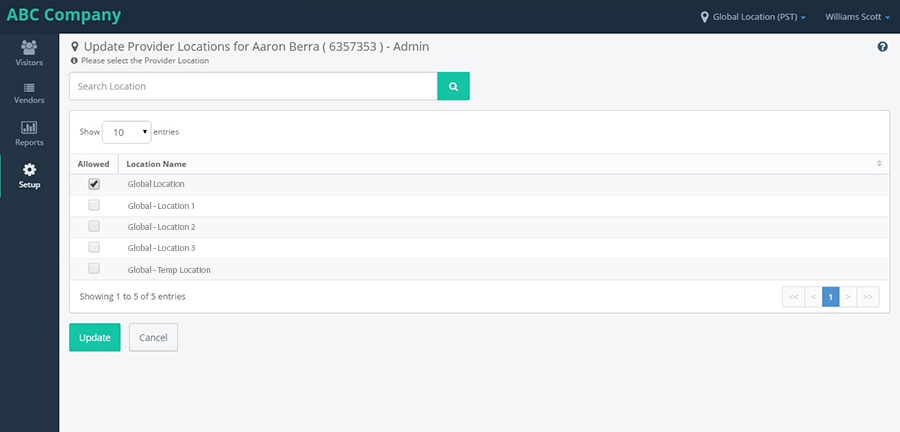
- On clicking on the search button next to the Username, it opens Users lookup, which has the list of Employees and on clicking on "Add" button, it opens "Update Provider Locations for
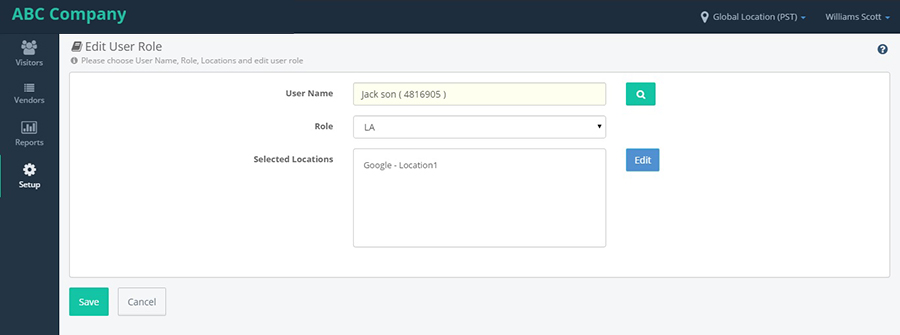
- ", we can select multiple locations from that page. - On clicking on Edit button by selecting any Employee, it navigates to "Edit User role" page, with all the values pre-populated along with Save and Cancel buttons.
- Click on Save, by manking any changes, the changes will be saved and on clicking on Cancel button, it navigates to "User roles and Location details" page.
- On clicking on Clone button, by selecting any Employee, it navigates to "Create New User role" page with all the values pre-populated along with Save and Cancel buttons.
- In this clone, we can change the Employee name and assign roles to other employees.
- On clicking on Search button, next to the Username, it opens "Users Lookup", which has the details of all the Employees.
- On clicking on Add, it navigates to "Update Provider Locations for
- ", we can assign multiple locations from here. - Click on Delete button, by selecting any Employee, the Employee will be deleted from the list and Roles assigned to the Employee will be deleted.
- On clicking on Cancel button, it navigates to Setup page.
-
LOCATIONS
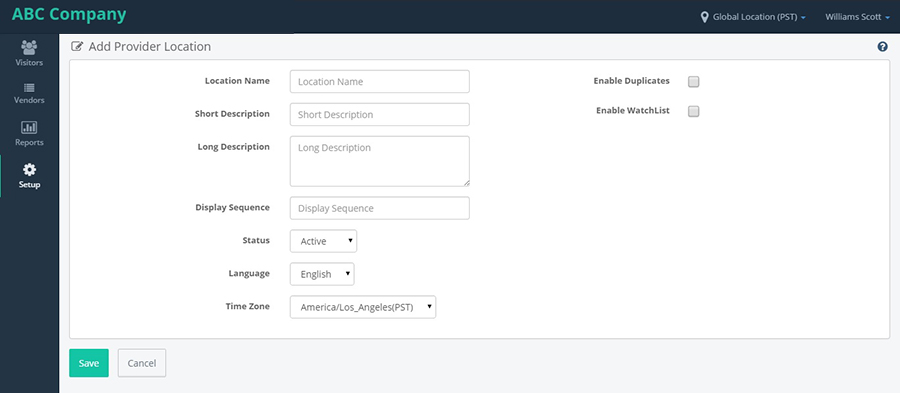
- Add: On clicking on Add button, it navigates to "Add Provider location" page, with a form to enter the details to add a location to that provider along with Save and Cancel buttons.
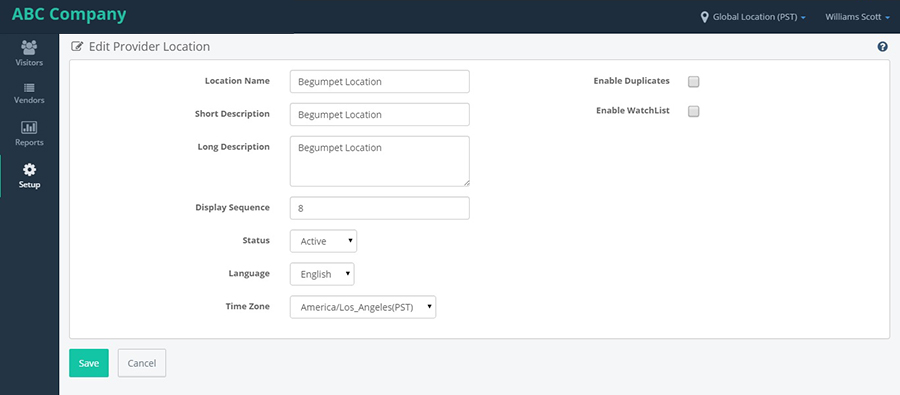
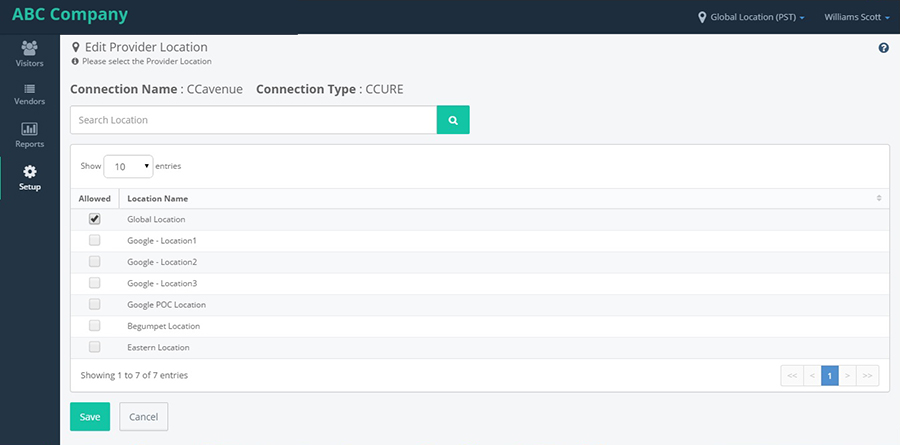
- Edit: Click on Edit button, by selecting any location, it navigates to "Edit Provider location" page with all the values pre-populated along with Save and Cancel buttons.
- Cancel: On clicking on Cancel button, it navigates to Setup page.
-
CONNECTORS
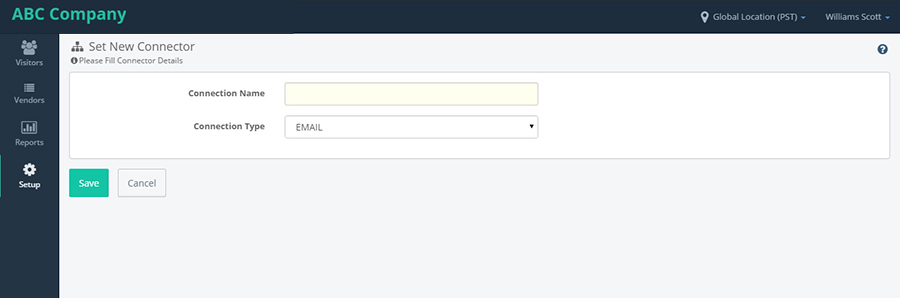
- Create New: On clicking on Create new button, it navigates to "Set New Connector" page, where we can add a new connector along with Save and Cancel buttons.
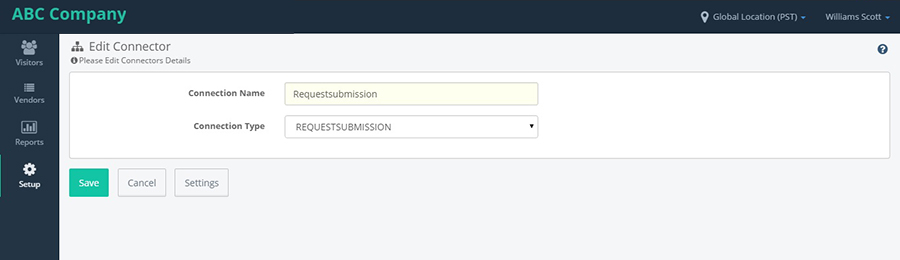
- Edit: On clicking on Edit button by selecting any Connection list, it navigates to "Edit Connector" page, with all the values pre-populated along with Save, Cancel and Settings buttons.
- Click on Save, by manking any changes, the changes will be saved and on clicking on Cancel button, it navigates to "Connectors list" page.
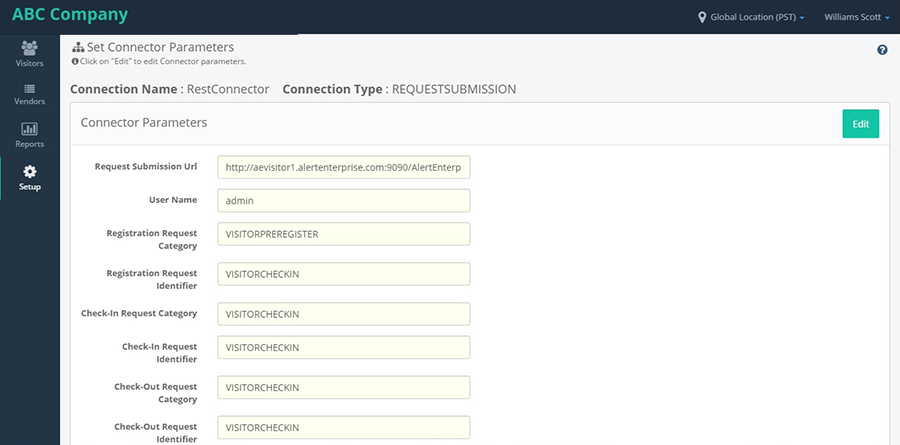
- On clicking on Settings button, it navigates to "Set Connectors Parameters" page, where we can set the parameters for a connection.
- On clicking on Edit button next to the header "Connector parameters", it opens the details of the selected connection type, with all the values pre-populated along with Save and Cancel buttons.
- On clicking on Edit button next to the "Selected Locations" column, it navigates to "Edit Provider location" page, where we can select different locations along with Save and Cancel buttons.
- Clone : On clicking on Clone button, by selecting any Employee, it navigates to "Edit Connector" page with all the values pre-populated along with Save, Cancel and Settings buttons.
- Delete : Click on Delete button, by selecting any Connection, the parameters for that connection will be deleted from the list.
- Cancel: On clicking on Cancel button, it navigates to Setup page.
- Splan Vendor Coordinator
- Dashboard
- Vendor Profile
- Visitors List
- Check-In/Out History
- Import Visitors.


On clicking on Roles and Locations, it navigates to User roles and Location details page with the list of Employees who have Roles assigned to them.The Employees can be of any location. Different permissions can be assigned to Employees and when the Employee logins with his respective credentials, he will be able to see his own roles.
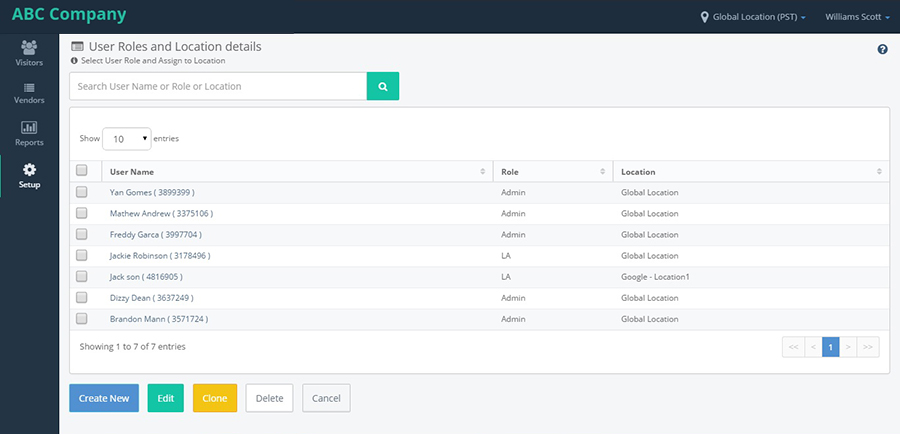
The page contains "Create New","Edit", "Clone","Delete" and "Cancel" buttons. Functionality of each button is mentioned below:
Create New :

Edit :
Clone :
Delete :
Cancel:
On clicking on Locations from the Setup page, it navigates to "Locations" page, which shows the different locations which are added for that particular provider.
The page has a column "Display sequence", based on the sequence number we select, the locations will be shown in the locations drodown.
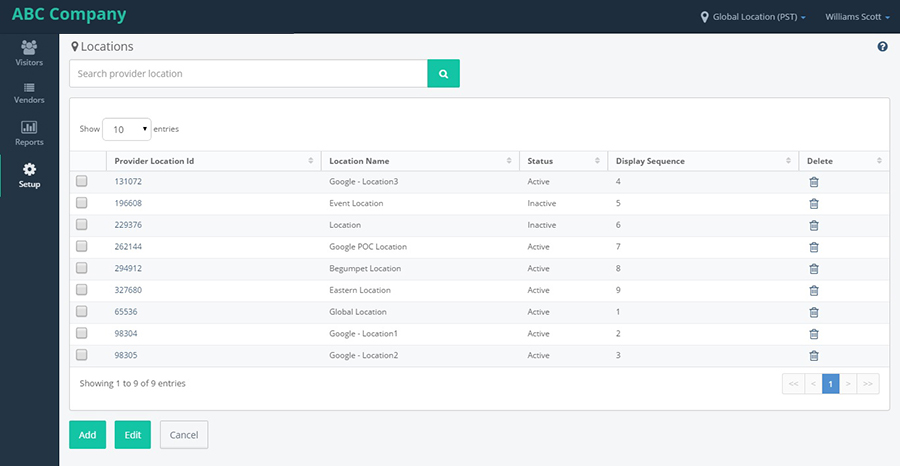
The page also has "Add","Edit" and "Cancel" buttons:
Connectors are the one which we use to set configurations for the different means of communication.We have different ways to communicate, like Email,SMS etc.
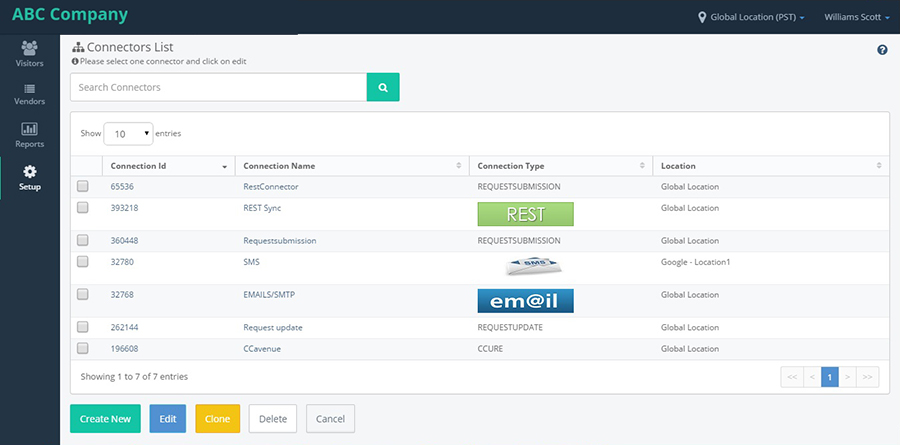
We have "Create New","Edit", "Clone", "Delete" and "Cancel" buttons.
Splan Visitor Management System Help Guide for Vendor
TABLE OF CONTENTS
User Guide Document
DASHBOARD
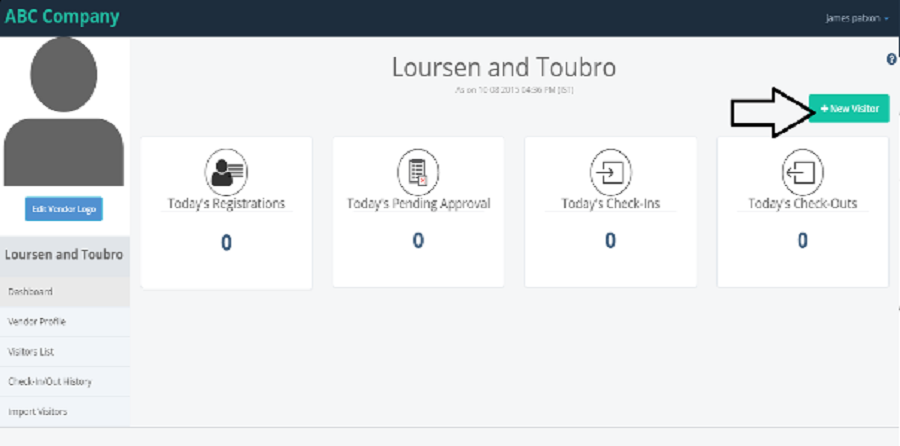
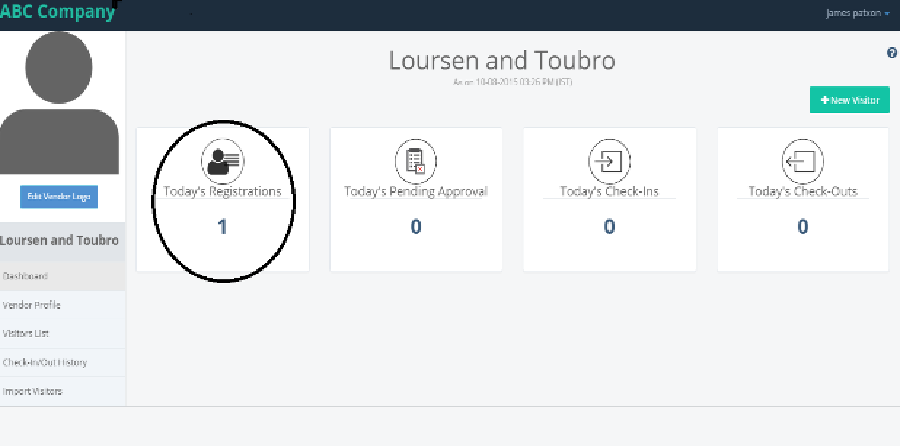
- Profile dashboard displays the list of Visitors registered, Pending Approval, Check-Ins and Check-Outs. We can create the new visitor by clicking the '+New visitor' button.
-
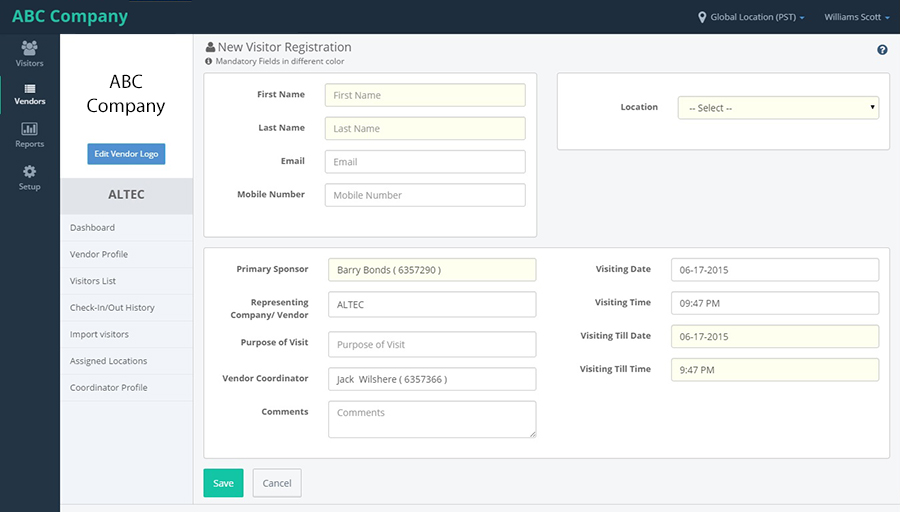
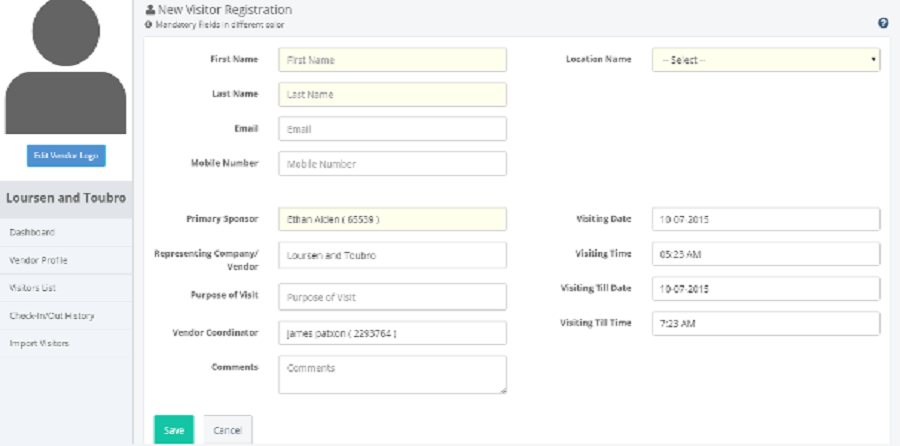
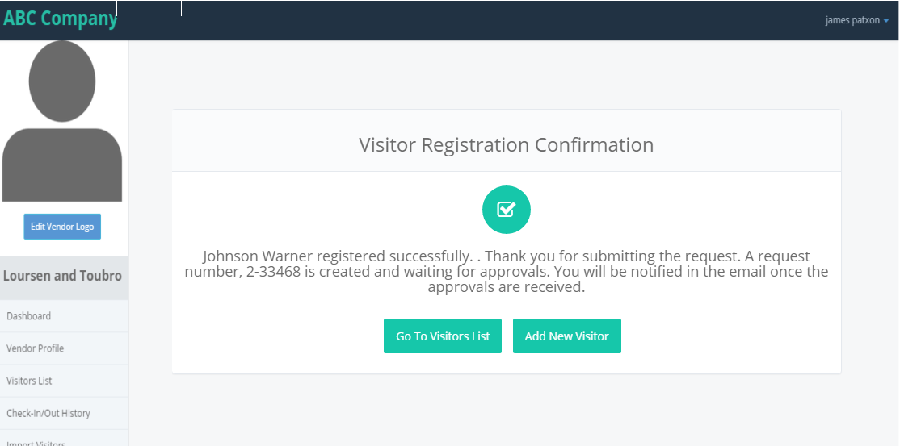
Click on new visitor, It navigates to New Visitor Registration page with pre populated values of 'primary sponsor,representing company/vendor,vendor coordinator,visiting date,visiting time,visiting till date,visiting till time' with Save and Cancel buttons. - After Clickling on Save in New Visitor Registration, it shows the confirmation screen.
- Fill the registration form and click on save. Now come to Dashboard you can see the count increased in 'Todays Registrations'
- click on '1' from todays registrations,it will navigate to the visitor list page with the todays registered visitors along with all the vistors who are registered for the vendor.
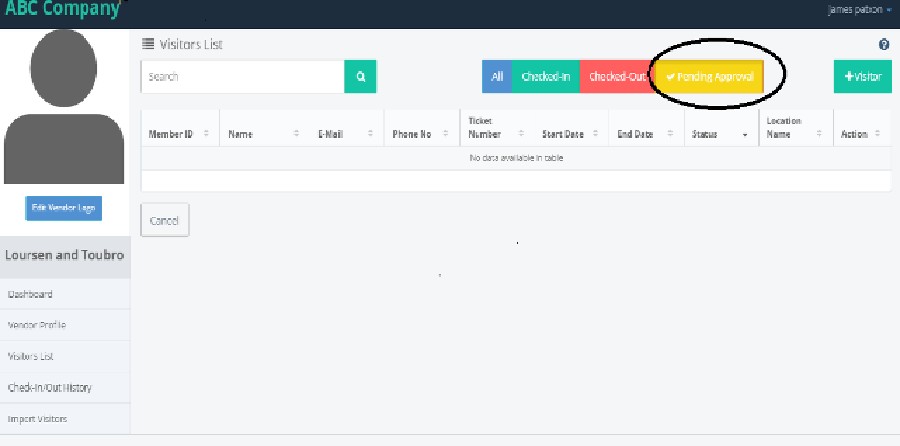
- Click on todays pending approval value"0".it will navigates to the visitor list whore are under pending approval state.
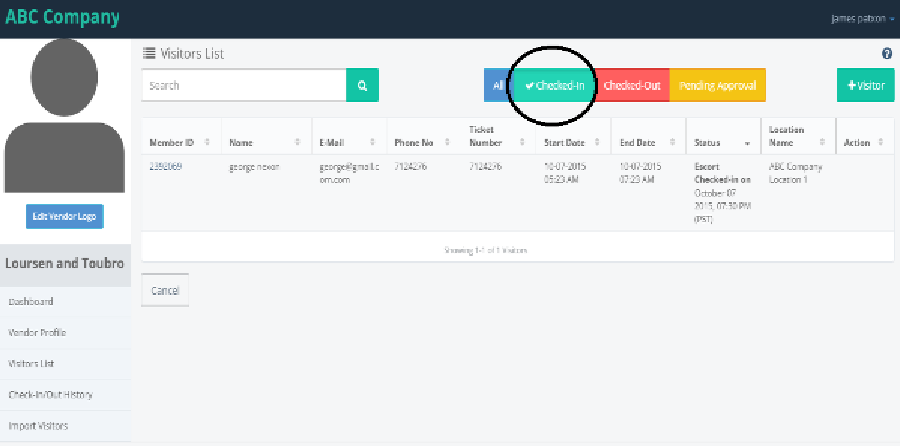
- Go to dashboard and click on todays checkin count value.it will navigates to the visitor list showing the tick mark on "checked-in" toggle button.and displayes who are checked-in for the day.
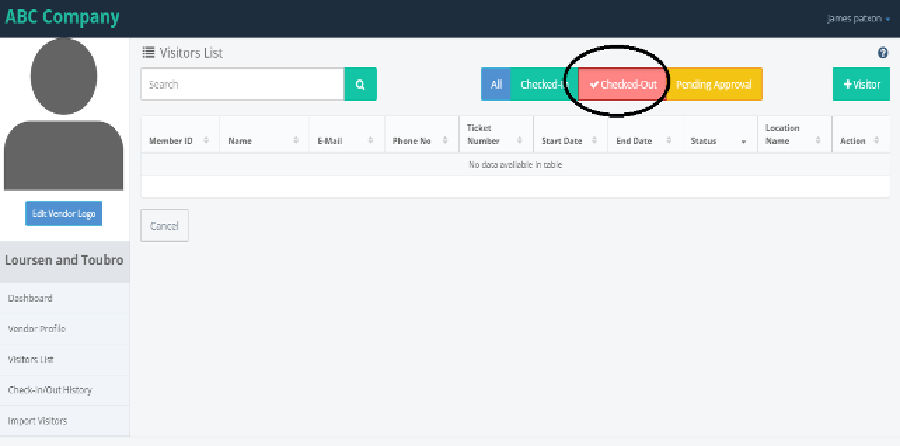
- Go to dashboard and click on todays checkout count value.it will navigates to the visitor list showing the tick mark on "checked-out" toggle button.and displayes who are checked-out for the day.

VENDOR PROFILE
VISITORS LIST
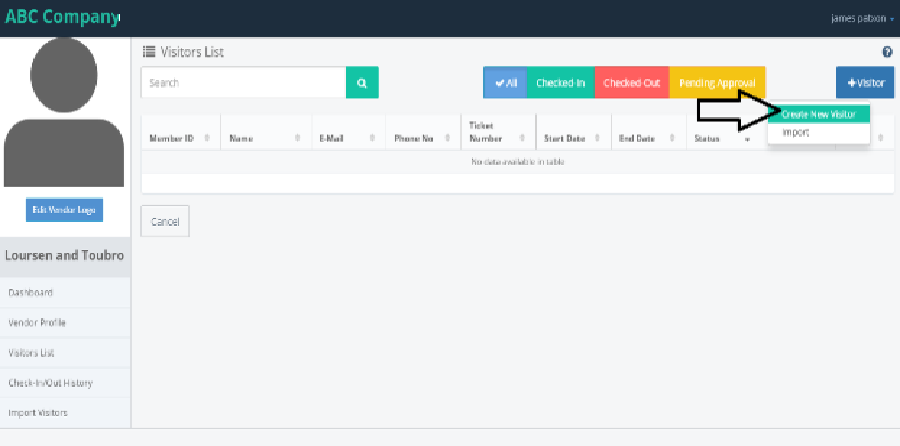
- Visitor list displays list of all the visitors who has a visit for the location. Click on visitor list from the left pannel and click on "+Visitor"
- Clicking upon on the +Visitor, an option to either create new visitor or an option to import visitors are displayed.
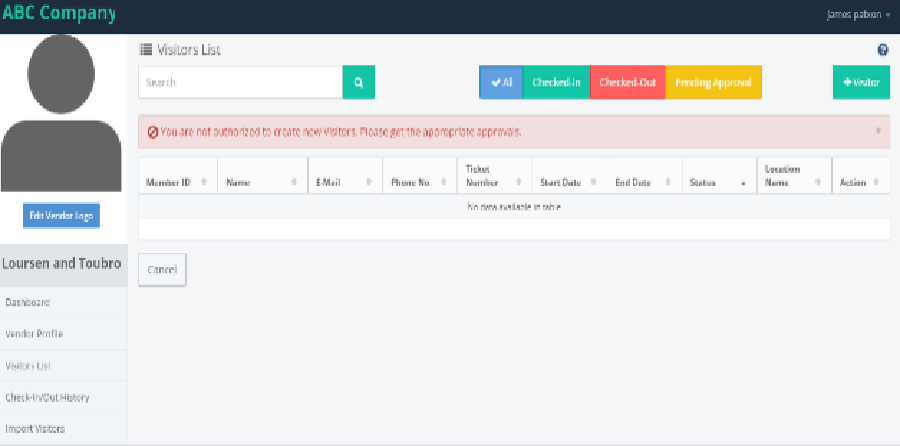
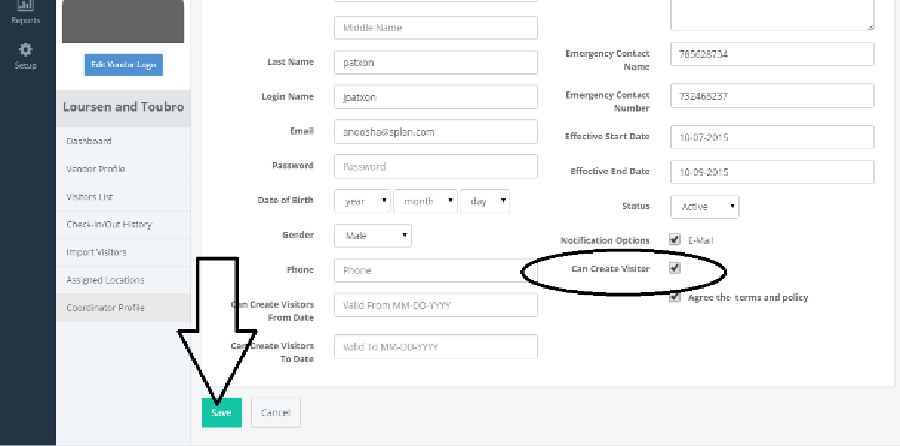
- Click on create new visitor, we can create the visitor only when the "can create the visitor" flage is enabel in the coordinator profile.if not it will throw the error message as "you not authorised to create new visitors.please get the appropriate approvals."
- Get the approval from the administrator,as the admin login's and enable the flag "Can create visitor" in the coordinator profile.after enabling the flag admin saves it.
- Again login as vendor coordinator,Click on Visitors list from the left pannel and click on '+visitor' select the 'create new visitor'.
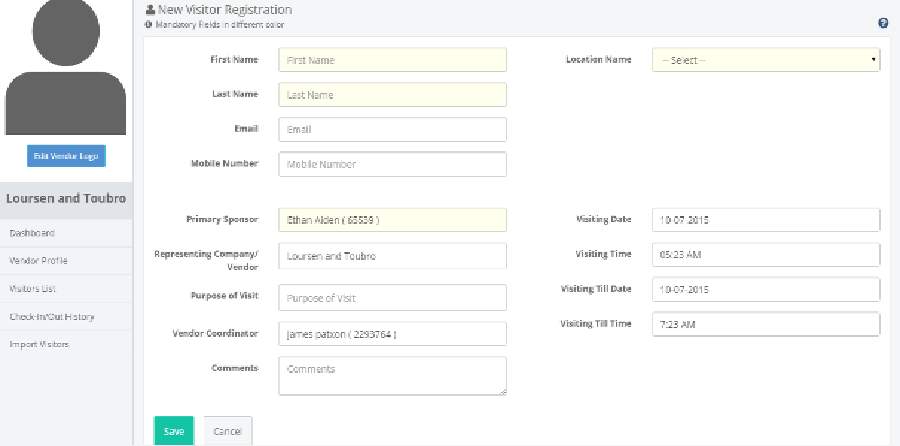
- It navigates to New Visitor Registration page with pre populated values of 'primary sponsor,representing company/vendor,vendor coordinator,visiting date,visiting time,visiting till date,visiting till time' with Save and Cancel buttons.
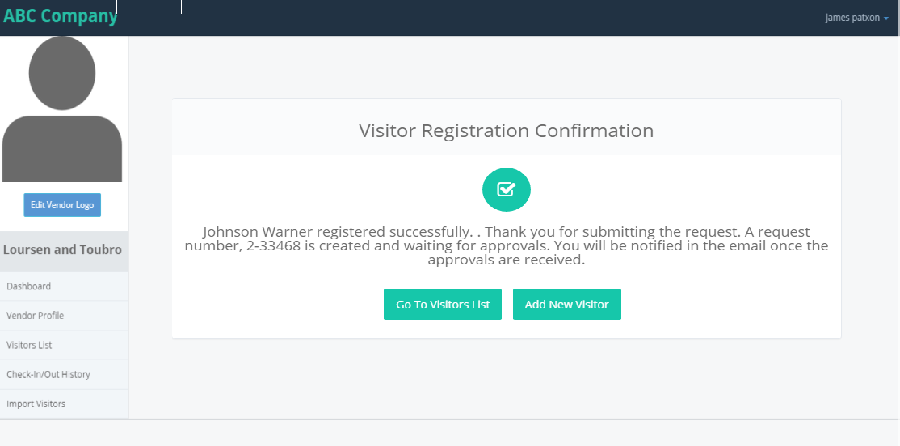
- Fill the visitor details and select the location from the dropdown list and Click on save, the Visitor will be added to the Vendor. It displays the ' Visitor registration conformation' with 'Go to visitors list' and 'Add new visitor' buttons.
- 1)Click on 'Go to visitors List' button.it navigates to the visitors list and displays all the visitors who are registered for that vendor.
- 2)Click on 'Add new visitor' button, it again navigates to the new visitor registration form.
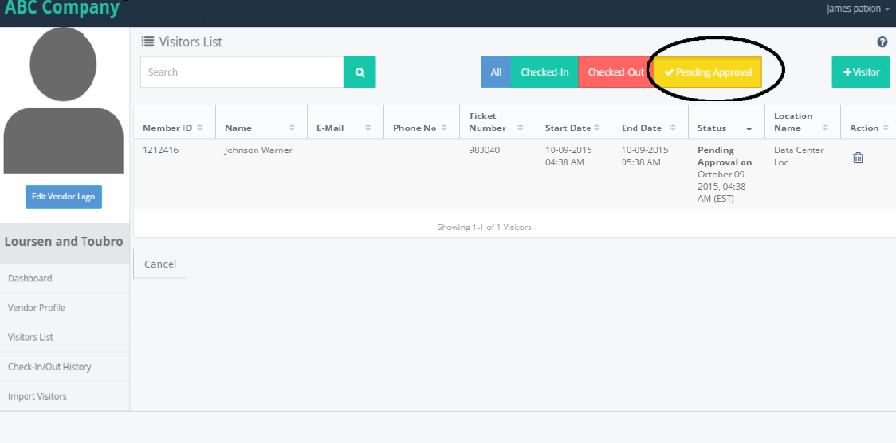
- Now Click on Dashboard from left pane and click on Pending Approal pod count which takes to the pending Approval Tab screen by showing the Pending Approval Visitors.
- Once user click on Pending Approval pod count , it navigates to the Pending Approval scren by showing the visitor in pending approval state.
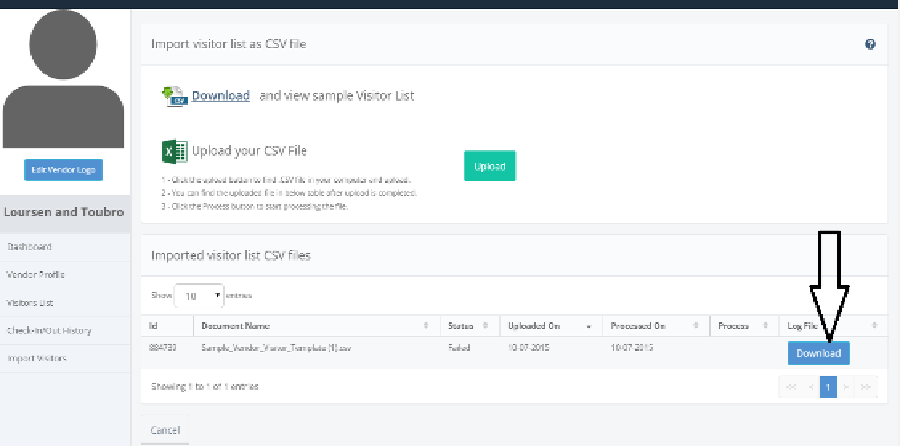
- Go to visitor list from the left pannel click on "+Visitor" and Click on import link from the "+New Visitor" button,
- It navigates to Import Visitor page, where visitors can be imported.
- Click on Download link, it will download the sample template to fill the details of the visitors. Open the sample template and fill all the visitor details nd save the template.
- Now come back to the application and click on the 'Upload' button.
- A pop-up is displayed to select the file to upload. Choose the file which is to be uploded and click on open button, the file will be uploaded.
- file will be uploaded successfully and shows a success message and 'Process' button will be shown next to the file name.and it shows the status as "pending"
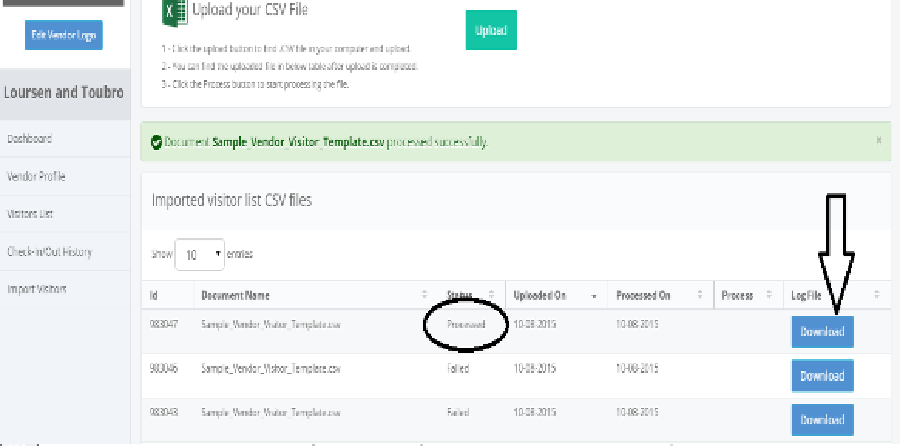
- Click on Process button, the file will be processed/failed and download button will be shown and the process button will be disappeared.
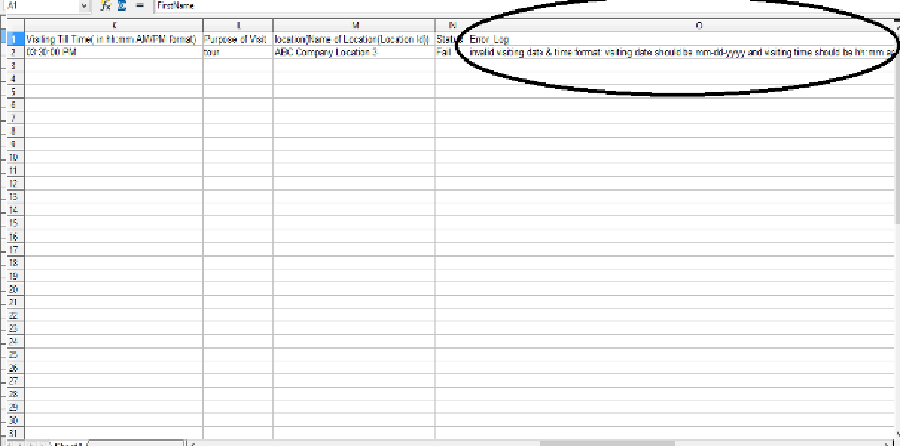
- If the status is showing failed, click on download button, the file will be downloaded and once it is opened, we can see the error log in the upploaded file.
- Solving the error which is showing in the errorlog and upload the file again until the status shows processed and click on download button to see the visitors which we are uploaded.


IMPORT VISITOR

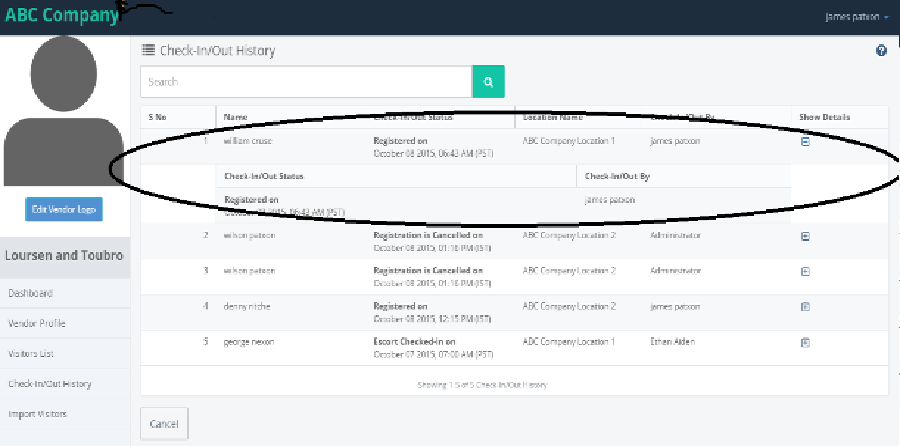
CHECK-IN/OUT HISTORY
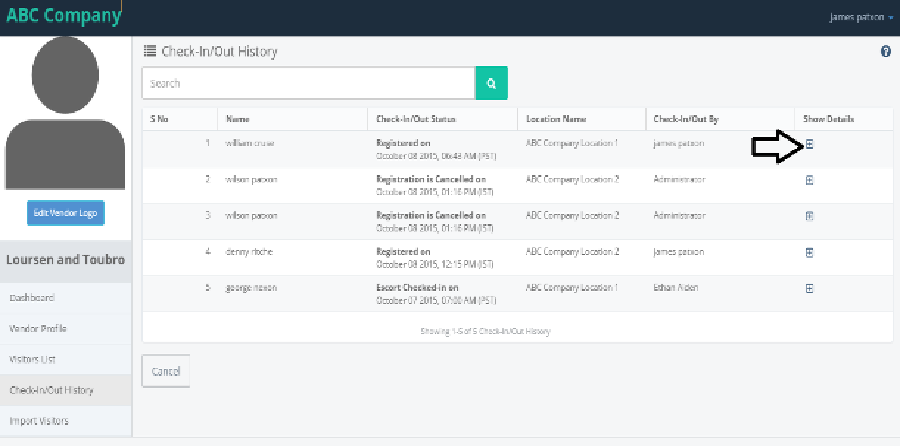
- Click on check-in/out History from the left pannel, it navigates to Check-in/out history page of that Vendor. And click on explorer button from the show details.
- It explores the checkin/out history of each visitor who are registered.
DRIVER'S LICENSE
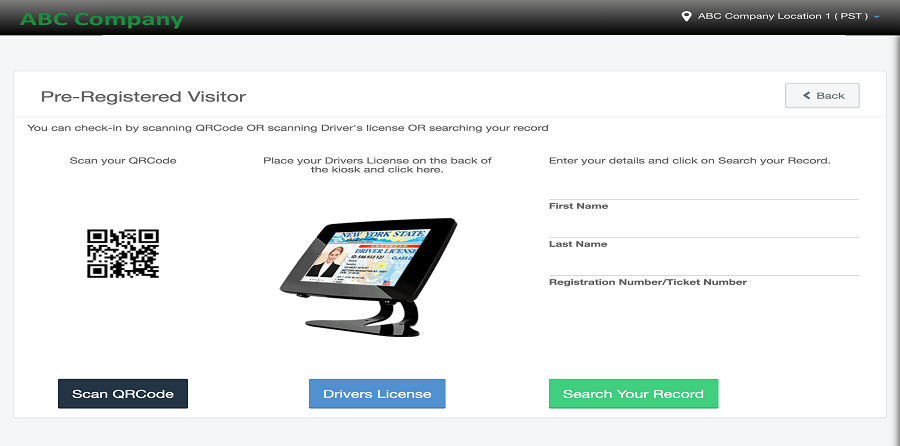
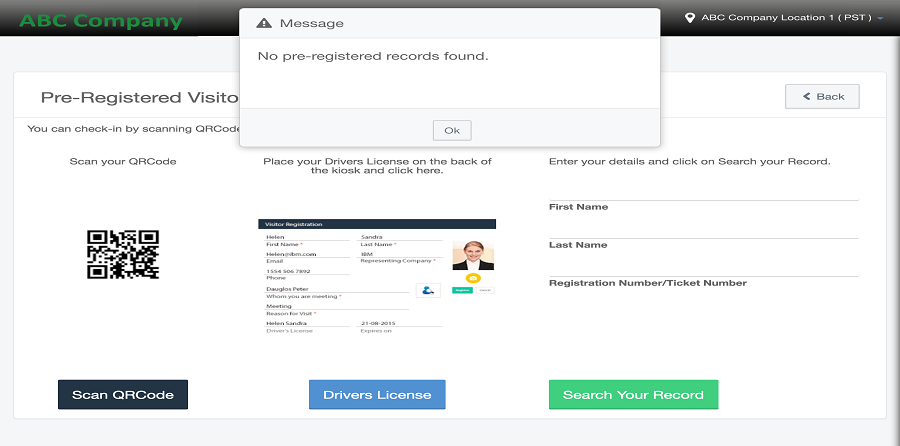
- Register the kiosk device from the provider and launch the app in the kiosk. Click on the Pre-Registered checkin button.it will display the Pre-Registered visitor page.
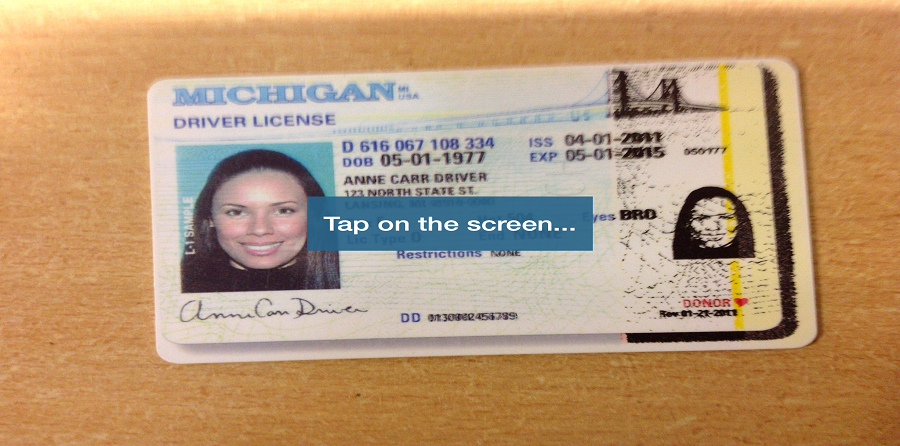
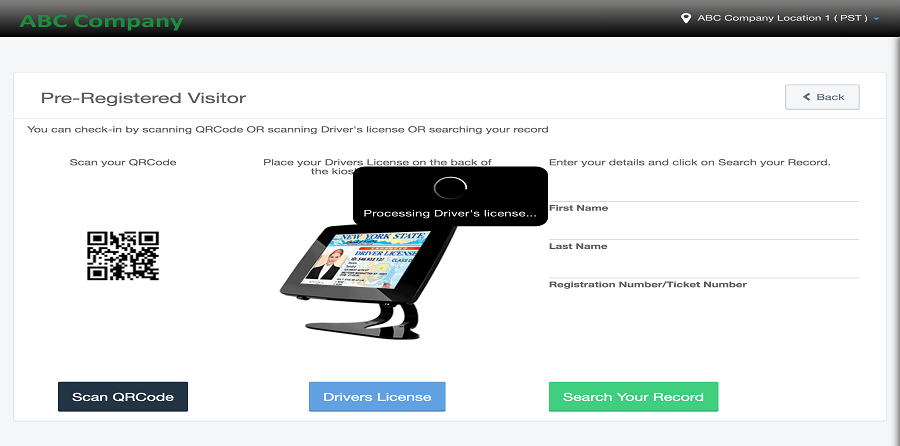
- Click on the Drivers License button and place the Driver License card to the back of the kiosk app. And Tap the screen to take a picture.
- It will display the below screen as Processing Drivers license.
- If the pre-Registered visitor is not registered before, then it displays the Meessage as 'No pre-registered records found". Click on ok button. And register from the provider as a new visitor.
- After the visitor is registered,come back to the kiosk app and follow the same. Now in place of displaying the 'Message'page it displays the 'Visitor Registration' page.
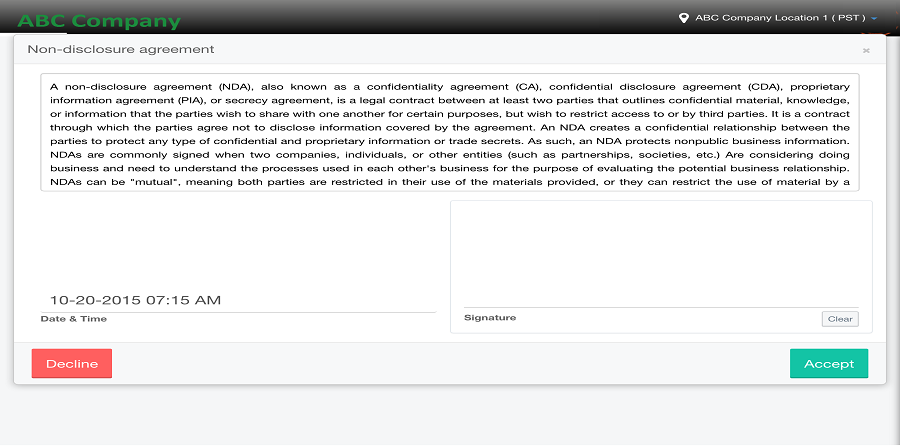
- Fill the details and and take a photo. Click on the check-in button.it navigates to the Non-disclosure agreement. Put the signature on the space provided and click on Accept button.
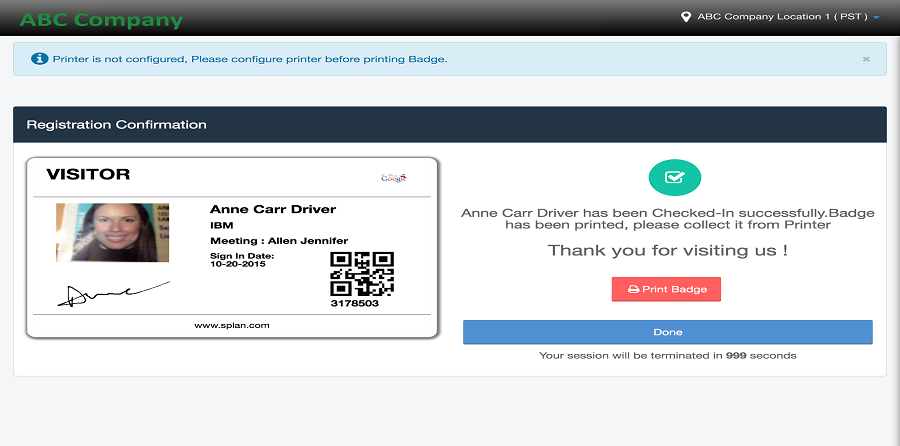
- It will navigates to the Registration confirmation page with the details. Click on print badge button. If the printer is not configured it will displays the message as printer is not configured,please configure printer before printing Badge.

Login and changepassword
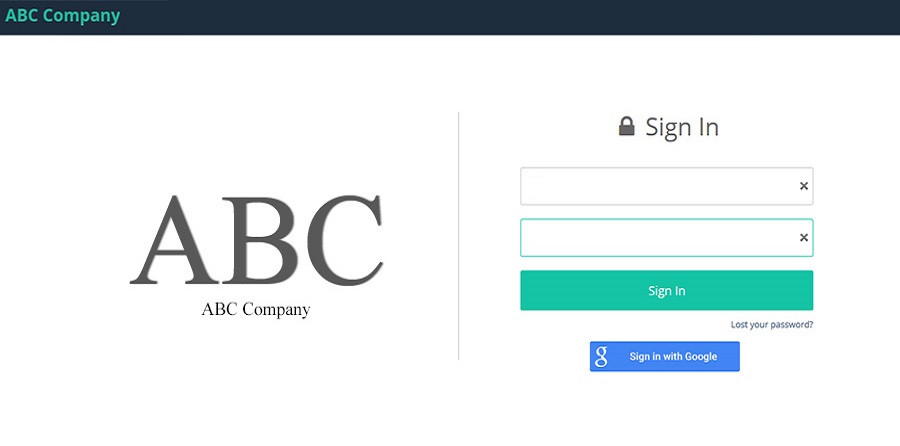
- Enter the URL and click on enter.the login page will be displayd.
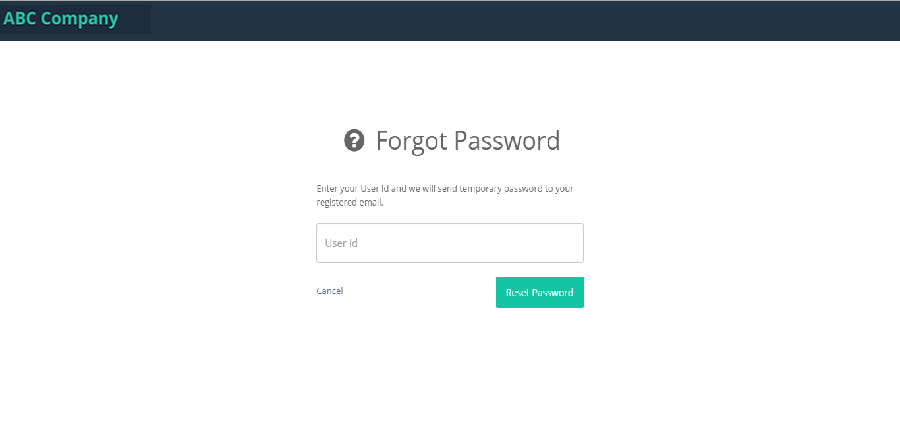
- Click on forgot password.it will navigate to the forgot password page.Enter the user id and click on 'Reset password' button.
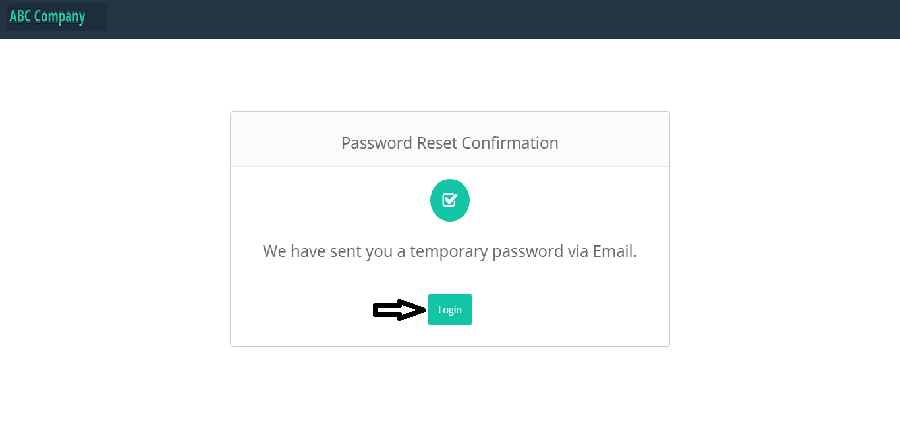
- It will navigate to the password Reset Confirmation page as the temporary password will be sent to the mail.
- Click on Login button.the page will be navigated to login page.Enter the user id and password in the fields provided,and click on sign in button.
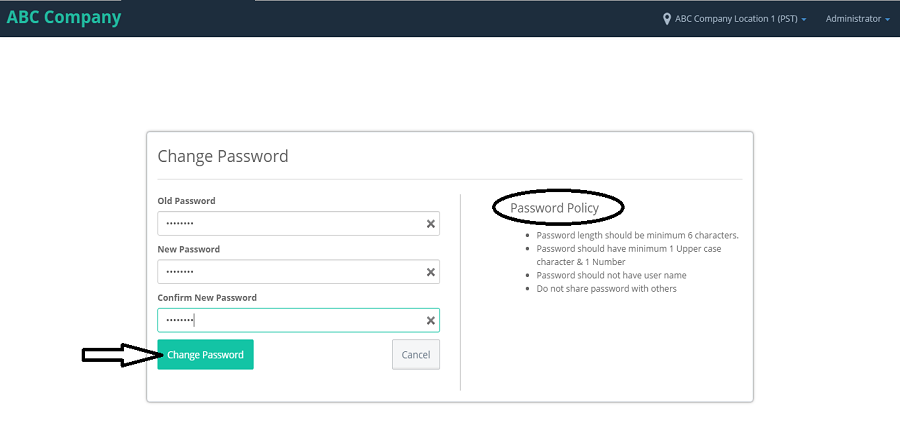
- The page will be navigated to the Dashboard page.click on Administrator and select the change password from the dropdown list.
- Then it will navigate to the change password page. Read the password policy and give the details accordingly. And click on change password button.
- Then the page will display the Reset Password Confirmation page.click on continue for the furthur process.